
In my previous post I looked at weather balloons and sondehub.org, the online tracking site where you can monitor the balloons. In this post I will cover my setup of a monitoring station using an SDR to monitor balloons and upload the data to SondeHub. It is much simpler and cheaper than I expected.
Monitoring balloons online
There are quite a lot of hobbyists interested in tracking and attempting to retrieve the radiosondes. A popular website sondehub.org is run by a group of hobbyists. It displays a map of the world and lets you monitor current and recent launches.

Monitoring station options
Before I found out about the software available, I thought I would need lots of expensive hardware, like in this image created for me by ChatGPT.

I found two main ways of setting up a monitoring station. One uses an SDR radio, commonly the RTL-SDR dongle, along with a Linux computer and the sondehub_auto_rx software. Another option uses a TTGO ESP32‑based microcontroller board with rdz_ttgo_sonde software.
TTGO ESP32 / SX127x LoRa module
This method uses an ESP32 microcontroller combined with an 433MHz SX127x LoRa transceiver and often a display on a single small circuit board running rdz_ttgo_sonde software. It doesn’t use LoRa modulation for the radiosonde, instead the SX127x is being used as a general-purpose narrowband FSK receiver and will happily run in the 400MHz frequency area used by the radiosondes. This setup can cost as little as AUD$30 (US$21). I have not tried this, but I have the parts ordered. This is a LILYGO module.

Linux + SDR + sondehub_auto_rx
This method involves setting up a Linux based computer or Raspberry Pi with an SDR (Software Defined Radio) dongle with a suitable antenna running sondehub_auto_rx. This will automatically scan for, receive, and upload data directly to SondeHub.
Setting up a Linux + SDR station
I needed a Linux-based computer, an SDR receiver, and an antenna. This is what I used.
SDR dongle
SDR stands for Software Defined Radio. It has been around for a while, but it really became popular when some techies discovered they could turn cheap $20–$30 USB TV tuner dongles into a wideband SDR receiver. Since then dedicated dongles have been developed.
sondehub_auto_rx supports a few different ones, but I decided to go with the popular RTL-SDR v3. They are available from many places, but I bought mine from their AliExpress store for AU$57 (US$41). Beware that there are lots of counterfeit versions so check the info on the RTL-SDR page.
This is the SDR temporarily dangling from the antenna connection.

Linux box
sondehub_auto_rx runs on Linux. A common option is to use a Raspberry Pi. I don’t have one, but I do have an old laptop that I thought might get me going without spending more money. It’s an HP Envy 6 from 2012 . At some point I must have added an extra 4GB of RAM as it now has 8GB. There is a 32GB SSD which isn’t much, but should be enough for this project. There is also a 500GB hard drive, which I’m not using for this project.
There is a downside of using this laptop. It only uses 10-15W of power, but if I leave it running that will be a significant amount per day. At the moment I start it before 9:00am and turn it off around noon as there are only balloons in this area for those few hours. A Raspberry Pi or other efficient computer would use much less power. I am treating this setup as temporary just for testing.
When I opened it up some time ago, it had a one of those spicy pillows inside I have heard about. This was a warning to check what other old laptops, tablets and phones I have and have now sent most of them to ewaste.

I removed the battery, discharged it and sent it to ewaste. The laptop works without the battery. At least I don’t have to worry about it being overcharged. I’m not a fan of leaving laptops constantly charging and wouldn’t leave one on constant charge.

Now it was time to install Linux and the sondehub_auto_rx software. I don’t have much experience with Linux so I won’t go into much detail. I chose Linux Mint Xfce Edition for no other reason than I have used Linux Mint before. I like having a Windows like interface and the Xfce edition is smaller than the regular Mint edition which is useful as I only have a 32GB SSD.
The basic steps I did:
- Download Linux.
- Install it onto a bootable USB drive.
- Set the computer to boot from USB.
- Restart the laptop with the drive connected and wait for it to boot. Linux now runs from the USB and doesn’t change the laptop drive.
- Check the display, WiFi and other drivers and peripherals work.
- Click on the icon to install Linux onto the laptop drive.
- Follow the prompts.
Linux runs on it well, except for WiFi. For some reason, I couldn’t get WiFi running. It appeared to connect and sometimes some data went through but mostly it didn’t work. I had a spare USB WiFi dongle that worked so I went with that.
There are a few ways to install sondehub_auto_rx. I installed it using Docker with the instructions in section 1 here. If like me, you are not familiar with Linux terminal then this may be a little challenging. In the end, I was somewhat surprised to find that it worked.
Configuration
Configuration of the software is done by editing the station.cfg file in the radiosonde_auto_rx folder. As I’ve installed a Linux with a desktop environment, double clicking on the filename opens it in an editor.
There is an instructions page for the configuration settings here. Most can be left at the default settings, but your location, station name and email address should be updated if you intend to upload to sondehub.org. It may make it easier to know that lines starting with a # are comments. This is an example. Only the last line is a setting.
# SDR Type## RTLSDR - Use one or more RTLSDRs# # Network SDR Server options:# SpyServer - Use an Airspy SpyServer# KA9Q - Use a KA9Q-Radio Server #sdr_type = RTLSDR
Operating
Initially I had difficulty knowing if it was working as I could really only know if it received data from a radiosonde and uploaded the data to SondeHub.
When the software is running, opening a browser in the laptop and going to the URL http://localhost:5000 opens a page with useful info including a frequency scan. This can also be accessed from other computers on the network by replacing localhost with the monitoring computer’s IP address, for example http://192.168.0.19:5000/.
Here it is running in the shed displaying info in a browser.

The Telemetry section shows it has monitored a radiosonde. The Scan Plot shows a frequency scan.
One important thing to note is that once the software locks onto a sonde it only receives data from that one unless it loses access to it from a set time (default is 3 minutes, set by rx_timeout). If there are multiple sondes in range, you will see the spikes in the Scan Plot for each of their frequencies, but only one sonde listed in the Telemetry.

Another check to confirm it is uploading to SondeHub is to check the data for the sonde directly in SondeHub. The Received via list should at least sometimes show your station.
Clicking the Plot button on the left leads to a lot of details with graphs and logs of the balloon. This should include details about your station. The pie chart should show the number of pages of data received. There is also a graph to show your station’s reported signal-to-noise ratio as well as lots of other info.

Antenna
I decided to build a 1/4 wave ground plane antenna. There is an excellent article with a calculator to determine measurements as well as lots of plans at M0UKD Amateur radio blog, projects and electronics. I aimed to 401.3MHz. The calculator gave a length of 17.8cm for the vertical monopole and 19.9cm for the radials.
I had some brazing rods that have been sitting in the shed since we purchased the house 39 years ago. I thought it was the right project and right time to use them. I cleaned them up with steel wool and they came up looking good. That doesn’t mean they are ideal for radio, but I pressed on.
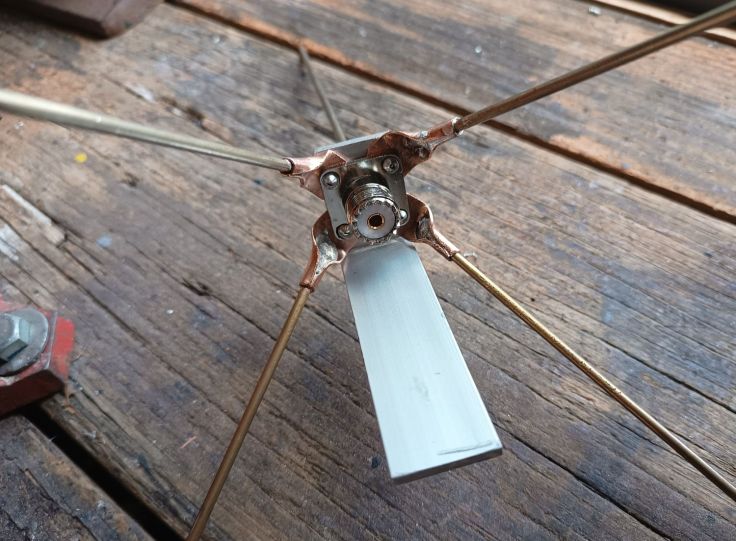
I purchased a couple of PL259 Chassis Mount connectors from AliExpress for AU$5.53. I wanted a spare because I thought I may melt one. I have since learned that PL259 connectors are not ideal for such high frequency, but as that is all I had I used them anyway. This became the base. I cut 4 pieces of rod for radials and and another for the vertical.
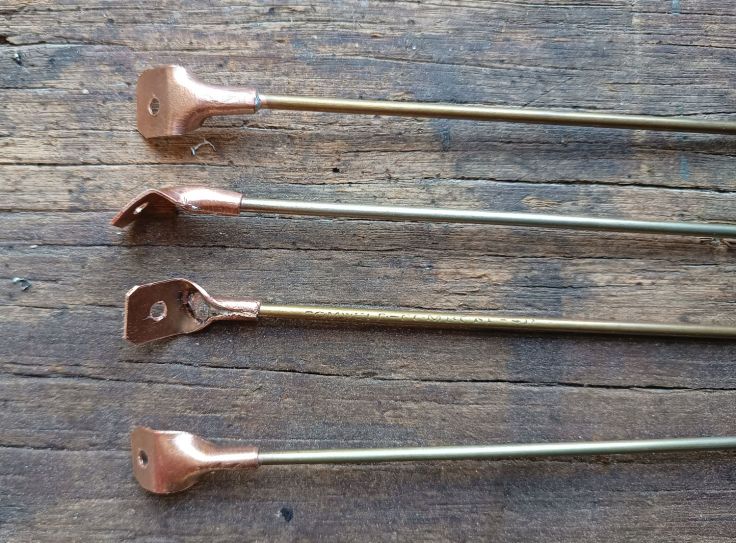
Update 5/10/2026: Initially the radials were soldered to lug connectors, but the ones that I used were far too weak. I redid these using some copper pipe that was cut open and flattened out. This was then cut into rectangles and bent to form a shape to hold the radials with some solder.
A mount was made from bending a piece of aluminium and drilling holes. The vertical rod was soldered to the PL259 plug with another copper crimp connector.




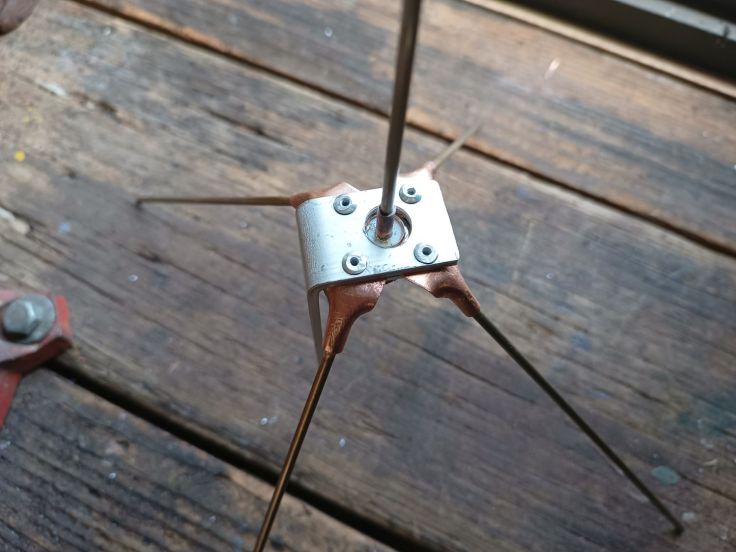
I purchased a 2M cable with connectors fastened to each end to connect it to the SDR and antenna. Here it is mounted on a tripod for testing. Even at this low height and indoors, it still picked up signals from balloons over 100km away.

Finally, it is mounted 4.5m up from the ground. Even at that modest height I’ve received signals from a balloon 511 km away.

Wrapping it up
It has been a very enjoyable project. If you’re considering building a receiver, you may get useful results with just a modest antenna. You can always upgrade it later. The SDR I purchased had an option to include a simple antenna and suction mount. I regret not getting one of those as it would be simple to set up and useful for other listening, so I have since ordered one.
The SDR and Linux laptop are working well, but I would prefer something that uses less power. I have one of these 433MHz LILYGO TTGO boards coming from AliExpress so I will try that out for both portable use and as a base station.
Interested in knowing more? Check out my previous post Track Weather Balloons: A Beginner’s Adventure.


Leave a Reply