
Back on 3 October 2023 I wrote about the issues I was having building a notifier that would send alerts to our house whenever the mailbox flap opened or someone entered our driveway. Building a smart mailbox: Challenges and unsolved issues. After 2 and a half years and more tinkering I have made some progress. There are still issues, but I’m declaring it good enough, at least for now.
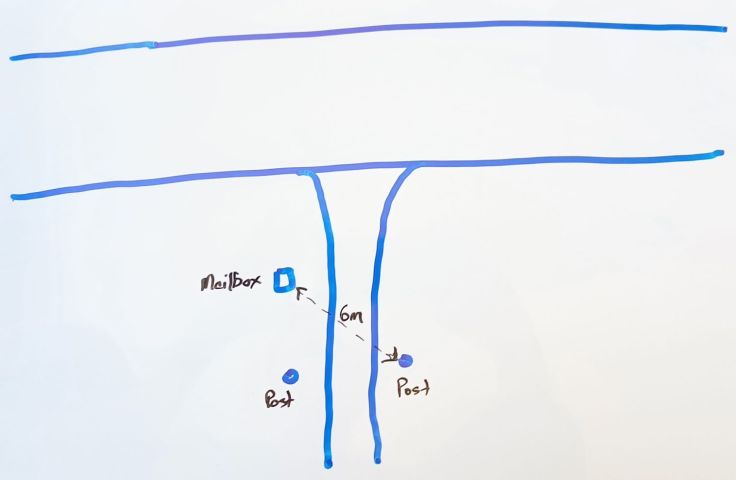
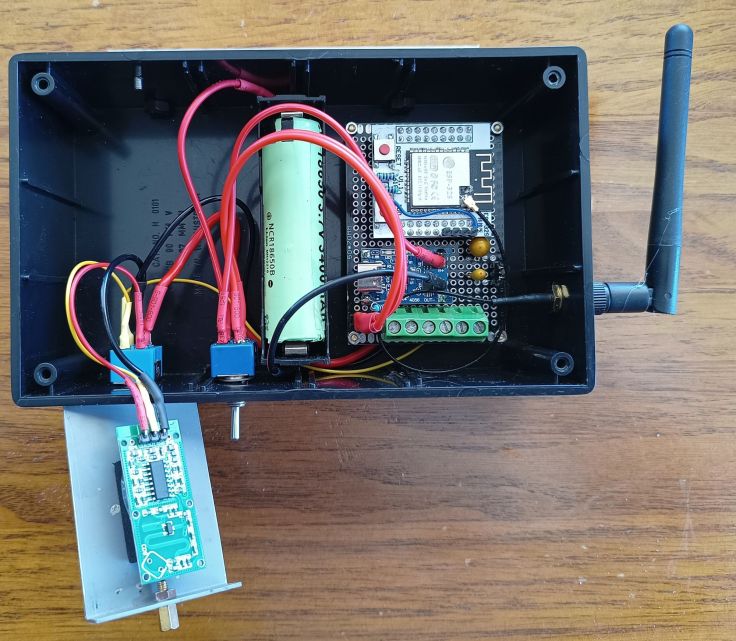
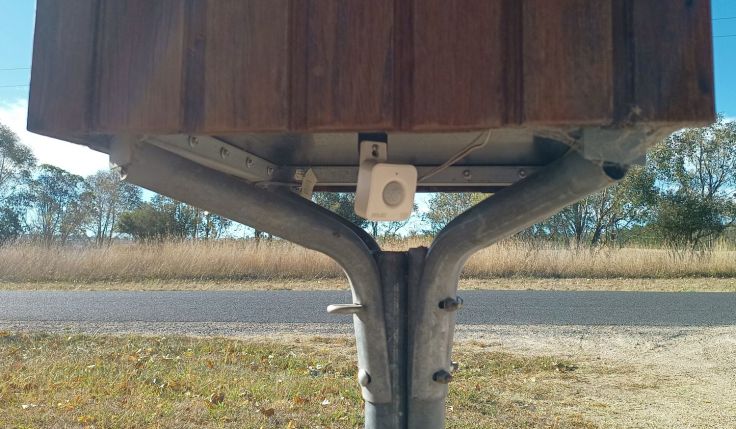
To recap, the circuit is based around an ESP32 that sends alerts using ESPNOW to another ESP32 in the house that has a 16×2 LCD display and speaker. The mailbox is near a rural road that gets regular traffic. The mailbox is not at the gate post and this has made detection of traffic through the gate more challenging.
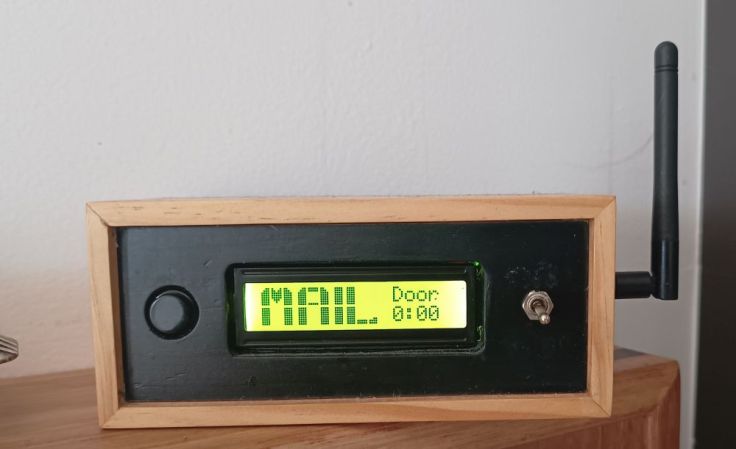
Indoor unit
The indoor unit receives data from the sender and displays it on an LCD display. This has been working well, although I have made a couple of improvements. To get the range I initially bent a paperclip and placed it against the built-in antenna on the ESP32. This improved the range just enough to get it working. But to narrow down other issues I replaced the ESP32 module with an ESP32 module that has a antenna socket and added a small antenna on the side of the box. Range is no longer an issue.
Gate monitoring made it more complex
Adding gate monitoring to this project made it far more complex than if I was just monitoring the mailbox. Any type of sensors I’ve looked at for the gate use enough power that I don’t think running it just on a battery would be practical.
Pushover notifications
As well as an alert sounding on the receiver and displaying on the display, the indoor unit now sends Pushover notifications. This was simple to set up. Random Nerd Tutorials have a good article about it. Pushover is a paid service, but it is very cheap. For individuals, Pushover is just a US$4.99 one-time purchase for each platform (iPhone/iPad, Android, and Desktop) where you want to receive Pushover notifications. I find this quite a reasonable cost and it is working well.
Wifi antenna fail
I tried a number of different antennas for the sender. Some I had purchased from AliExpress, a couple of others came from old wifi routers. I was surprised the wifi ones didn’t work very well. It was some time before I discovered there is a difference in the connections. Both use SMA connectors, however, the AliExpress antennas and connectors use standard radio terminations. The antenna has a male connection and the ESP32 side uses a female connector. Apparently wifi has these swapped, so these antennas have a female connector. Connecting the wifi antenna appeared to connect properly, but internally both centre connections were female. Just another trap I fell for.
Dodgy switch
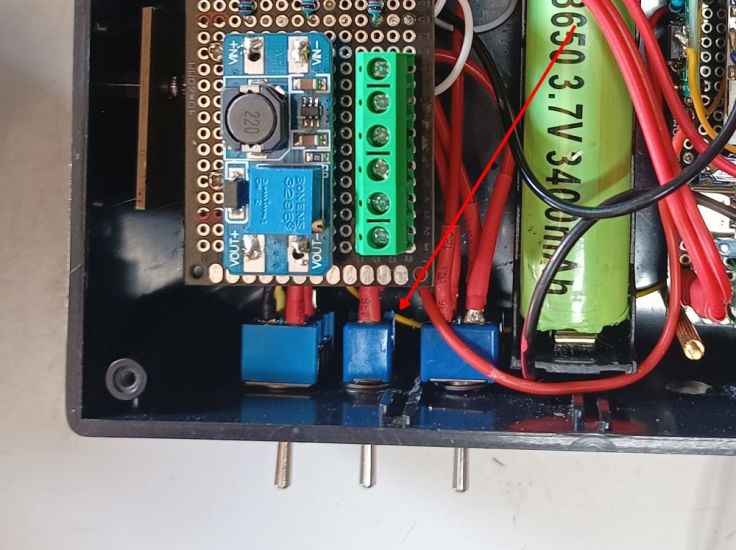
The sender was working reasonably reliably until it wasn’t. The battery voltage being reported was only 3.8V despite long sunny days. The fault turned out to be an SPST toggle switch that disconnects the solar panel. It had ceased conducting. A few flicks back and forth got it working again. This switch came in a batch of ones from AliExpress. I had trouble soldering to these. Heating the terminal often melted the housing, and this may have impacted this one.
Solar charging
I used an epoxy polycrystalline silicon solar panel to charge a Li-ion cell. These have polycrystalline silicon cells sealed under a protective, waterproof epoxy resin layer. The sun in Australia is harsh and the panel has not lasted well. After about a year, the surface of the resin layer had turned milky white. I sanded it smooth and used some cutting polish to bring it back. That worked fairly well. I then tried adding some leftover protective vinyl for car headlights I had. This made it look like new, but it didn’t last. The first image is of the panel when I first applied the vinyl. The second is just over one year later.
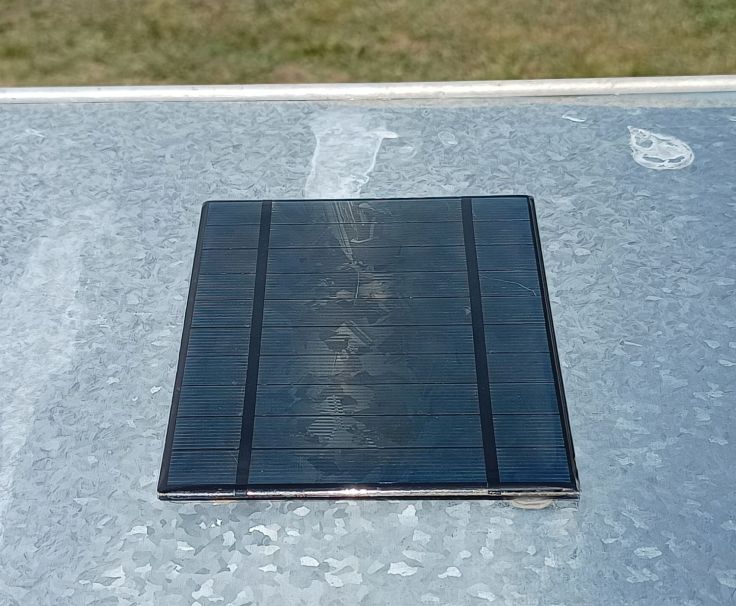
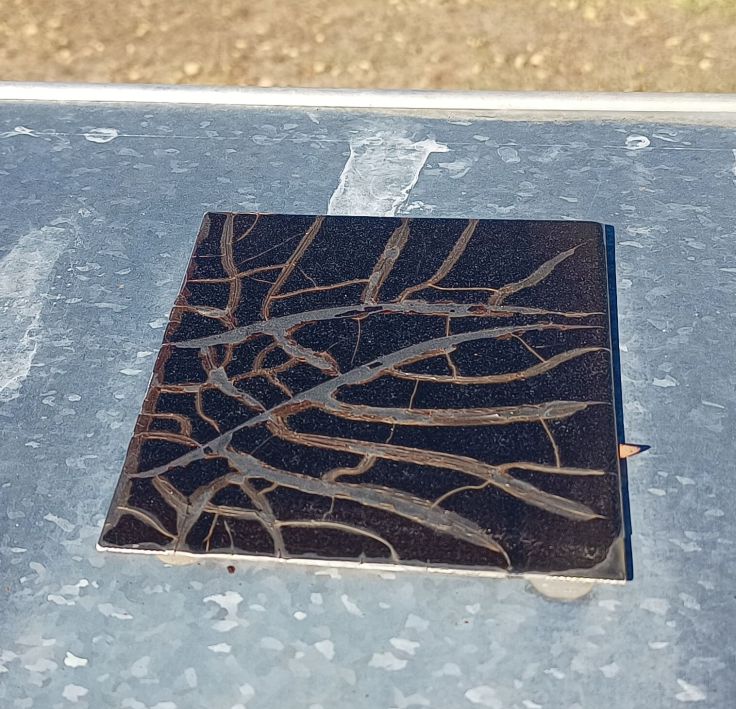
Surprisingly, the battery is still fully charging each day. However, I will look at replacing it soon. As yet I have not found a longer lasting replacement.
Larger power capacitor prevents reboots
I made a small circuit to provide a stable 3.3V from the battery for the ESP32. For this, I used an LDO voltage regulator and a couple of capacitors. Initially I used a 100uF tantalum capacitor. I found when the battery voltage started to drop the ESP32 would sometimes go into constant reboot cycles. I replaced the capacitor with a 1000uF electrolytic one and this solved that issue. The larger capacitor may have helped by supplying short bursts of current during ESP32 transmit spikes.
Gateway sensors
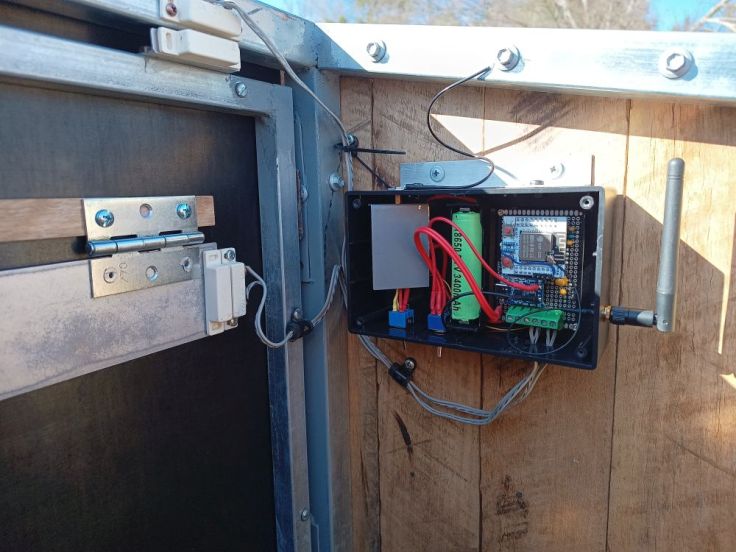
This has been the most challenging part. I’ve tried a number of different sensors to detect movement through our gateway. Our gate is on a road that has cars and trucks passing by. The gate is always open so I needed something to detect an object passing through.
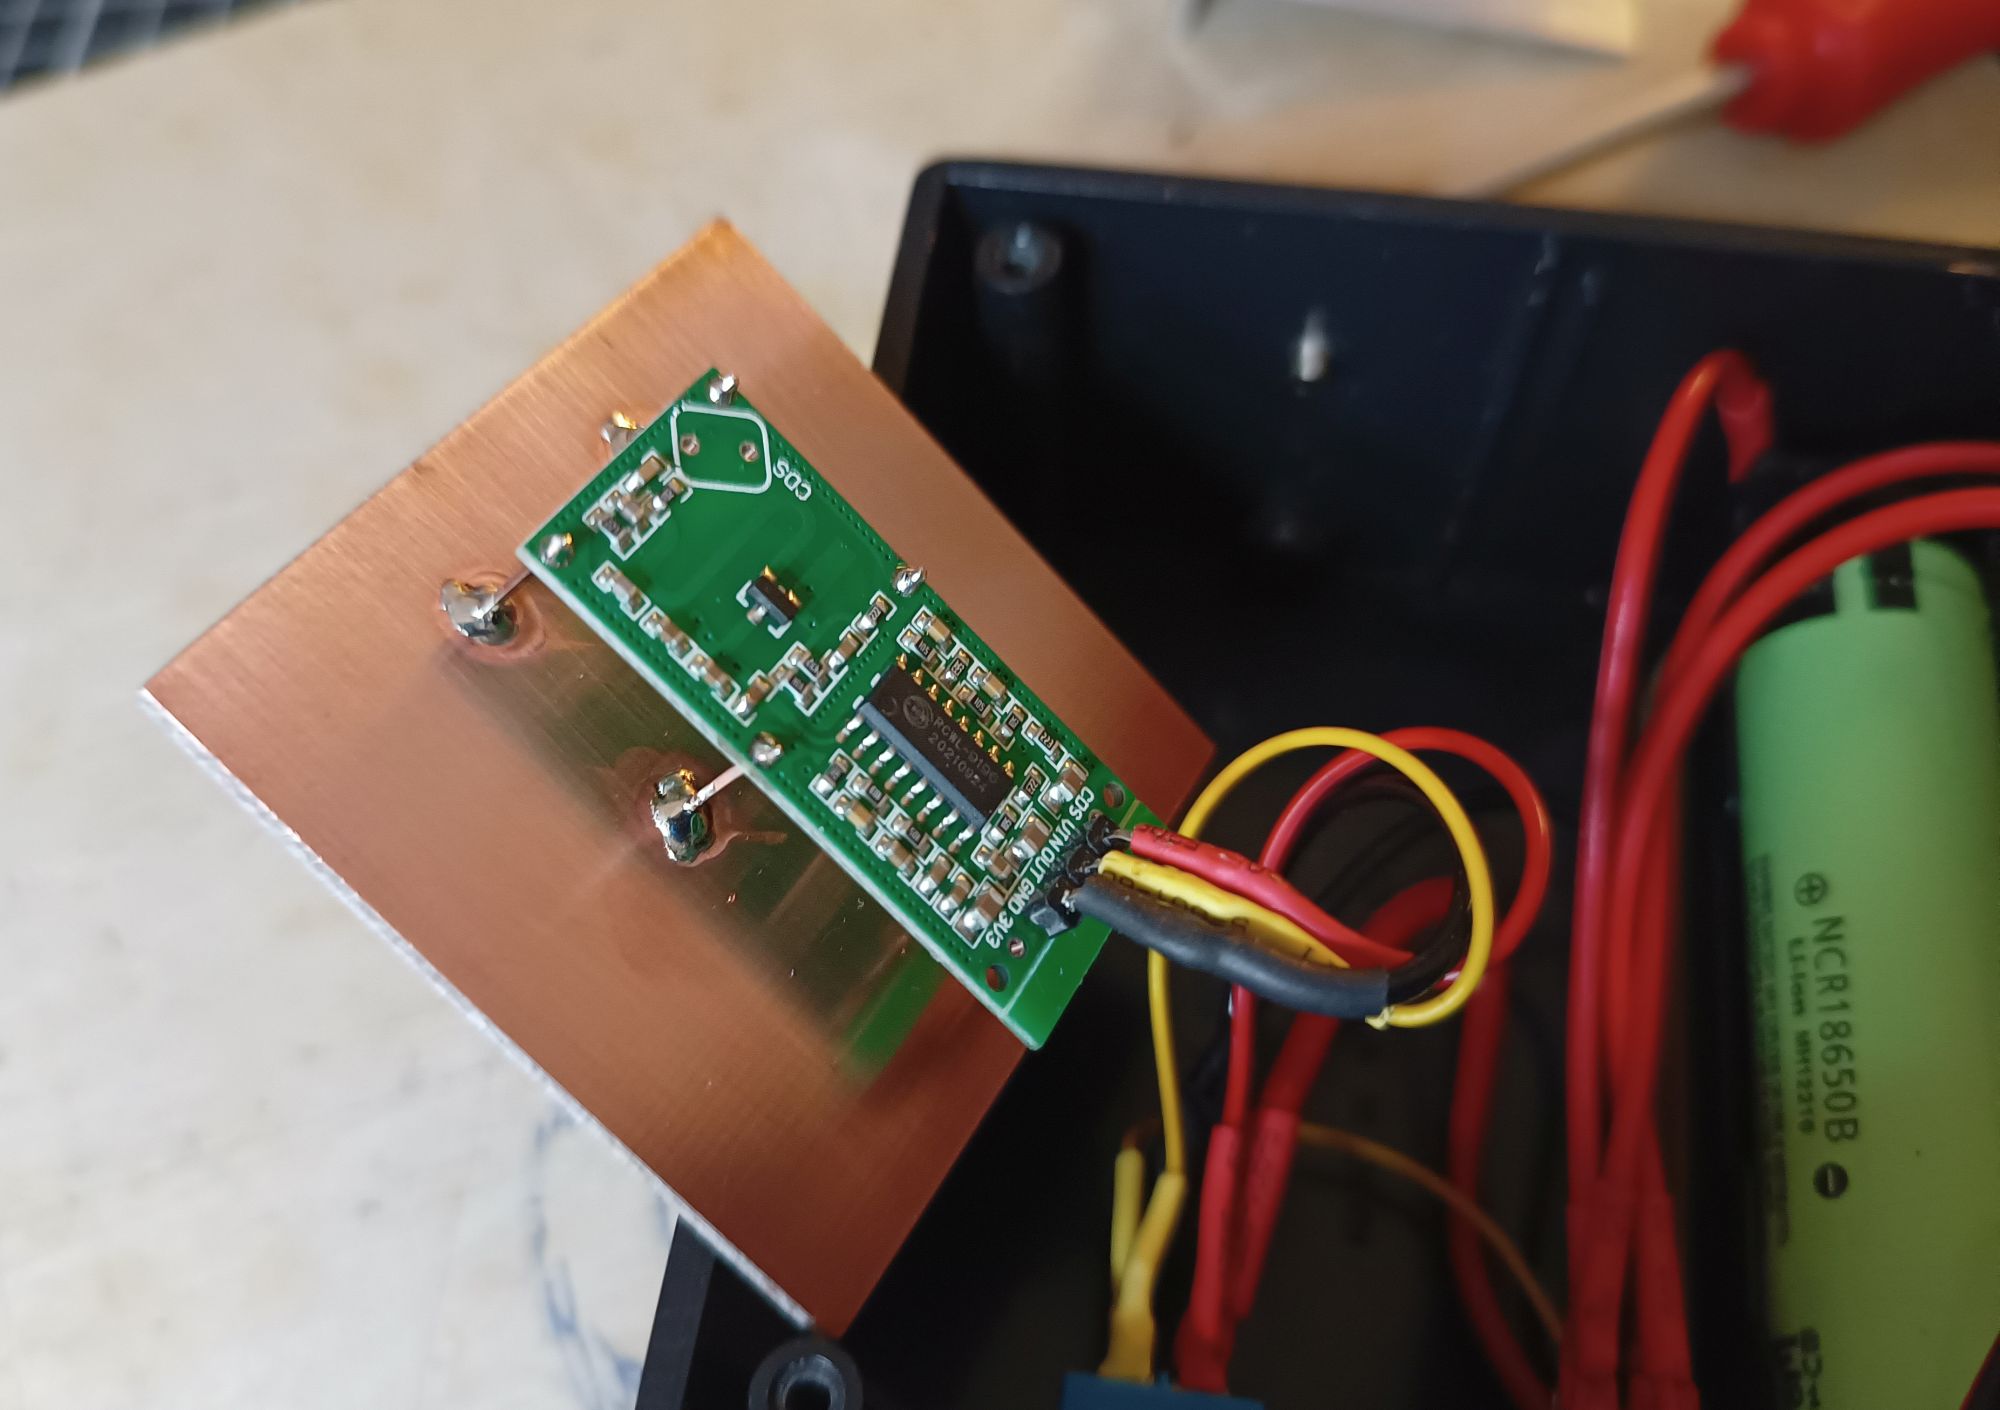
Microwave radar motion sensor module
The first sensor I tried was sold as a Microwave Radar Motion Sensor Module sensor. I believe these transmit radio waves (~3.2 GHz) and listens for changes in reflections. I got it from AliExpress. I don’t have a link to the one I bought, but it was like this one. This sale is for 10 for only AU$7.21, so very cheap.
I was so confident this would work that I built it into the project case without properly testing it. This was a mistake as I found I got a lot of false positives. While I tried to angle the sensor so that I thought it wouldn’t be triggered by passing traffic, it was. I tried to adding a metal shield behind it, but I was just guessing how to do it and it wasn’t any better.
I even added a ground plane behind it to see if that would help. It didn’t.
Cheap PIR attempt #1
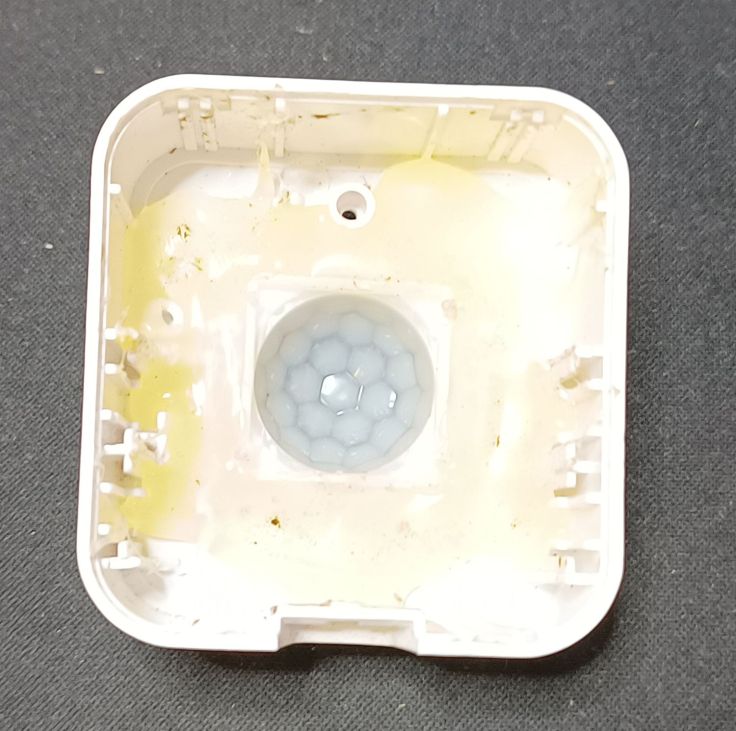
Next I tried one of the common PIR modules used with Arduino projects. This is an example
HC-SR501 HC-SR505 AM312 Adjust IR Pyroelectric Infrared Mini PIR module Motion Sensor Detector Module Bracket For Arduino AU$1.86.
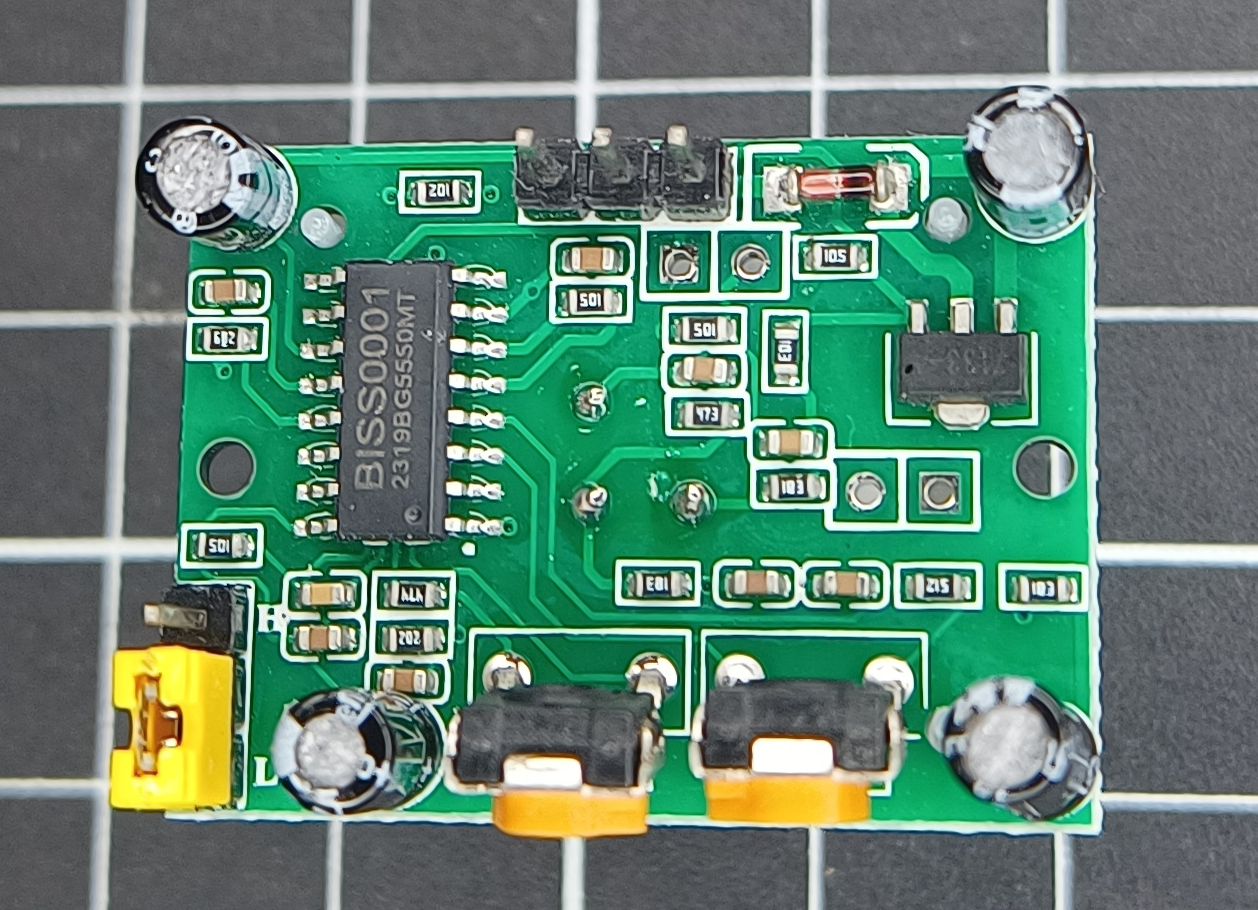
These have an operating voltage of 5V-20V (5V recommended) and provides a 3.3V digital output. Maximum Current Draw is < 2mA.
These don’t come with a housing, but I had one from a commercial sensor and used that.
It seemed to work reasonably well, but I did get some false triggers during the day. I don’t know if these were due to clouds passing over or movement of hot air. What was surprising was that it would regularly trigger when I turned the system on early in the morning. I later determined this was due to low battery voltage.
24V PIR
I looked around for a good PIR sensor that didn’t use mains voltage, but I didn’t have any luck. So I tried this cheap one I found on AliExpress. It was listed as 24V Motion Sensor PIR Movement Detector for AU$4.72. The listing has gone, but this may be the same module.
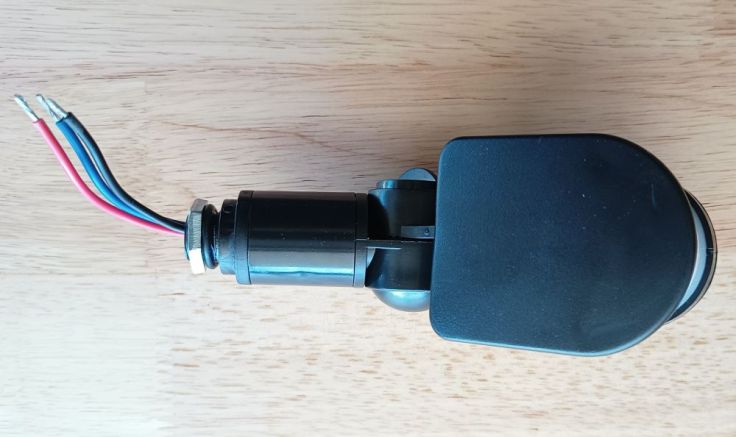
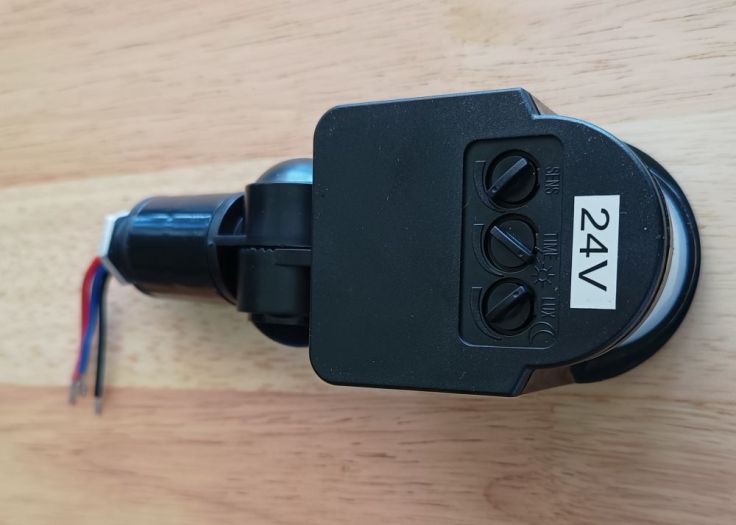
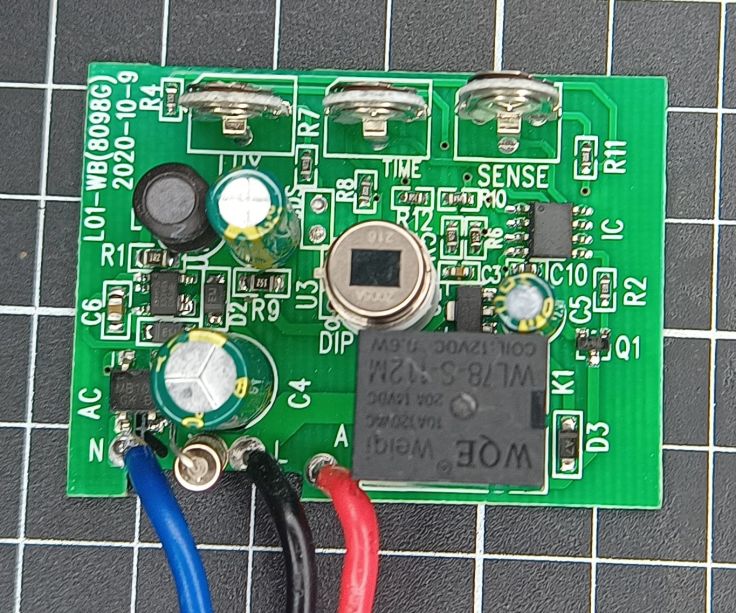
I was hoping that the module would have a voltage regulator that I could bypass and run it on a lower voltage. That may well be possible but I gave up on trying to do that. The power connections on the board are N (Neutral) and A (Active). There is a bridge rectifier and next to it the marking AC.
The listing I linked to sells 12V, 24V and 110/220V versions. There may be differences in the boards, but it looks like the one I have is designed to accept AC input.
I did try using it and powered it from a boost converter. It worked but it drained the battery too much during the night, so I gave up on it.
IR beam sensor #1
I purchased a pair of IR beam sensors from AliExpress here for AU$8.64. They were marketed as DOORHAN DITEC ATA Photocell For Gate.
This pair of modules are designed to be placed on either side of an opening. One module is a sender and the other a receiver. The receiver triggers when the beam from the transmitter is blocked.
They are listed as working distance of 20m and a working voltage DC12-24V. I used a boost converter again to get the required voltage. The sender needs power as well. The gravel driveway is nearly as hard as concrete which would make running power to the sender difficult. So for testing I powered it from another Li-ion battery with a boost converter.
While it worked, I had a couple of issues. Due to the combination of boost converter and the modules current draw, it drained the battery too much overnight. Also, the sun seemed to affect it and didn’t detect as it should.
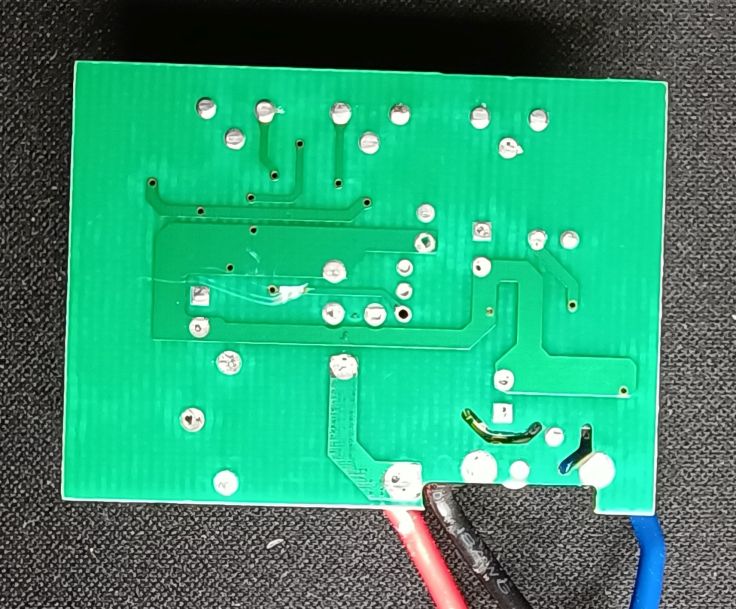
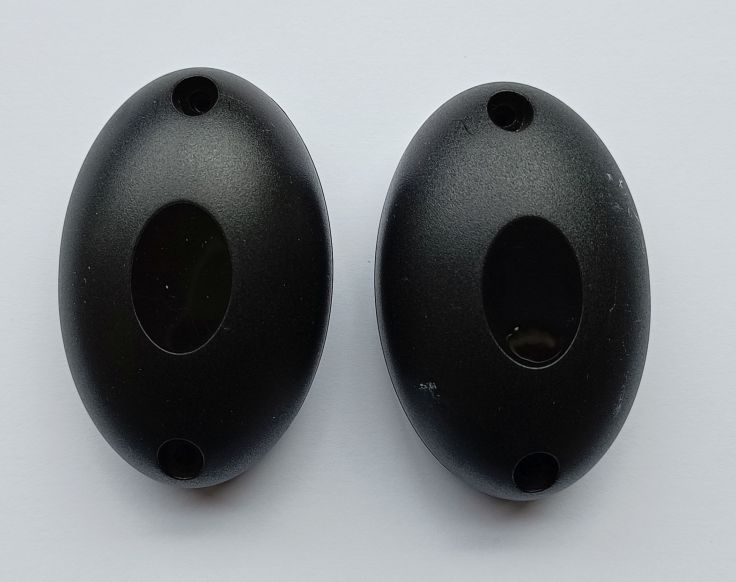
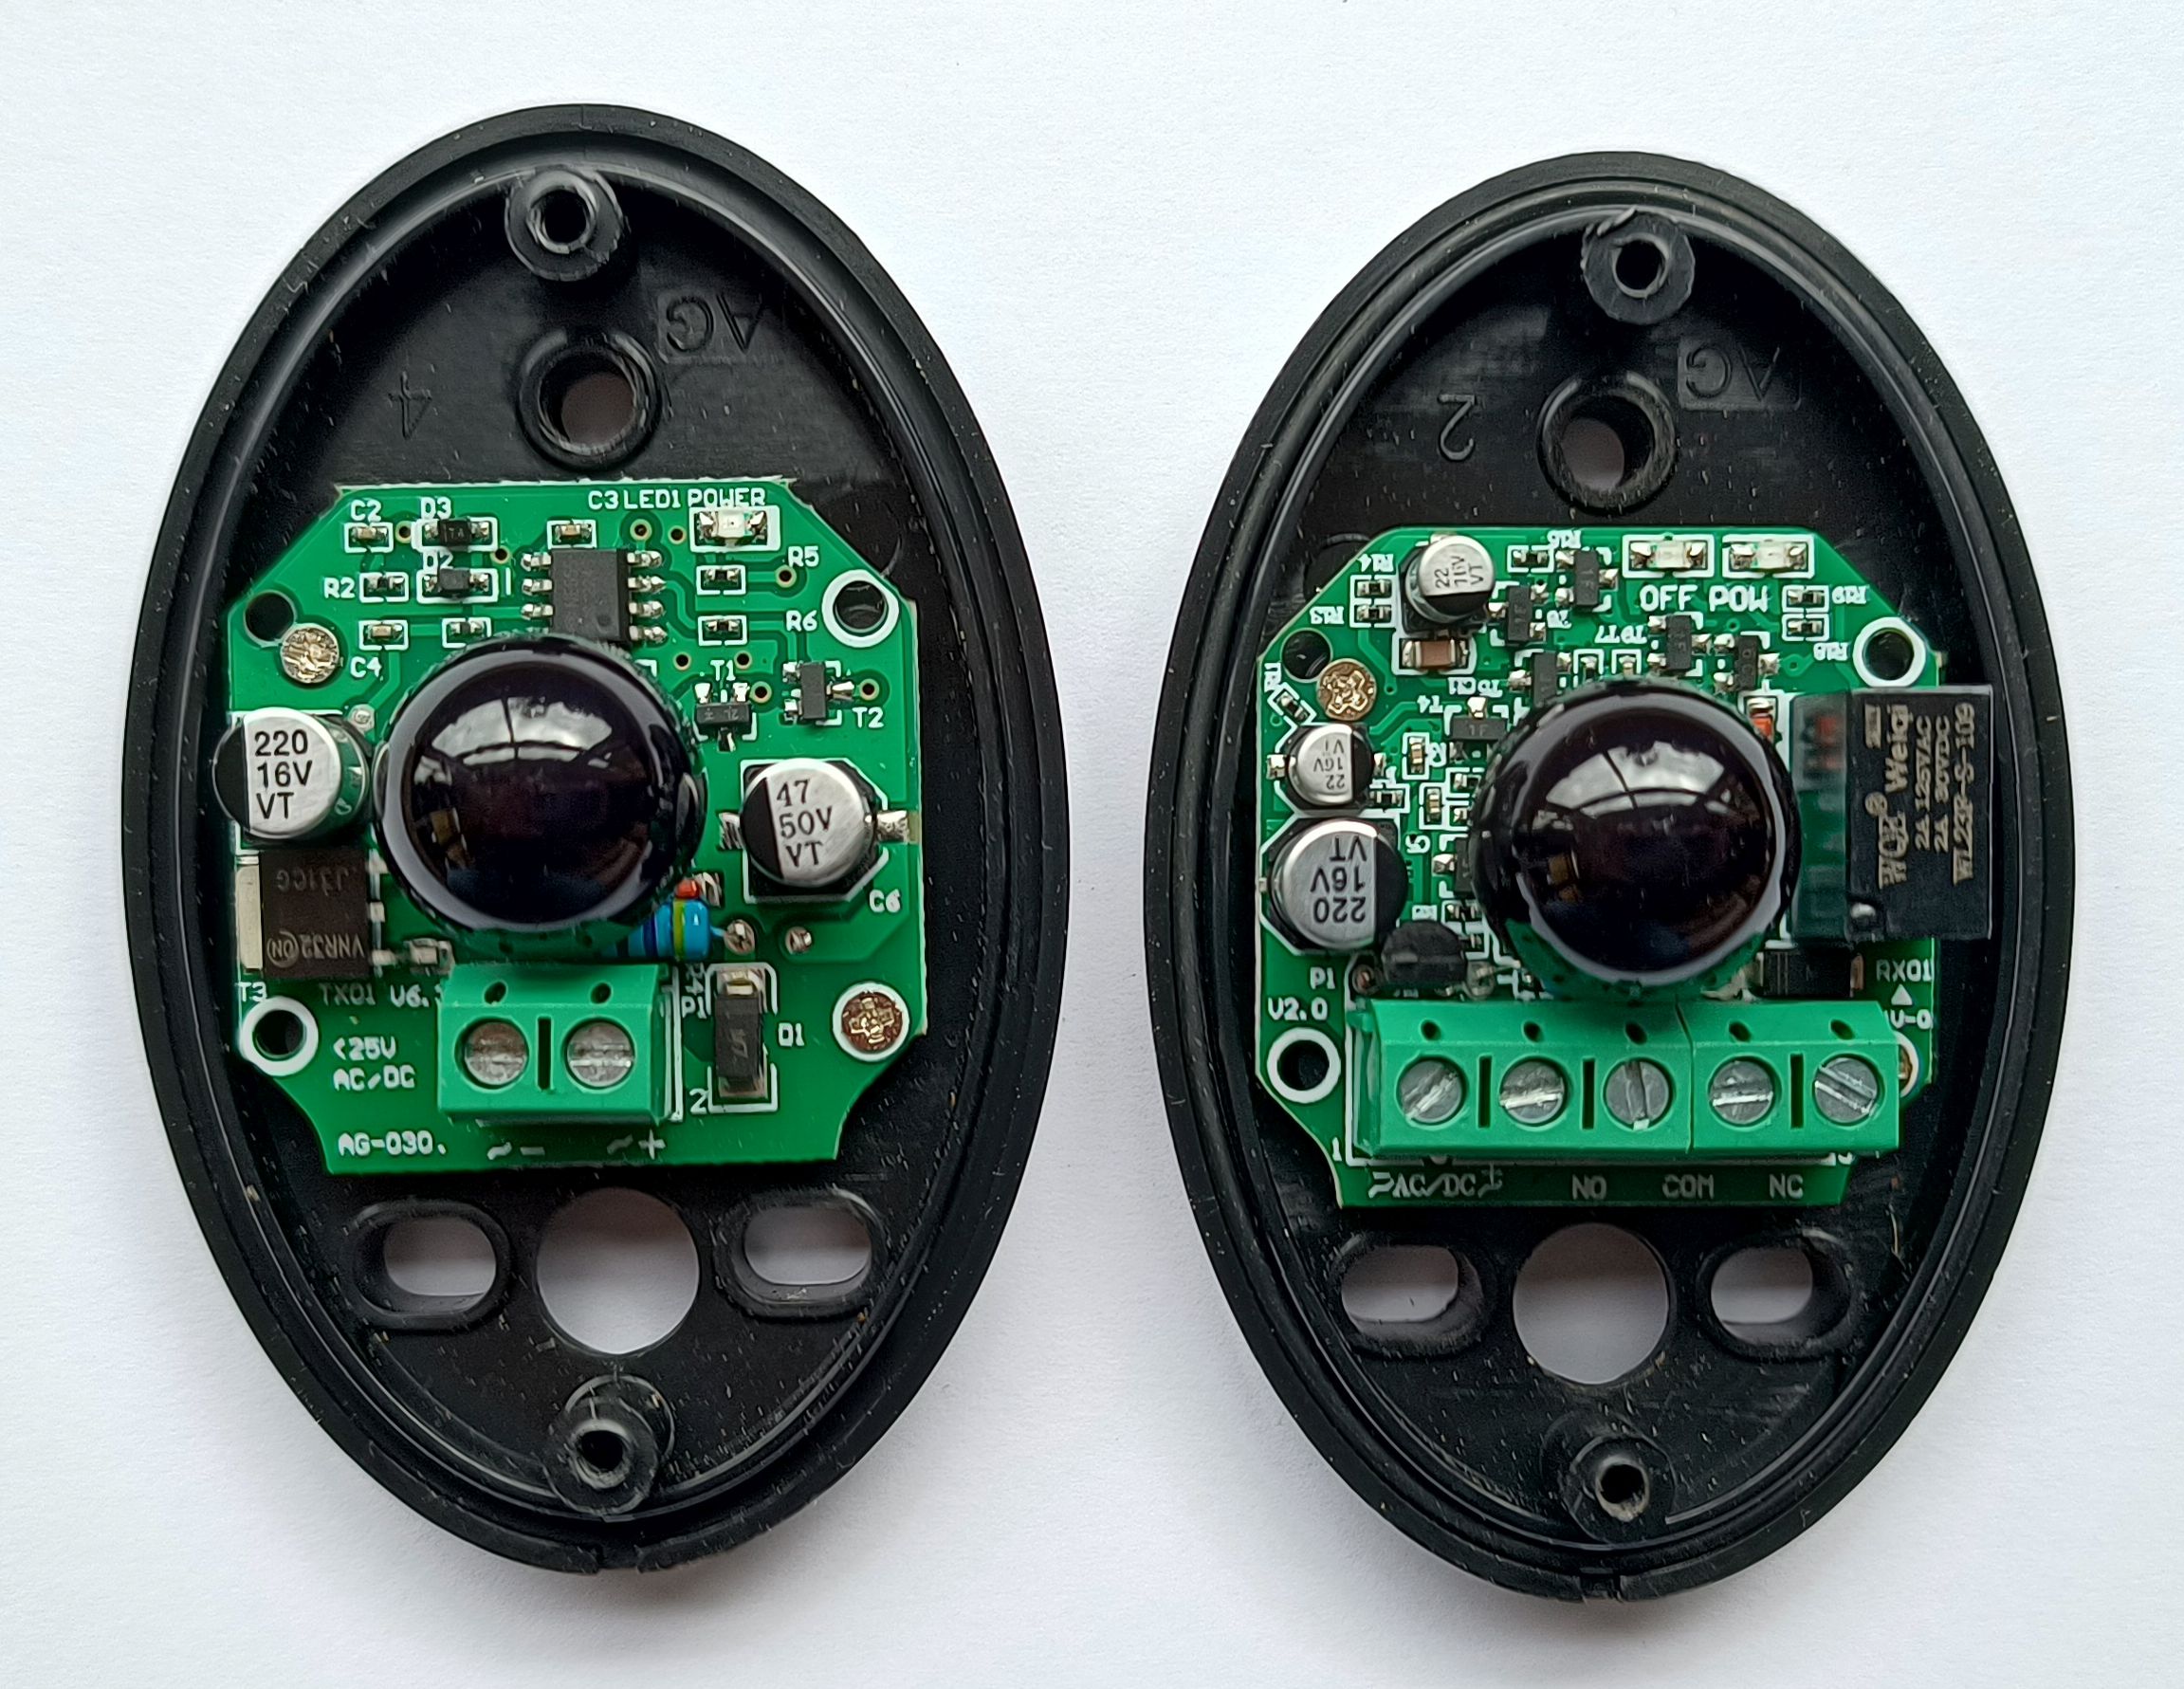
IR beam sensor #2
I tried another pair that is designed to go across an opening. Again, one module is a sender and the other a receiver. One of its features interested me. The sender runs on 2 x 1.5V AAA batteries.
The AliExpress listing I used is no longer available, but this listing appears to be the same one. I paid AU$12.45.
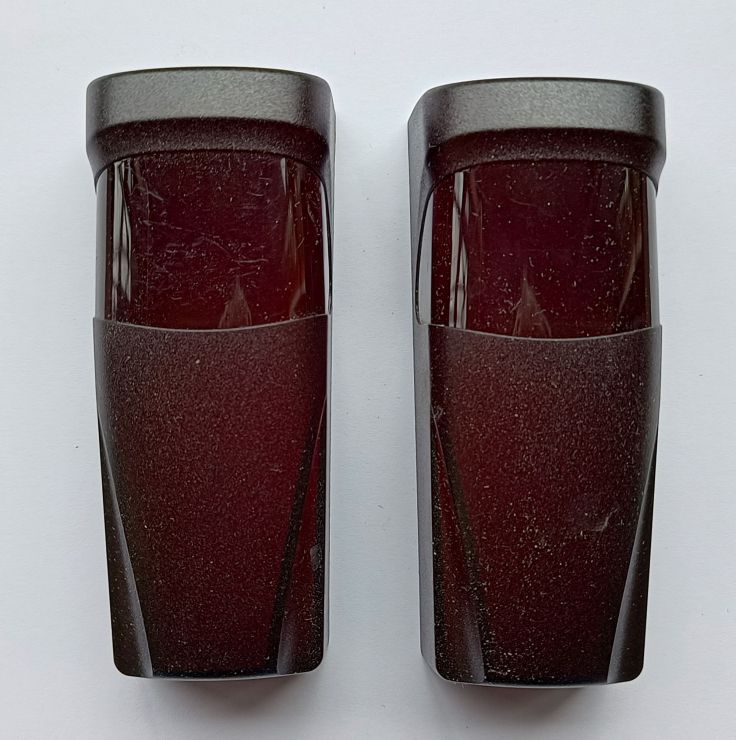
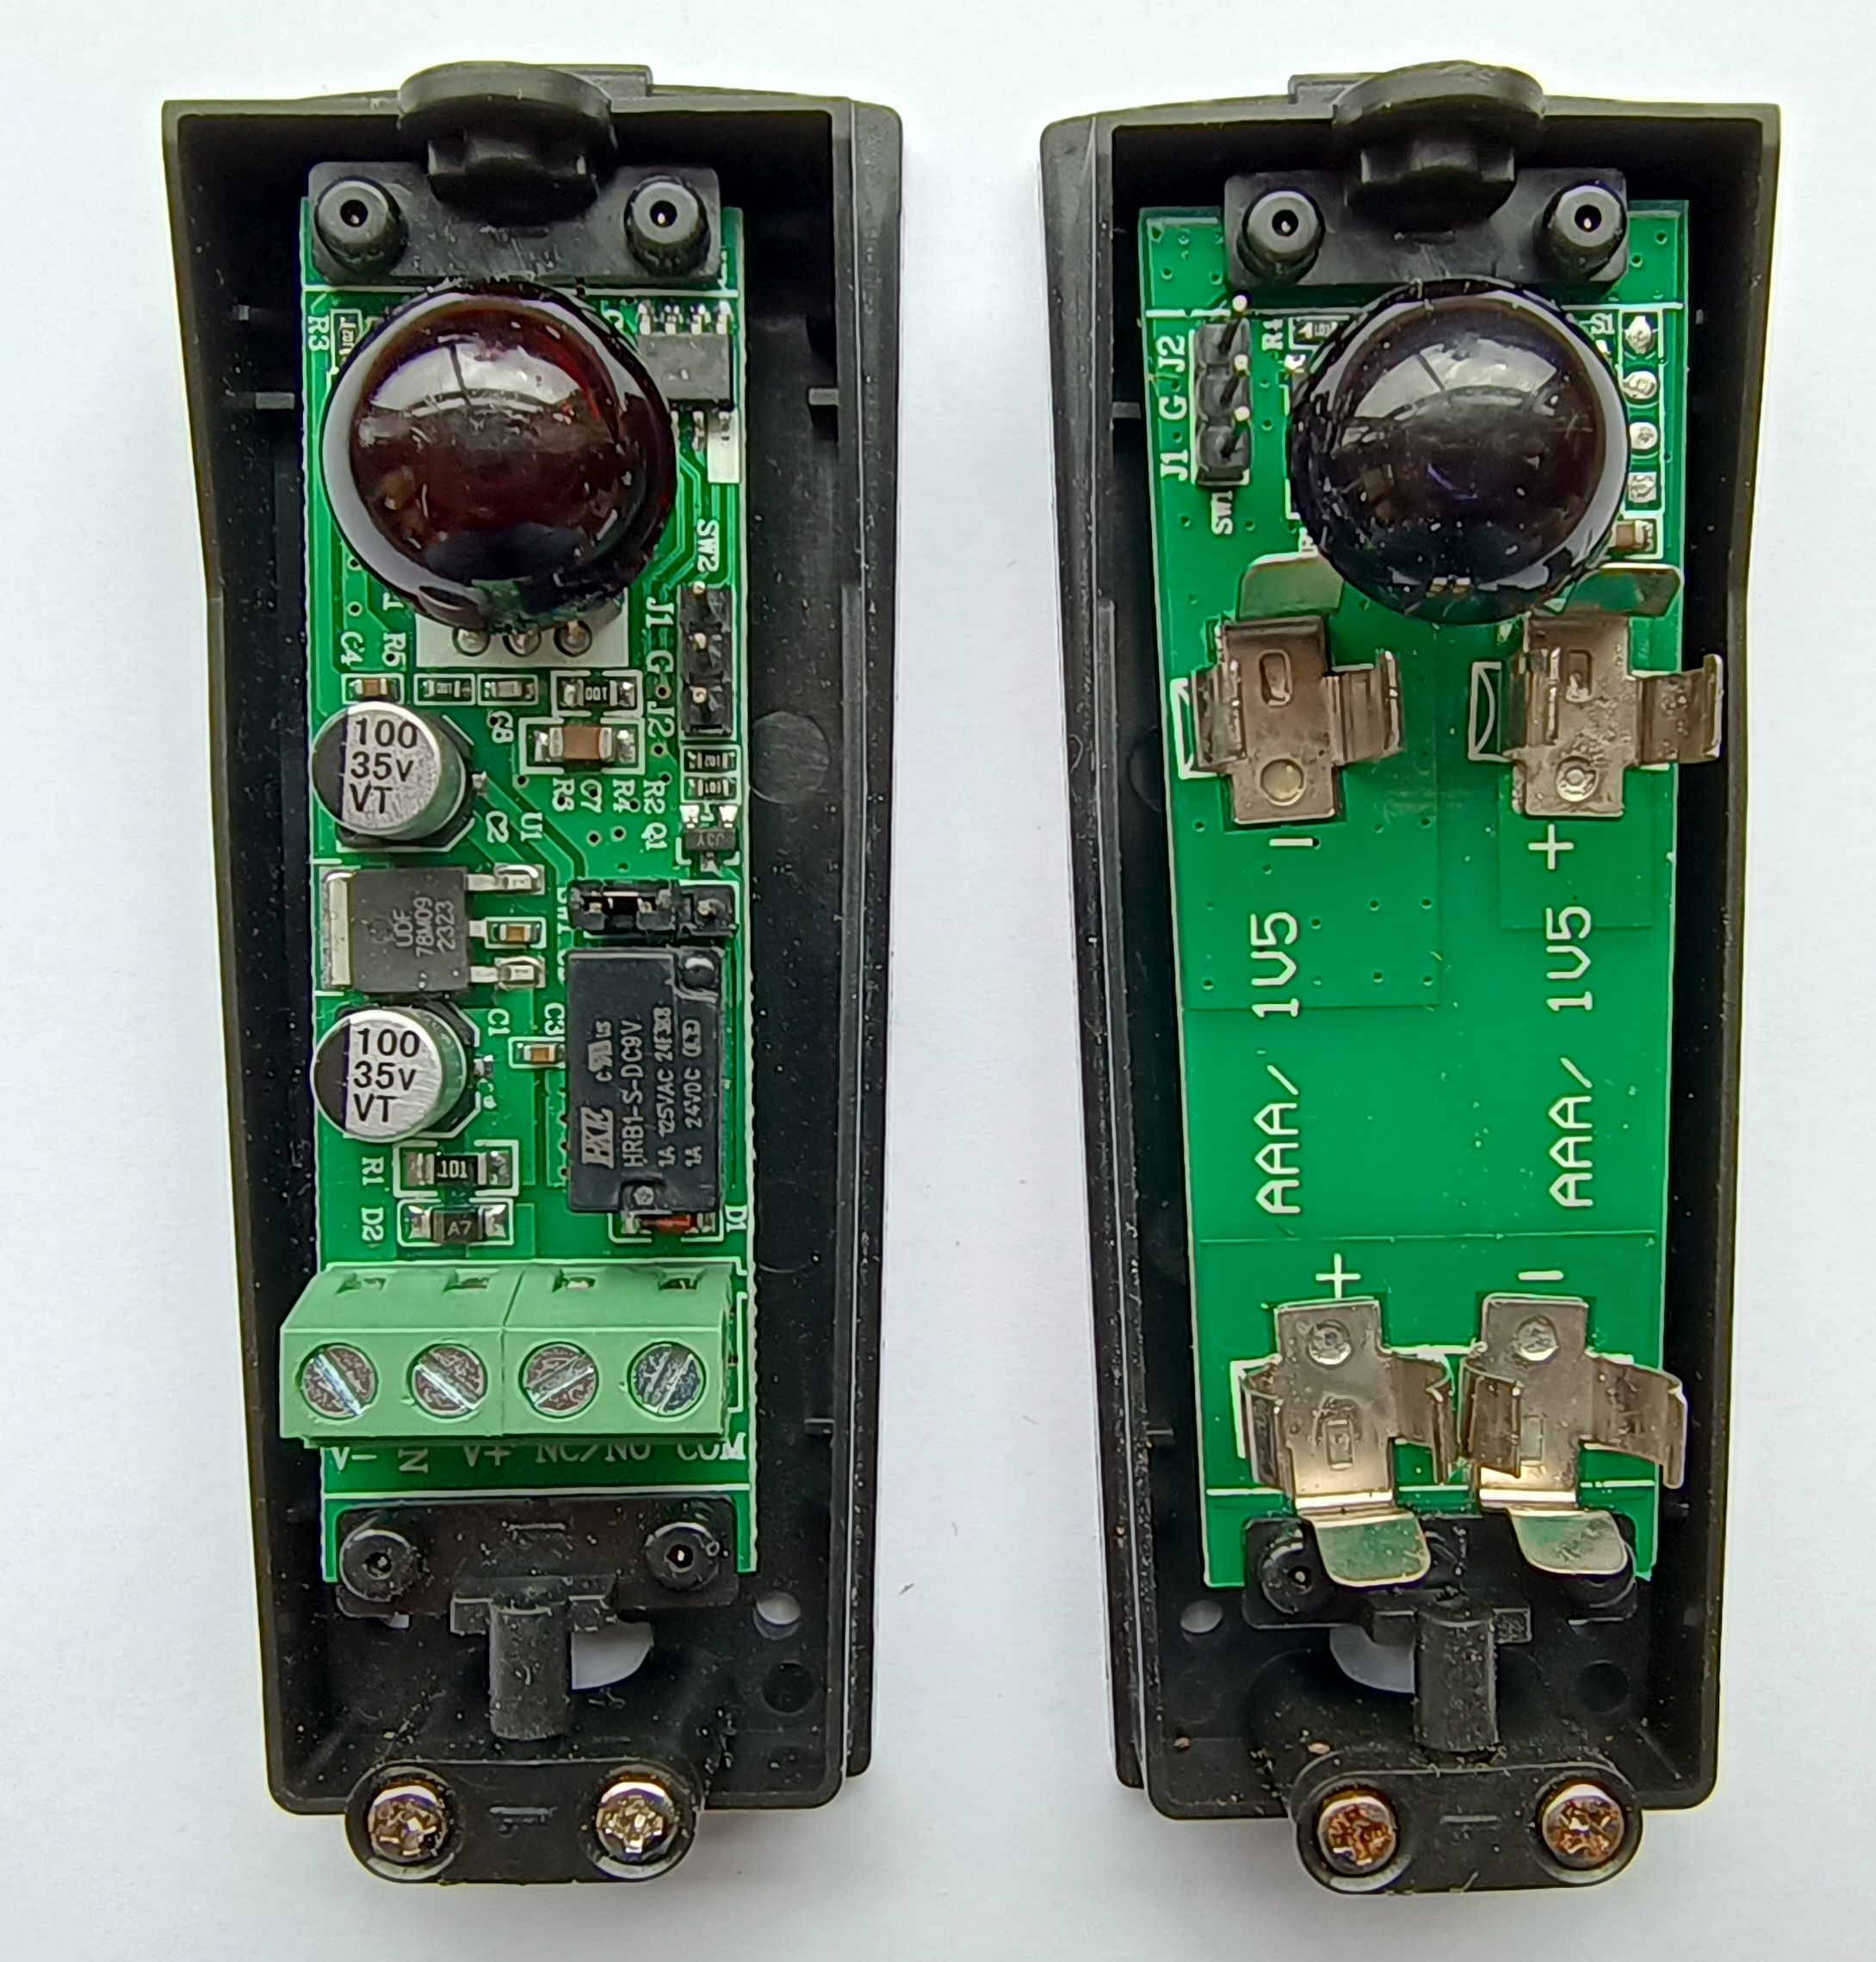
Working current for the transmitter is listed as < 85uA and the receiver < 30mA (24V DC)
I perhaps gave up on this one too soon but I found the receiver used more current than I wanted and again I had trouble with these working in direct sunlight.
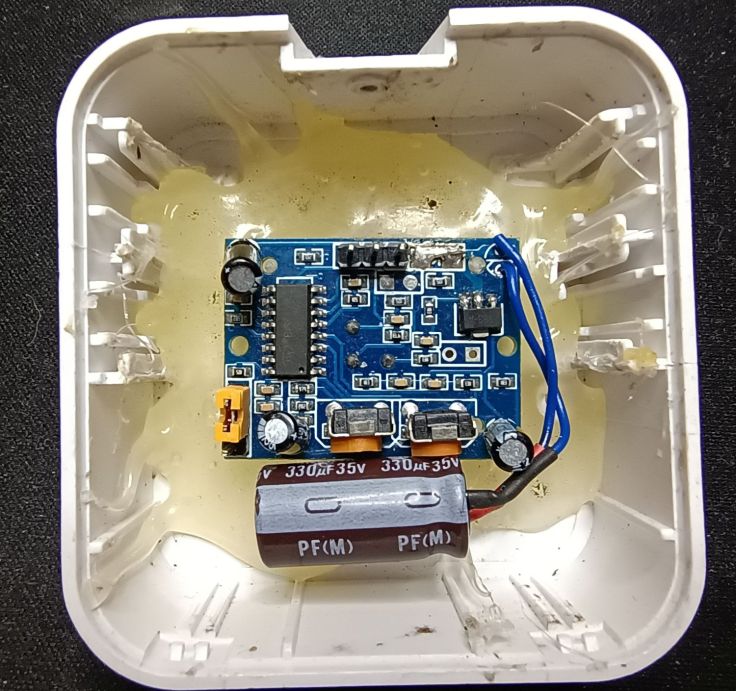
HC-SR501 PIR sensor attempt #2
I decided to have another go with one of the cheap PIR sensors. This time I decided to make some modifications. As part of the power circuit these have a protection diode in series with the positive input and a 3.3V regulator. This suggested the module actually runs on 3.3V.
There is a good info page that includes a schematic of the module by IOT Experiments here. I made three changes to the module:
- I removed the protection diode and soldered a wire across the pads. This diode was dropping over 0.6V. With the added losses in voltage regulator this left the circuit with insufficient voltage when the battery voltage was low, which was occurring in early mornings. This may have been the only useful change I made to it.
- I replaced the regulator with known LDO regulator I had. This was tricky and may not have made any difference.
- I replaced the 22uF electrolytic capacitor on the supply with a larger electrolytic capacitor. This too, was probably not necessary.
The module is powered directly from the Li-ion battery, not through the regulator for the ESP32. This is the sensor I am currently using.
Current operation
The system has now been running for some months with this change and it is mostly working well. The PIR module mostly triggers when a person or vehicle passes through the gate. Occasionally it doesn’t. It sometimes fails at night when the car is leaving the house. I guess the car is as cold as the surrounding area.
There are also a few false alarms. PIR sensors detect changes in infrared radiation, so rapid temperature changes from moving clouds or wind may be contributing to the false triggers. It also seems to get worse with higher winds. Most non windy days I probably average about one false alarm.
I would find the false triggering more annoying if I was on holiday and got an alert that it had triggered but didn’t have a way to check if we had a visitor. However, we don’t often go away and if it goes off we simply look out the window to see if someone is coming in.
Lessons learned
I haven’t found an ideal solution for the gate alarm that is cheap and simple. While what I have is not perfect, it’s good enough for my needs.
It has changed the way I look at building projects. Rather than trying to get it all in a small nicely finished enclosure, I now view it as making a test bed where I can continue to experiment, because that is probably what I will have to do. So ensuring plenty of space, building it in modules and connecting things together with removable connectors is now my practice.
If I were just monitoring the mailbox, the project would have been much easier. I would look at building it so that the power going to the circuit, including the ESP32 goes through the sensor switch. That would mean it wouldn’t use any power when not triggered. That would save having a solar panel, charging and power path circuitry. Random Nerd Tutorials describes a circuit for that Latching Power Switch Circuit (Auto Power Off Circuit) for ESP32, ESP8266, Arduino and Andreas Spiess also talks about it in his video #400 The Best Power Source for ESP32/ ESP8266 Projects
If I could get WiFi access at the mailbox I wouldn’t build a receiver. It’s nice, but with Pushover notifications it is not necessary. Instead I would have it connect to our WiFi and have it send the notification to Pushover.
At some point I may build a circuit and software to use a latching trigger with Pushover notifications as I find the idea interesting.

Leave a comment