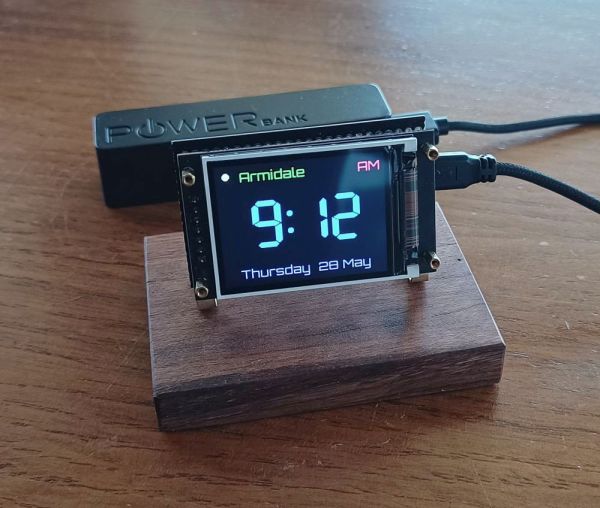
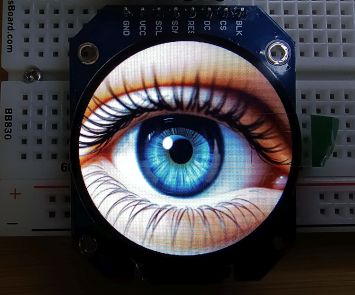
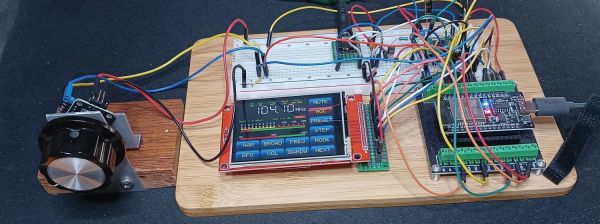
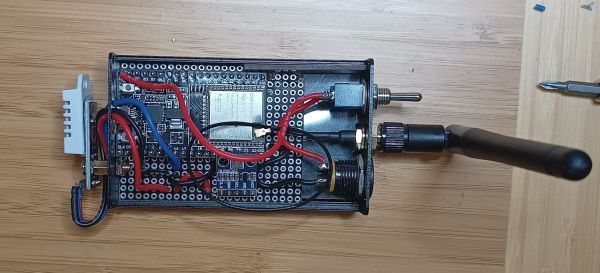
In my last post Using Text to Speech online tools to create audio files for Arduino projects I had some info about online text to audio sites I have been using to create audio alert files for projects. The files produced by ttsmp3.com seemed to have a lower audio level than I expected. I found I could run all the files through a batch process in Audacity to normalize them. I spent a lot more time trying to find out how to do it so I’m making this quick post so I have the info for next time.
I was running Audacity 2.1.3 which is now an old version. The terminology and location of the feature changed in 2.3.0. Essentially the pre 2.3 version seems to call it ‘chains’ whereas it became ‘macros’ in 2.3. I’ll include info for both as I made notes for the older versions first.
Create a chain/macro with the processes that will be run during the batch process. This only needs to be set up once.
Select files and run the task.
There are a lot of other changes that can be included. I’ve also added Mono to one as I found some of my files created another way were stereo and others mono. My project only had a single speaker so I converted them all to mono for consistancy.
Pre 2.3 version
In these versions the batch process is referred to as a chain.
To create a chain
Go to File
Select Edit chains…
Add button
Set a name, e.g. Normalize to -0.1dB
Insert Normalize – Tweak settings if desired. I didn’t
Insert ExportMP3 – This is required otherwise the files are not saved
The chain should look something like this
To use the chain
Go to File
Select Apply chains…
Select the chain, in my case ‘Normalize to -0.1dB’
Select Apply to files
Browse to the file folder and choose files
Select Open
Converted files will be placed in a folder called cleaned inside the folder of the selected files
Current version
In later versions it is called a macro.
To create a macro
Go to Tools
Select Macros…
New button
Set a name, e.g. Normalize
Insert Normalize. There is also an option ‘Normalize (Macro_Normalize)’ that I have not tried
Insert Export as MP3 – This is required otherwise the files are not saved
To use the macro
Go to Tools
Select Macros…
Select the macro, in my case Normalize
Select Files
Browse to the file folder and choose files
Select Open
Converted files will be placed in a folder called macro-output inside the folder of the selected files
Before and after
Here is a before and after shot. The before is the one at the top.
As always if let me know if you find inaccuracies in my info.
I’ve made a couple of projects that play audio alerts using a dfplayer and MP3 files. One in a clock that plays announcements and the other a countdown timer. When I did those, I used onlinetonegenerator.com to convert text to speech. I liked the voices but it doesn’t have an option to save the audio as an MP3 file. I ended up using Audacity to record the computers audio. It worked but was very tedious. Since then, I’ve been looking for a simpler way.
The important criteria in a text to speech service for me is:
Ability to enter text, listen to the converted audio in the browser and then download it as an mp3 file.
Sufficient audio quality.
Volume level ok.
Suitable lead in and end dead time to allow multiple files to be played in sequence with the result sounding as a smooth sentence. For example these four files together; “The time is”, “eleven”, “thirty two”, “am”.
A suitable voice. They don’t all have the same voices. I prefer some more than others.
Free or good value.
Ability to change speed, pitch and emphasis a bonus.
I’m unable to listen in browser. No play button displays until a file is created and then the player presented appears to use flash and is blocked by my browser. The file can be downloaded and used.
This is the one that I am intending to use in my next project. Lots of features, MP3 file output and a fair amount of free usage. It is:
Free for 3,000 characters (~375 words) per day.
Lots of different voices.
Supports speed, pitch and other effects using tags.
Multiple voices can be used in the one piece of text by using tags.
MP3 file download.
TTSMP3 uses Amazon Polly and comes with quite a few voices and features. Additional effects can be used by using tags in your text. More info about tags is available on this Amazon page.
Here is an example of the voices.
That audio file was created by pasting the text below into the converter. Beware if you do this it will use up most of your daily 3000 word limit.
[speaker:Zeina] Hi, I'm Arabic Zeina
[speaker:Russell] Hi, I'm Russell Australian English Russell
[speaker:Nicole] Hi, I'm Australian English Nicole
[speaker:Camila] Hi, I'm Brazilian Portuguese Camila
[speaker:Ricardo] Hi, I'm Brazilian Portuguese Ricardo
[speaker:Vitória] Hi, I'm Brazilian Portuguese Vitória
[speaker:Emma] Hi, I'm British English Emma
[speaker:Amy] Hi, I'm British English Amy
[speaker:Brian] Hi, I'm British English Brian
[speaker:Chantal] Hi, I'm Canadian French Chantal
[speaker:Enrique] Hi, I'm Castilian Spanish Enrique
[speaker:Lucia] Hi, I'm Castilian Spanish Lucia
[speaker:Conchita] Hi, I'm Castilian Spanish Conchita
[speaker:Zhiyu] Hi, I'm Chinese Mandarin Zhiyu
[speaker:Mads] Hi, I'm Danish Mads
[speaker:Naja] Hi, I'm Danish Naja
[speaker:Ruben] Hi, I'm Dutch Ruben
[speaker:Lotte] Hi, I'm Dutch Lotte
[speaker:Céline] Hi, I'm French Céline
[speaker:Léa] Hi, I'm French Léa
[speaker:Mathieu] Hi, I'm French Mathieu
[speaker:Vicki] Hi, I'm German Vicki
[speaker:Marlene] Hi, I'm German Marlene
[speaker:Hans] Hi, I'm German Hans
[speaker:Karl] Hi, I'm Icelandic Karl
[speaker:Dóra] Hi, I'm Icelandic Dóra
[speaker:Aditi] Hi, I'm Indian English Aditi
[speaker:Raveena] Hi, I'm Indian English Raveena
[speaker:Carla] Hi, I'm Italian Carla
[speaker:Giorgio] Hi, I'm Italian Giorgio
[speaker:Bianca] Hi, I'm Italian Bianca
[speaker:Takumi] Hi, I'm Japanese Takumi
[speaker:Mizuki] Hi, I'm Japanese Mizuki
[speaker:Seoyeon] Hi, I'm Korean Seoyeon
[speaker:Mia] Hi, I'm Mexican Spanish Mia
[speaker:Liv] Hi, I'm Norwegian Liv
[speaker:Ewa] Hi, I'm Polish Ewa
[speaker:Jan] Hi, I'm Polish Jan
[speaker:Maja] Hi, I'm Polish Maja
[speaker:Jacek] Hi, I'm Polish Jacek
[speaker:Inês] Hi, I'm Portuguese Inês
[speaker:Cristiano] Hi, I'm Portuguese Cristiano
[speaker:Carmen] Hi, I'm Romanian Carmen
[speaker:Maxim] Hi, I'm Russian Maxim
[speaker:Tatyana] Hi, I'm Russian Tatyana
[speaker:Astrid] Hi, I'm Swedish Astrid
[speaker:Filiz] Hi, I'm Turkish Filiz
[speaker:Joey] Hi, I'm US English Joey
[speaker:Kimberly] Hi, I'm US English Kimberly
[speaker:Salli] Hi, I'm US English Salli
[speaker:Ivy] Hi, I'm US English Ivy
[speaker:Matthew] Hi, I'm US English Matthew
[speaker:Kendra] Hi, I'm US English Kendra
[speaker:Joanna] Hi, I'm US English Joanna
[speaker:Justin] Hi, I'm US English Justin
[speaker:Miguel] Hi, I'm US Spanish Miguel
[speaker:Lupe] Hi, I'm US Spanish Lupe
[speaker:Penélope] Hi, I'm US Spanish Penélope
[speaker:Gwyneth] Hi, I'm Welsh Gwyneth
[speaker:Geraint] Hi, I'm Welsh English Geraint
Comparisons
Compared with the original audio files that I created by using Audacity to record the PC audio and onlinetonegenerator.com, ttsmp3.com had lower volume. I may have had the record level a bit high when I used Audacity so not sure that the ttsmp3 level is too low.
The bit rate is also different, with the Audacity ones higher. That’s probably because I unnecessarily chose a higher bitrate in Audacity. TTSMP3 was 48kbs.
And that affected the file size. The TTSMP3 is much smaller.
Here are a couple of examples for comparison. For each I created four separate files and then joined them together to see how smooth the transition was. The four files were “The time is”, “11”, “32”, “AM”. I had to be a bit creative with the AM for French Celine as it was pronounced as “am”.
onlinetonegenerator.com Voice is Google français. I like this voice. It has added a lot of character to my speaking clock.
ttsmp3.com Voice is French Celine. It was much easier to create and the timing between files is ok, but the voice doesn’t have the same character to the one above in my opinion
ttsmp3.com This is British Amy. This was just for comparison to see how the same text would sound with an English voice.
I love those simple cheap rotary encoders as used in the KY-040 modules as a method of getting user input with Arduino and ESP32 projects. The issue of bounce with them is significant and for years I’ve been looking a reliable method of dealing with it. I thought I had it figured out by either using a couple of 100nF capacitors or by using code ignore quick changes but this was not always reliable and sometimes missed legitimate changes when rotating at speed. In forums I read people recommending to use a lookup table, but not me. I persevered with what I knew, at least until my methods didn’t work.
I’ve only recently started using ESP32s. The first time I started using one with an encoder the bouncing was terrible. Turning a single indent resulted in a large number of false increments. I assumed that this was because the ESP32 was so running much faster than the Nanos I’ve been using and triggering on even quicker bounces. I don’t know if that is a possibility, but I now believe that the encoder I was using was extremely noisy. I thought it was time to revisit debouncing. After all a reliable encoder will not necessarily stay reliable forever.
An alternative solution
In some forums I read there was sometimes a comment saying there was a more reliable way. That is to use a table to compare the previous state with the new state and using a lookup table to ignore those changes that are not valid for a legitimate change. I decided to investigate. I came across this page Rotary Encoder : How to use the Keys KY-040 Encoder on the Arduino. I recommend reading it if you want to learn more about it.
I tried the Code For Improved Table Decode and was really surprised just how well it worked without any hardware filtering. There were only two things missing that I wanted. Firstly, it uses polling and I wanted to use interrupts and secondly it has a copyright notice and I respect that. However, I want to use code that I can include in projects that I can place online to share with others. It’s still a great read and I am grateful for Best Microcontroller Projects for providing the resource.
I also found these to be very helpful. I found some others had similar code that I believe is based on the code by Oleg. Oleg’s code worked well too, but I couldn’t get it to work on the ESP32 without a couple of changes. It uses port read to read the value of the encoder pins, which I expect is a very efficient thing to do, but didn’t work with the ESP32. Also, the interrupt version uses PROGMEM that also appears to be incompatible with the ESP32, or at least as it is done in the example.
However, you can stop here and use Oleg’s code if you are using a Nano or Uno, or use the Best-Microcontroller-Projects.com version. To get Oleg’s version working on the ESP32 I made these changes.
Port read
Olig’s code reads the ports directly without using Arduino’s digitalRead. I had a go at using digitalRead, which I hoped would allow it to work on the ESP32 and perhaps other microcontrollers. To do that I:
Removed this define
define ENC_PORT PINC
And changed this:
old_AB |= ( ENC_PORT & 0x03 ); // Add current state
to this to use digitalRead:
if (digitalRead(ENC_A)) old_AB |= 0x02; // Add current state of pin A if (digitalRead(ENC_B)) old_AB |= 0x01; // Add current state of pin B
Progmem
I’m not sure why program memory is used instead of SRAM, only that I couldn’t get it to work on the ESP32 so I removed the reference to it making it the same as Oleg’s polling version. So from this:
I confess to not fully understanding the code, so I can’t be sure that there are not issues with it. I have made some other tweaks too, but those are mainly just the addition of comments. These are the two versions that I am currently using.
Polling version
/* Based on Oleg Mazurov's code for Reading rotary encoder on Arduino, here
https://chome.nerpa.tech/mcu/reading-rotary-encoder-on-arduino/ and here
https://chome.nerpa.tech/mcu/rotary-encoder-interrupt-service-routine-for-avr-micros/
This example does not use the port read method. Tested with Nano and ESP32
Connections
===========
Encoder | ESP32 | Nano
--------------------------
A | D5 | Nano D2
B | D21 | Nano D3
GND | GND | GND
*/
// Define rotary encoder pins
#define ENC_A 21
#define ENC_B 5
volatile int counter = 0;
void setup() {
// Set encoder pins
pinMode(ENC_A, INPUT_PULLUP);
pinMode(ENC_B, INPUT_PULLUP);
// Start the serial monitor to show output
Serial.begin(115200); // Change to 9600 for Nano, 115200 for ESP32
delay(500); // Wait for serial to start
Serial.println("Start");
}
void loop() {
static int lastCounter = 0;
read_encoder();
// If count has changed print the new value to serial
if(counter != lastCounter){
Serial.println(counter);
lastCounter = counter;
}
}
void read_encoder() {
// Encoder routine. Updates counter if they are valid
// and if rotated a full indent
static uint8_t old_AB = 3; // Lookup table index
static int8_t encval = 0; // Encoder value
static const int8_t enc_states[] = {0,-1,1,0,1,0,0,-1,-1,0,0,1,0,1,-1,0}; // Lookup table
old_AB <<=2; // Remember previous state
if (digitalRead(ENC_A)) old_AB |= 0x02; // Add current state of pin A
if (digitalRead(ENC_B)) old_AB |= 0x01; // Add current state of pin B
encval += enc_states[( old_AB & 0x0f )];
// Update counter if encoder has rotated a full indent, that is at least 4 steps
if( encval > 3 ) { // Four steps forward
counter++; // Increase counter
encval = 0;
}
else if( encval < -3 ) { // Four steps backwards
counter--; // Decrease counter
encval = 0;
}
}
Interrupt version
/* Based on Oleg Mazurov's code for rotary encoder interrupt service routines for AVR micros
here https://chome.nerpa.tech/mcu/reading-rotary-encoder-on-arduino/
and using interrupts https://chome.nerpa.tech/mcu/rotary-encoder-interrupt-service-routine-for-avr-micros/
This example does not use the port read method. Tested with Nano and ESP32
both encoder A and B pins must be connected to interrupt enabled pins
Connections
===========
Encoder | ESP32 | Nano
--------------------------
A | D5 | Nano D2
B | D21 | Nano D3
GND | GND | GND
*/
// Define rotary encoder pins
#define ENC_A 21
#define ENC_B 5
volatile int counter = 0;
void setup() {
// Set encoder pins and attach interrupts
pinMode(ENC_A, INPUT_PULLUP);
pinMode(ENC_B, INPUT_PULLUP);
attachInterrupt(digitalPinToInterrupt(ENC_A), read_encoder, CHANGE);
attachInterrupt(digitalPinToInterrupt(ENC_B), read_encoder, CHANGE);
// Start the serial monitor to show output
Serial.begin(115200); // Change to 9600 for Nano, 115200 for ESP32
delay(500); // Wait for serial to start
Serial.println("Start");
}
void loop() {
static int lastCounter = 0;
// If count has changed print the new value to serial
if(counter != lastCounter){
Serial.println(counter);
lastCounter = counter;
}
}
void read_encoder() {
// Encoder interrupt routine for both pins. Updates counter
// if they are valid and have rotated a full indent
static uint8_t old_AB = 3; // Lookup table index
static int8_t encval = 0; // Encoder value
static const int8_t enc_states[] = {0,-1,1,0,1,0,0,-1,-1,0,0,1,0,1,-1,0}; // Lookup table
old_AB <<=2; // Remember previous state
if (digitalRead(ENC_A)) old_AB |= 0x02; // Add current state of pin A
if (digitalRead(ENC_B)) old_AB |= 0x01; // Add current state of pin B
encval += enc_states[( old_AB & 0x0f )];
// Update counter if encoder has rotated a full indent, that is at least 4 steps
if( encval > 3 ) { // Four steps forward
counter++; // Increase counter
encval = 0;
}
else if( encval < -3 ) { // Four steps backwards
counter--; // Decrease counter
encval = 0;
}
}
Downsides of this method
While it is working well in tests, I have not used it in a permanent project yet. The only downside I can find so far is that if using interrupts instead of polling it requires two interrupt pins. Other methods I’ve used only need one. I don’t expect this will be an issue of the ESP32 but it may be with the Nano.
Update: 10 June 2022
I thought it was worth adding an update. I notice this post has now had over 1900 views which makes it my second most popular post which encourages me to keep it updated.
The examples above are missing the ability to change the output, in these cases update the counter at a greater amount per step if the encoder is rotated at a greater rate. A commenter asked about this and I posted a reply in the comments but at the time I had not used it in a project. I now have and it is working successfully. I’m using it in a couple timer projects to set the countdown time. In those projects I only use two steps. For steps slower than 40ms the count increased by 1. If quicker the count increases by 3.
Rather than use a formula to give a fully variable change I’ve opted in the examples below to use 3 steps. In my kitchen timer I only had two speeds and that worked really well.
The interrupt method probably has more code in the interrupt routine than is good practice. It has some magic numbers in there too, but there should be enough info to tweak it. I’m not convinced that there is an ideal formula or numbers for this. In testing the size of the knob seemed to play a factor.
In the examples below the time after the four steps of each click of the counter is recorded. I’m not sure if that is the best approach but seems reasonable. I’ve only included the read_encoder routine below. The rest of the sketch is the same as above so just swap the routine above with this. It is the same for polling an interrupt versions.
void read_encoder() {
// Encoder interrupt routine for both pins. Updates counter
// if they are valid and have rotated a full indent
static uint8_t old_AB = 3; // Lookup table index
static int8_t encval = 0; // Encoder value
static const int8_t enc_states[] = {0,-1,1,0,1,0,0,-1,-1,0,0,1,0,1,-1,0}; // Lookup table
static unsigned long lastInterruptTime = 0;
unsigned long interruptTime = millis();
old_AB <<=2; // Remember previous state
if (digitalRead(ENC_A)) old_AB |= 0x02; // Add current state of pin A
if (digitalRead(ENC_B)) old_AB |= 0x01; // Add current state of pin B
encval += enc_states[( old_AB & 0x0f )];
// Update counter if encoder has rotated a full indent, that is at least 4 steps
if( encval > 3 ) { // Four steps forward
if (interruptTime - lastInterruptTime > 40) { // Greater than 40 milliseconds
counter ++; // Increase by 1
} else if (interruptTime - lastInterruptTime > 20){ // Greater than 20 milliseconds
counter += 3; // Increase by 3
} else { // Faster than 20 milliseconds
counter += 10; // Increase by 10
}
encval = 0;
lastInterruptTime = millis(); // Remember time
}
else if( encval < -3 ) { // Four steps backwards
if (interruptTime - lastInterruptTime > 40) { // Greater than 40 milliseconds
counter --; // Increase by 1
} else if (interruptTime - lastInterruptTime > 20){ // Greater than 20 milliseconds
counter -= 3; // Increase by 3
} else { // Faster than 20 milliseconds
counter -= 10; // Increase by 10
}
encval = 0;
lastInterruptTime = millis(); // Remember time
}
}