
I’ve been building up a small collection of LCD screens for use with Arduino projects. I’ve uploaded a few example sketches mostly using Bodmer’s TFT_eSPI library. I found it a little challenging to set the display configuration in the library, but otherwise it worked well.
There seems to be some concern that the library is no longer being maintained. I’m not sure about that, but I can certainly understand if maintenance has stopped. There must be enormous pressure from users to keep adding new features and fixes.
LovyanGFX library
While looking at alternatives, I came across the LovyanGFX library. It looks like it supports all the displays I have and gets good reviews. Some of the information is in Japanese, which adds a layer of mystery to the whole experience 🙂
At this point all I wanted to do was get a few of the examples running on my displays. With this library, the display config information is added to the project sketch or included with it as a .h file. This makes it easy to manage, particularly when using multiple LCD types and projects.
I wasn’t sure how to set up the LCD config info, so I asked Claude for help. It spat out the code below, but you know what would’ve been easier? Just typing “ST7789 240×320 LovyanGFX config” into Google. Turns out the answer was sitting right there in the AI response the whole time.
Pasting the LCD config code into a demo sketch got me up and running with a ESP32 Dev Module. For the record, I’m using Arduino IDE 2.3.6 with the LovyanGFX library installed through the library manager. These displays all use SPI communication.
I’m not knowledgeable enough to claim I understand this library, I’m just posting it for anyone else struggling to get past ‘Go’ without collecting $200 and for my own reference later.
I also found this very useful article How to use LovyanGFX with ILI9341 240×320 display, which explains many of the settings.
Including the config info
Method 1: Quick and dirty
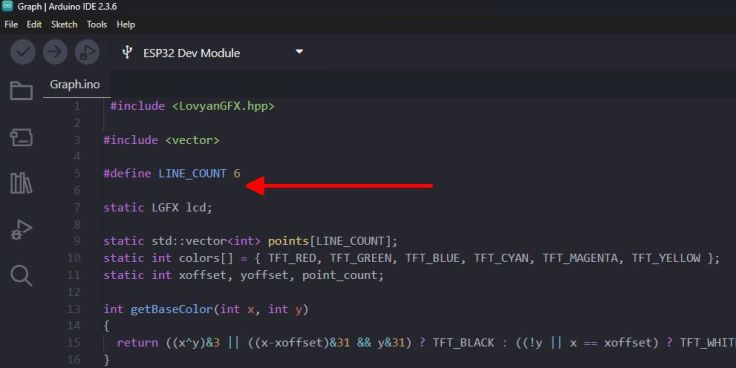
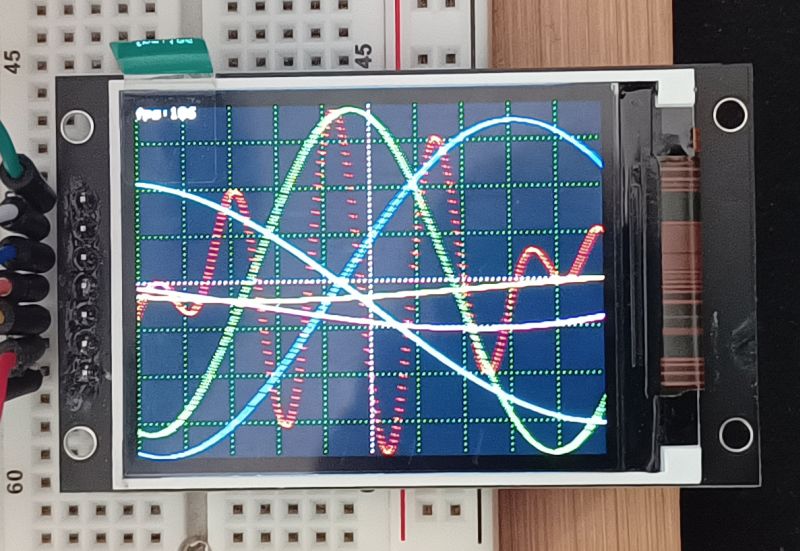
Copy the config info from the display info below and paste it to the top of the sketch below #include <LovyanGFX.hpp>. It must be above static LGFX lcd; For example here with the Graph sketch.
Method 2: Better practice
It is better practice to place the info in a header file. The file will appear as a separate tab in the Arduino and as a separate file in the Sketch folder.
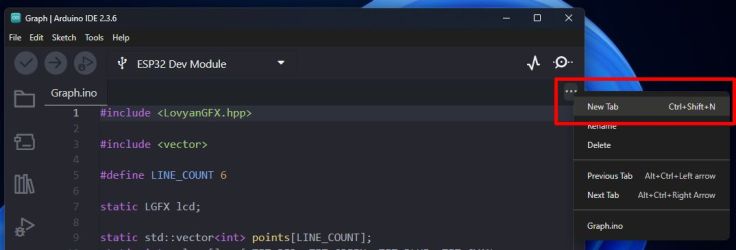
First click on the three dots on the right and select New Tab. When prompted to enter a file name enter a name with .h at the end. For example; LovyanGFX_ST7789_240x320_Settings.h
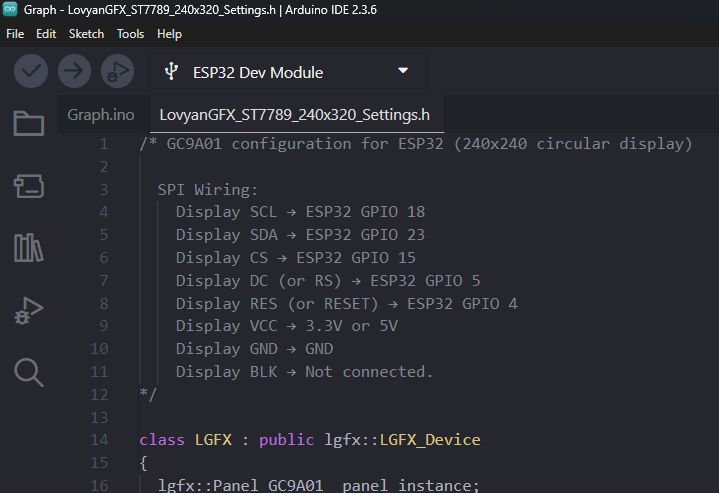
Select the new tab and paste the config code into the new tab.
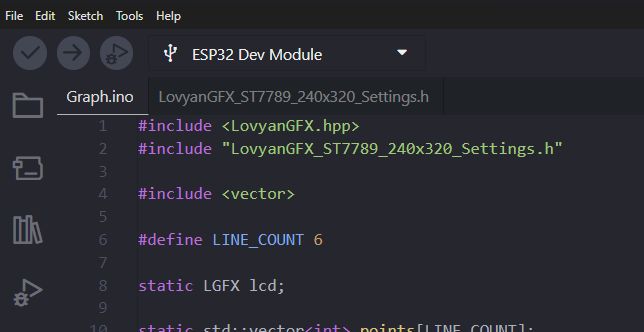
Select the .ino tab and enter an include for the new file you have created, for example; #include “LovyanGFX_ST7789_240x320_Settings.h”
Wire it up
I wired it up to an ESP32 Dev Module, following the pin notes in the config comments.
ILI9341 240×320 display (no touch)
This display has a touch screen. The config file for this one doesn’t include touch support for it. I purchased it from AliExpress, but I no longer have a link to the seller I purchased from. This looks like the same display.
Currently AU$7.89 / US$5.12

Wiring
- Display SCK → ESP32 GPIO 18
- Display SDI (MOSI) → ESP32 GPIO 23
- Display SDO (MISO) → ESP32 GPIO 19
- Display CS → ESP32 GPIO 15
- Display DC (or RS) → ESP32 GPIO 5
- Display RST (or RESET) → ESP32 GPIO 4
- Display LED → 3.3V (backlight!)
- Display VCC → 3.3V or 5V
- Display GND → GND
Config code
class LGFX : public lgfx::LGFX_Device
{
  lgfx::Panel_ILI9341 _panel_instance;
  lgfx::Bus_SPI _bus_instance;

public:
  LGFX(void)
  {
    {
      auto cfg = _bus_instance.config();
      cfg.spi_host = VSPI_HOST;     // ESP32 VSPI (SPI3)
      cfg.spi_mode = 0;
      cfg.freq_write = 40000000;    // 40MHz (ILI9341 supports high speeds)
      cfg.freq_read  = 16000000;
      cfg.spi_3wire  = true;
      cfg.use_lock   = true;
      cfg.dma_channel = SPI_DMA_CH_AUTO;
      cfg.pin_sclk = 18;            // SPI SCK
      cfg.pin_mosi = 23;            // SPI MOSI (SDI)
      cfg.pin_miso = 19;            // SPI MISO (SDO)
      cfg.pin_dc   = 5;             // Data/Command pin
      _bus_instance.config(cfg);
      _panel_instance.setBus(&_bus_instance);
    }

    {
      auto cfg = _panel_instance.config();
      cfg.pin_cs           = 15;    // Chip Select
      cfg.pin_rst          = 4;     // Reset
      cfg.pin_busy         = -1;    // Not used
      cfg.panel_width      = 240;   // Physical width
      cfg.panel_height     = 320;   // Physical height
      cfg.offset_x         = 0;     // X offset
      cfg.offset_y         = 0;     // Y offset
      cfg.offset_rotation  = 0;
      cfg.dummy_read_pixel = 8;
      cfg.dummy_read_bits  = 1;
      cfg.readable         = true;
      cfg.invert           = false; // Color inversion (toggle if colors look wrong)
      cfg.rgb_order        = false; // BGR order for ILI9341
      cfg.dlen_16bit       = false;
      cfg.bus_shared       = true;

      _panel_instance.config(cfg);
    }

    setPanel(&_panel_instance);
  }
};
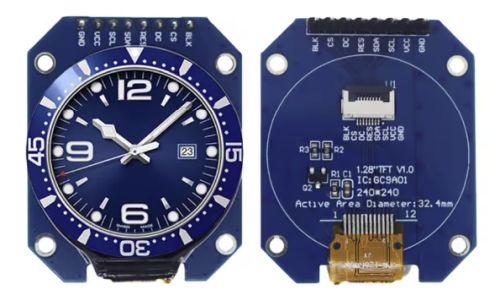
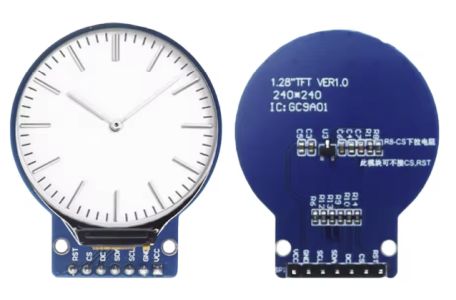
GC9A01 240×240 circular display
These were also purchased from AliExpress.
Currently AU$5.62 / US$3.64
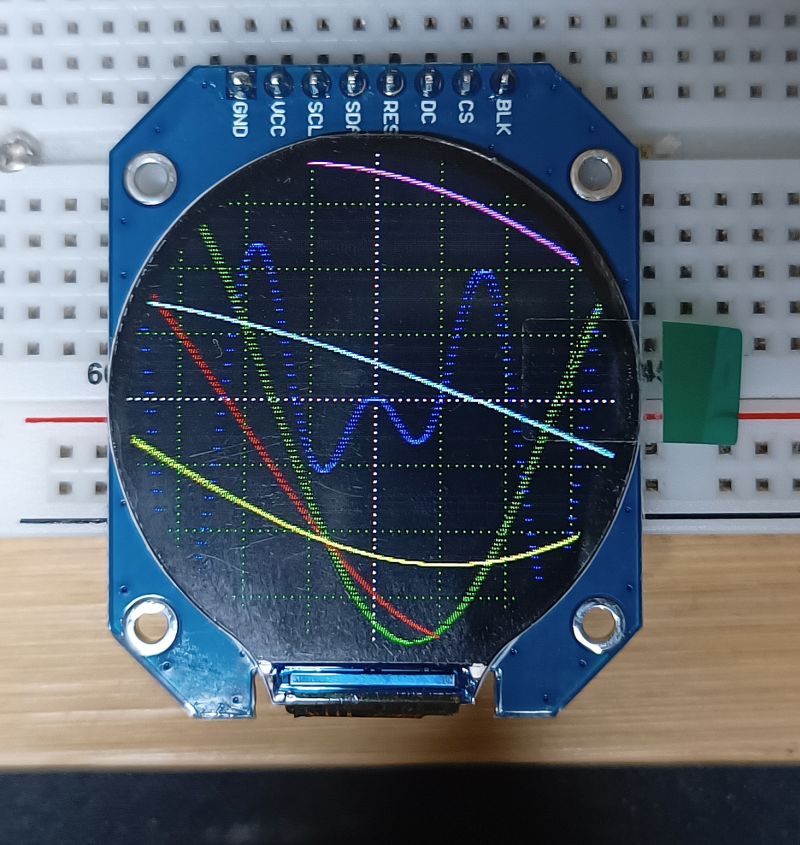
Wiring
- Display SCL → ESP32 GPIO 18
- Display SDA → ESP32 GPIO 23
- Display CS → ESP32 GPIO 15
- Display DC (or RS) → ESP32 GPIO 5
- Display RES (or RESET) → ESP32 GPIO 4
- Display VCC → 3.3V or 5V
- Display GND → GND
- Display BLK → Not connected.
Config code
class LGFX : public lgfx::LGFX_Device
{
  lgfx::Panel_GC9A01 _panel_instance;
  lgfx::Bus_SPI _bus_instance;

public:
  LGFX(void)
  {
    {
      auto cfg = _bus_instance.config();
      cfg.spi_host = VSPI_HOST;     // ESP32 VSPI (SPI3)
      cfg.spi_mode = 0;
      cfg.freq_write = 40000000;    // 40MHz (GC9A01 supports high speeds)
      cfg.freq_read  = 16000000;
      cfg.spi_3wire  = true;
      cfg.use_lock   = true;
      cfg.dma_channel = SPI_DMA_CH_AUTO;
      cfg.pin_sclk = 18;            // SPI SCK (connect to display SCL)
      cfg.pin_mosi = 23;            // SPI MOSI (connect to display SDA)
      cfg.pin_miso = 19;            // SPI MISO (not connected)
      cfg.pin_dc   = 5;             // Data/Command pin
      _bus_instance.config(cfg);
      _panel_instance.setBus(&_bus_instance);
    }

    {
      auto cfg = _panel_instance.config();
      cfg.pin_cs           = 15;    // Chip Select
      cfg.pin_rst          = 4;     // Reset
      cfg.pin_busy         = -1;    // Not used
      cfg.panel_width      = 240;   // Physical width (circular display)
      cfg.panel_height     = 240;   // Physical height (circular display)
      cfg.offset_x         = 0;     // X offset
      cfg.offset_y         = 0;     // Y offset
      cfg.offset_rotation  = 0;
      cfg.dummy_read_pixel = 8;
      cfg.dummy_read_bits  = 1;
      cfg.readable         = false;
      cfg.invert           = true;  // Color inversion (toggle if colors look wrong)
      cfg.rgb_order        = false;  // RGB order for GC9A01
      cfg.dlen_16bit       = false;
      cfg.bus_shared       = true;

      _panel_instance.config(cfg);
    }

    setPanel(&_panel_instance);
  }
};
ST7789 240×320 display
Again, this was purchased from AliExpress. A nice smaller display. It doesn’t have touch support.
Currently AU$5.99 / US$3.88

Wiring
- Display SCL → ESP32 GPIO 18
- Display SDA → ESP32 GPIO 23
- Display CS → ESP32 GPIO 15
- Display DC (or RS) → ESP32 GPIO 5
- Display RST (or RESET) → ESP32 GPIO 4
- Display VCC → 3.3V or 5V
- Display GND → GND
Config code
class LGFX : public lgfx::LGFX_Device
{
  lgfx::Panel_ST7789 _panel_instance;
  lgfx::Bus_SPI _bus_instance;

public:
  LGFX(void)
  {
    {
      auto cfg = _bus_instance.config();
      cfg.spi_host = VSPI_HOST;     // ESP32 VSPI (SPI3)
      cfg.spi_mode = 0;
      cfg.freq_write = 40000000;    // 40MHz (ST7789 supports higher speeds)
      cfg.freq_read  = 16000000;
      cfg.spi_3wire  = true;
      cfg.use_lock   = true;
      cfg.dma_channel = SPI_DMA_CH_AUTO;
      cfg.pin_sclk = 18;            // SPI SCK (connect to display SCL)
      cfg.pin_mosi = 23;            // SPI MOSI (connect to display SDA)
      cfg.pin_miso = 19;            // SPI MISO (not connected)
      cfg.pin_dc   = 5;             // Data/Command pin
      _bus_instance.config(cfg);
      _panel_instance.setBus(&_bus_instance);
    }

    {
      auto cfg = _panel_instance.config();
      cfg.pin_cs           = 15;    // Chip Select
      cfg.pin_rst          = 4;     // Reset
      cfg.pin_busy         = -1;    // Not used
      cfg.panel_width      = 240;   // Physical width
      cfg.panel_height     = 320;   // Physical height
      cfg.offset_x         = 0;     // X offset
      cfg.offset_y         = 0;     // Y offset
      cfg.offset_rotation  = 0;
      cfg.dummy_read_pixel = 8;
      cfg.dummy_read_bits  = 1;
      cfg.readable         = false;
      cfg.invert           = true;  // Color inversion (may need to toggle)
      cfg.rgb_order        = false; // BGR order (ST7789 typically uses RGB, adjust if needed)
      cfg.dlen_16bit       = false;
      cfg.bus_shared       = true;

      _panel_instance.config(cfg);
    }

    setPanel(&_panel_instance);
  }
};
Finally
I still have a fair way to go before I can do anything impressive with these displays, but getting the built-in examples running felt like a solid first win.
Have you got any experience with this? Let me know if I can improve this info, or let me know if it is helpful.
Update 18 November 2025: I’ve used the config files in a project. Check out Animating a Blinking Eye on an Arduino-Powered LCD Display if you are interested.

At 59 I’m a late entrant to the world of Arduino. However, my understanding grows every day.
I do have an ESP32 board and a display, so I might just give your suggestions a shot. The wiring info. is a great help, thanks.
LikeLike
Good luck with it. I’m a similar age and have been playing with Arduino’s for 7 – 8 years, but I wasn’t doing much for a lot of that time. I’m enjoying the assistance of AI as I used to get stuck a lot. I got one of the round displays displaying eye images yesterday so it appears like blinking eyes. I’ll do a post about that soon.
LikeLiked by 1 person
Awesome!
LikeLike
Ciao Dopo giorni e giorni di ricerca e compilazioni ho trovato questa tua esperienza utile. ho il problema di disegnare su un pannello crown da 7 pollici rossi, una tabella che posso aggiornare con dei sensori. Potresti aiutarmi con qualche esempio pratico. Grazie
LikeLike
Hi, I’m just a beginner so I can’t provide much help. I tried to search for your display but I think some of the details got lost in translation. I recommend using AI to help. I’ve found ChatGPT to be helpful but now prefer Claude. When I was trying to get code for the displays I have, I ended up adding a link to a page that sold the panel into the AI prompt so that it could get more info about the panel from there. If you are not familiar with this sort of question with AI, start with something like “Create an example program for arduino and the LovyanGFX library to display information in a table from sensors. I am using a 7 inch red LCD screen like this one…..” You can also ask it to include lots of comments or to explain particular sections of code.
LikeLike