
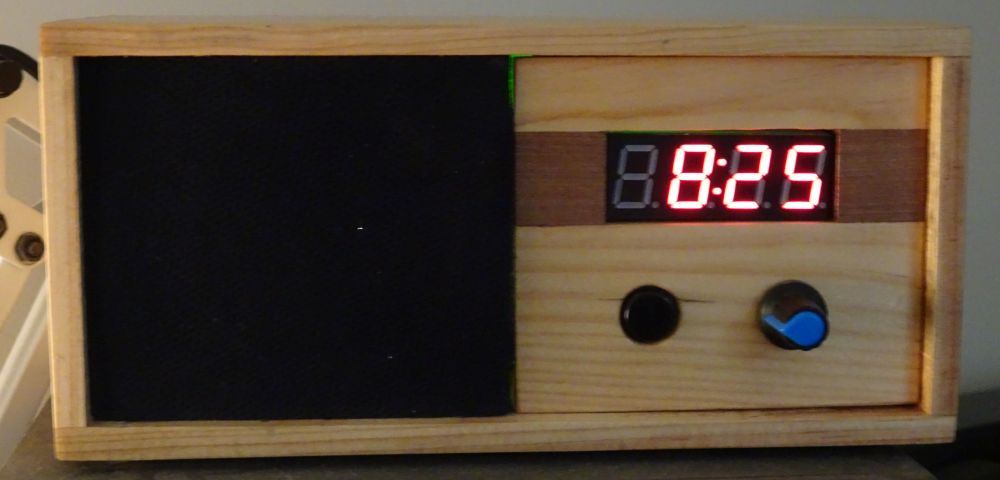
In recent post I’ve posted about Using Text to Speech online tools to create audio files for Arduino projects and Batch processing files with Audacity. I have a couple of projects that use speech alerts and one of those is a speaking clock. It announces the time at the press of a button, but more helpfully announces the hour, when it is time to get up and when to have morning tea and lunch.
While I don’t think the Arduino code is in a fit state to share I’ve uploaded the audio files to Github for anyone to use in their projects. There are two versions of of the files:
- French Celine created with Online Tone Generator. These are the files I am currently using in my clock.
- British Amy created with TTSMP3. An alternative set I made to test TTSMP3
I use French Celine in my project. Here are a couple of examples of what they can do when joined:
Google français
British Amy
I have uploaded the mp3 files to my Github for anyone to freely use. They are available here. This is a list of the files:
000 zero.mp3
001 one.mp3
002 two.mp3
003 three.mp3
004 four.mp3
005 five.mp3
006 six.mp3
007 seven.mp3
008 eight.mp3
009 nine.mp3
010 ten.mp3
011 eleven.mp3
012 twelve.mp3
013 thirteen.mp3
014 fourteen.mp3
015 fifteen.mp3
016 sixteen.mp3
017 seventeen.mp3
018 eighteen.mp3
019 nineteen.mp3
020 twenty.mp3
021 twenty one.mp3
022 twenty two.mp3
023 twenty three.mp3
024 twenty four.mp3
025 twenty five.mp3
026 twenty six.mp3
027 twenty seven.mp3
028 twenty eight.mp3
029 twenty nine.mp3
030 thirty.mp3
031 thirty one.mp3
032 thirty two.mp3
033 thirty three.mp3
034 thirty four.mp3
035 thirty five.mp3
036 thirty six.mp3
037 thirty seven.mp3
038 thirty eight.mp3
039 thirty nine.mp3
040 forty.mp3
041 forty one.mp3
042 forty two.mp3
043 forty three.mp3
044 forty four.mp3
045 forty five.mp3
046 forty six.mp3
047 forty seven.mp3
048 forty eight.mp3
049 forty nine.mp3
050 fifty.mp3
051 fifty one.mp3
052 fifty two.mp3
053 fifty three.mp3
054 fifty four.mp3
055 fifty five.mp3
056 fifty six.mp3
057 fifty seven.mp3
058 fifty eight.mp3
059 fifty nine.mp3
060 sixty.mp3
061 one oclock.mp3
062 two oclock.mp3
063 three oclock.mp3
064 four oclock.mp3
065 five oclock.mp3
066 six oclock.mp3
067 seven oclock.mp3
068 eight oclock.mp3
069 nine oclock.mp3
070 ten oclock.mp3
071 eleven oclock.mp3
072 twelve oclock.mp3
073 noon.mp3
074 twelve noon.mp3
075 midnight.mp3
076 the time is.mp3
077 it is.mp3
078 it is time to wake up.mp3
079 it is morning tea time.mp3
080 it is lunch time.mp3
081 am.mp3
082 pm.mp3
083 I was sleeping.mp3
084 good morning.mp3
085 good day.mp3
086 good afternoon.mp3
087 good evening.mp3
088 at the third stoke.mp3
089 beep beep beep.mp3
090 exactly.mp3
092 its time to do something.mp3
094 or there abouts.mp3
095 precisely.mp3

A problem I have been trying to solve for a number of years. There was a time when MAC had a program that would play an MP3 file on the hour, or quarter hour or any combination. It also had the programability to make it play a random MP3. So, you could essentially have a folder of random MP3 and every 15 minutes the computer would play a random sound. I loved it. It was hysterical. The programmer has stopped updates. Looking at your blog and your knowledge, you might have suggestions for me to build a box that would do the exact same thing. Am I correct? Any suggestions?
LikeLike
Hi. Although I’ve had several iPads I’ve never had a mac, but I remember reading back in the 90’s that macs quacked every now and then. I presume this is the same thing. It shouldn’t be too difficult to design and build something that does that with an Arduino module, for example a Nano and one of these MP3 modules. If you are not concerned about it making the sound at defined times, for example on the hour then it would be simpler as a Real Time Clock module would not be required. You could have it play a random sound at either every 15 minutes or so or at random times. I would look at setting the next play time using millis timer and then play the track and then set the next play time.
If you want it to play on the hour and set intervals between the hour then you are only a step away from building a clock. It’s just missing a display.
LikeLike
Thanks for responding!! Okay, so if I were to purchase and Arduino Nano… that would be a start. I really want to do this and would love to play around, but nothing is more frustrating to me than starting a new hobby and finding out I didnt reallllllly get what I needed. So, Arduino Nano. Then I assume I can get into the terminal… and I would wager there is coding somewhere for what I want.. or at least basis for it. I could set it to play a random wav file from a drive of thousands of files and.. I could set it to play at specific intervals.. ( it also helps me track time passing ) and … lol.. yes.. macs could quack. They ‘had” about seven basic sounds you could set as notifications. The app I am referring to was basically a “cuckoo clock” from a programmer that allowed you to choose the sound and how often it repeated. I really miss my computer randomly spitting out phrases…
LikeLike
Ideally it sounds like software for your computer to do this would be the best option. However, Arduino is an alternative way. If I understand correctly, you have not used Arduino before so I’ll provide a bit more info about that. Sorry if you already know this. Arduino consists of programming software and standalone hardware. The hardware is based around cheap microcontrollers that are supplied on a development board that have additional support parts to get them up and running fairly easily. Included on many boards including the Nano is a USB socket to allow it all to be easily programmed by a Mac, Windows or Linux computer.
They were designed to make it easier to program to allow more people to make things. Many people that have done programming before are surprised at how quickly they can get going with it. I expect anyone that has never programmed before to find it a bit more challenging but still doable.
The Arduino Nano doesn’t have a built-in clock, but it does have a timer that begins counting up as soon as it is powered. The timer counts in milliseconds and while it is useful for many things it is not as accurate as a clock. I’ve pasted in a simple program below for the Nano that uses the timer to play a random track every set number of minutes. The code may give you an idea if this is the sort of thing you want to take on or not.
I've added in lots of comments to provide info about each bit. In this example delayTime and numberOfTracks need to be changed to the number of minutes between each play and the total number of tracks in the SD card folder.
Tracks need to be placed on a Micro SD card in a folder and each track needs to start with a 3 digit number starting with 001. The rest of the filename is not important. The DFPlayer just looks at the first three digits.
This creates a standalone project. If you are still interested, I recommend having a look more at Arduino. I usually buy parts from eBay and I expect the Nano and DFPlayer would cost around US$10 - $15 for the two. A good speaker can cost more but you may already have one of those.
LikeLike
WOW.. thank you for all the information. Very helpful and I had no idea I would get this much help via a blog. I will check it out. It would be nice to have software for my computer, but the arduino would make it much more portable than a desktop lol. Okay, now Ive got some steps to take. Thanks again.. Ill keep you apprised.
LikeLike
Im pulling the trigger on this lol.. I have no idea how the two parts meld together.. but.. I trust they will. Excited to learn a new craft…
NEW – Arduino Nano V3.0 ATMEGA328P CH340 16Mhz ** NEW with USB-C port !! **
New
DFplayer Mini MP3 DF Player Module Module Music Audio SHI O8F8 J9K Voice V9B1
New
LikeLike
Good luck with the project. I’ve not used the version of the Nano with a USB connection but I don’t expect you should have any issues with it and I expect you already have a cable to fit it whereas the mini USB cables are not very common any more.
Other than the DFplayer module and a speaker, you will also need a micro USB card to store files and a 1K resistor. The resistor is for the data control line between the Nano and the DFPplayer and its purpose is to reduce the current and prevent noise from the Nano coming through to the speaker. As well as a resistance value, resistors also have a maximum current rating. The smallest is usually .25W which is fine. A 1K .25W resistors are usually sold in lots of at least 25 for about $2.
The wiring will be similar to this tutorial https://forum.arduino.cc/t/dfplayer-mini-not-working-with-arduino-nano/508293/10 except for:
– The wire between the Nano D10 and the DFPlayer (green wire) is not needed.
– The yellow wire (TX) should be connected to D9 on the Nano instead of D11 to use the demo code I supplied.
LikeLike
So, nano was delivered.. the player wont appear till mid oct. ( supply chain?) Nano mentions a static warning.. and dear lord, its been a life time since I’ve soldered. I need to get a gun to do it. lol.. starting to feel a bit in over my head and yet.. it looks pretty simple. How static sensitive is this thing?
LikeLike
Good to hear the Nano has arrived. From what I can find online I don’t think Nanos are particularly prone to static as they have inbuilt diodes to protect against that, but I always avoid touching the pins too much. Most get destroyed in other ways such as trying to use the output pins to drive a large load, or in my case I’ve had them connected up on my desk and a metal object has slid underneath shorting out pins.
LikeLike
okay… all the parts have arrived.. now comes the challenge of finding the time to put this new toy together….
LikeLike
I havent forgotten this thread… apparently there is a serious supply chain issue with the player.. still waiting. In the meantime I am watching youtube videos to remember soldering tips.
LikeLike
Bad news about the player. I hope it turns up soon. I’m interested to hear how it all goes.
LikeLike
hmmm didnt post… I’ll try again. So… all the parts have arrived, now for the daunting task of making the time to put it together lol
LikeLike
Hi David, sounds like the fun is about to begin. If you get stuck you can post questions here, or if you prefer I can send you my email to avoid it all being public.
LikeLike
lol..Im an actor… being embarrassed in public is second nature.. but email might simplify. I appreciate all the free knowledge you have provided, I dont want to push it 😉
LikeLike
I hope David is enjoying his, but in case anyone else tries this that’s more interested in a traditional clock, I wouldn’t particularly recommend an Arduino + an RTC + some way to set it. Torturing people with Arduino is just mean.
ESP32 is massively easier to program. Even the humble ESP32-C3 (that goes for about a buck when on sale and to new customers. $2 is typical.) RTC isn’t needed. Configure it to start an NTP client and it’ll stay synced to atomic time forever. (Yes, you’ll have to teach it Wifi and your Time Zone rules, which is just a couple lines of code.)
If you have access to other humble devices with WiFi (ESP8266, BL602, PineNut, RP2040*W* etc.) and on 32-bit processors, the same logic applies. Just needing external serial/USB bridges and no debugging facilities and working harder to still not be able to take advantage of those newfangled internet servies (like, ahem, time 🙂 ) is just tougher to justify as every year passes. 32-bit parts with networking, usb, etc. are awesome and now, they’re affordable.
LikeLike
lol.. sadly I have YET to make this project… but I am hoping my Christmas project gives me a regular schedule and nice time off. There have been a LOT of changes in my life since this thread started… and life took some really unfortunate twists. I am fine, but.. well… life, ya know?
My project technically isnt a clock either.. really. Imagine random wav files going off at whatever time frequency. I had an app with my mac that was part of a clock.. and absolutely loved it. Many times cracking me up with random, but oddly appropriate, movie quotes or noises, or whatever.. going off every 15 minutes. Yeah.. it would freak out guests from time to time.. but.. kept me amused. All of the parts are sitting in a box.. to my right.. and its been there since this thread last ended. I still have no skills nor needed knowledge,.. but I have the advice and am waiting for the opportunity to build it. It’s project “Bumblebee” named after the Autobot that uses sound files to communicate. 😉
LikeLike
I think I may have taken the title of “clock projects” a bit too literally. With the DFPlayer and an SD card, you can store and trigger practically unlimited audio files, and the microcontroller doesn’t need to do much beyond occasionally nudging it to play something. Maybe you were planning to use your own recordings—I was also thinking about the possibility of a web interface so you could change the spoken text or sounds using the DFPlayer’s speech synthesis.
If you’re just playing back pre-recorded clips, it’s straightforward with either setup since the microcontroller is really just acting like a glorified kitchen timer. But if you’re going for something more dynamic—like changing content on the fly through a browser and using the speech synthesis on the device or all the weirdo sound bits and bobs that it comes with—that would work better with a more capable MCU that supports WiFi.
Also, if you’re okay with it running constantly or you add a simple “quiet time” trigger like a light sensor, you might not even need to worry about actual timekeeping at all.
This idea clearly stuck with me—I prototyped something very similar a few months ago with these same parts. Anyway, I’ve got piles of these MCUs and speech chips lying around. They’re fun to tinker with. You’ve got plenty of options, so build what you want. And don’t let insomniacs halfway across the globe tell you otherwise!
Have fun with it!
LikeLike
Thanks for these great generated sound files for clock projects.
If I might be so bold as to suggest it would help if there were sounds for “hundred” (as in “the time is thirteen hundred”), “oh” (as in “the time is nine oh nine”) and “oh clock” (without the hour to make it easier for some programs that might want to compose hour + o’clock without having to have special cases for each hour).
I was able to generate these for my project using the pointer to ttsmp3.com, so thanks for that too.
LikeLike
Hi James. That’s a good idea. I’ll look at doing that, but it may be a while before I do. I’m also thinking of trying to make a set or two using some of the newer voices that are now available.
LikeLike
Im sure its easy, just never done anything like it at all.
What I want to do is simply this.
I have THOUSANDS of snippets of sounds.. movie quotes etc. MP3s, wavs.
I want them to be played automatically and randomly.. ie a different random file played every fifteen minutes. I would love it as a stand alone device or even as an app on my computer.
thats all.
😉
LikeLike
Thank you for posting these files on Github. On Github, for the British files, it appears that the number 29 is missing. Is it possible to include that one?
LikeLike
Hi. Well, that’s a mystery, I couldn’t find any record of it. I’ve created a new one and uploaded it to GitHub.
LikeLike