
Choosing an Anemometer
I’ve been considering what to use for an anemometer for my weather station. I was thinking of making my own, but a significant downside would be calibrating it. I checked what was available on AliExpress. Many are plastic and I don’t want a plastic one and I don’t want to have to replace it in a few years. I concentrated on those that were made of metal.
I found one that was only about AU$34 that appeared to have aluminium cups and housing. It looked like it was reasonably well made. The listing title was ‘Anemometers Wind Speed Monitoring Sensor 3 Cups Wind Speed Sensor Anemometer 0‑3.8V Aluminium Alloy’. There are a few sellers selling these.
Rather than outputting a pulse, this outputs a voltage up to 3.8 volts. That’s not far above the maximum input voltage for an ESP32s ADC. I had some concerns about this type, but at least the reading should be simple to make using an analogue input pin. There were some positive reviews so in the cart it went and soon arrived.
First Impressions
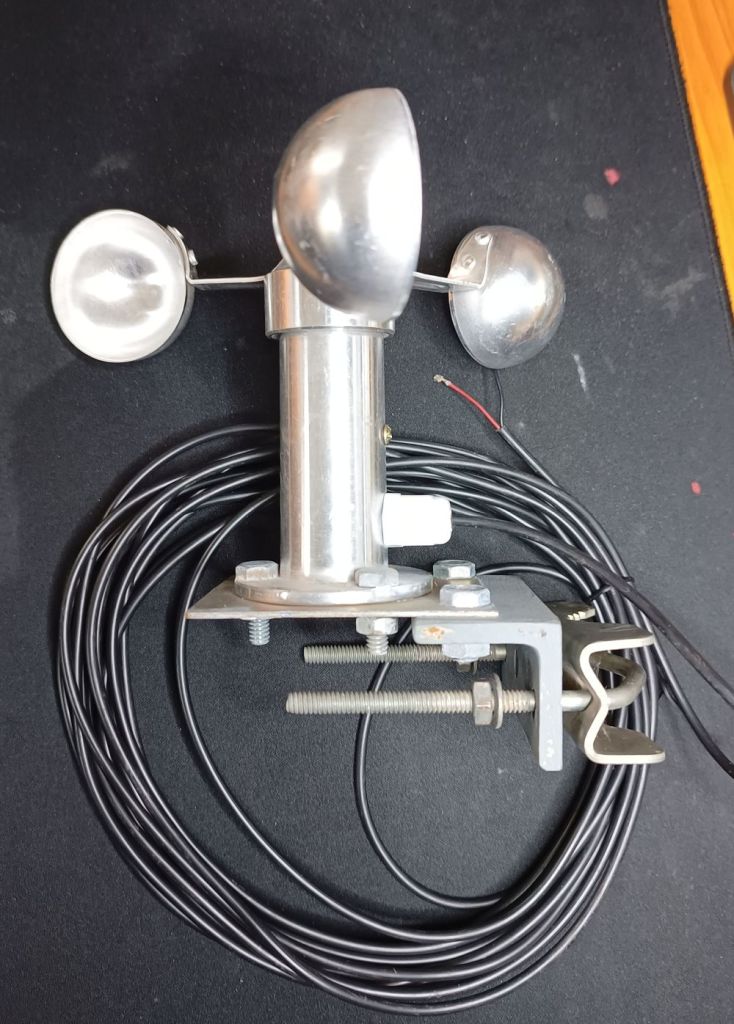
It arrived with a bent arm. A bit disappointing, but at least it came in a box and being aluminium, it straightened out easily with a gentle ‘persuasion’. Other than that, it looked fairly good. It is not anodized, just bare aluminium. It seems to be nicely machined and appeared as though it would last for a while. The cups rotated smoothly and there was an 8m cable to connect it to the microcontroller or meter.
Here it is fastened to a bracket I made. It had been running for a few weeks at this point.
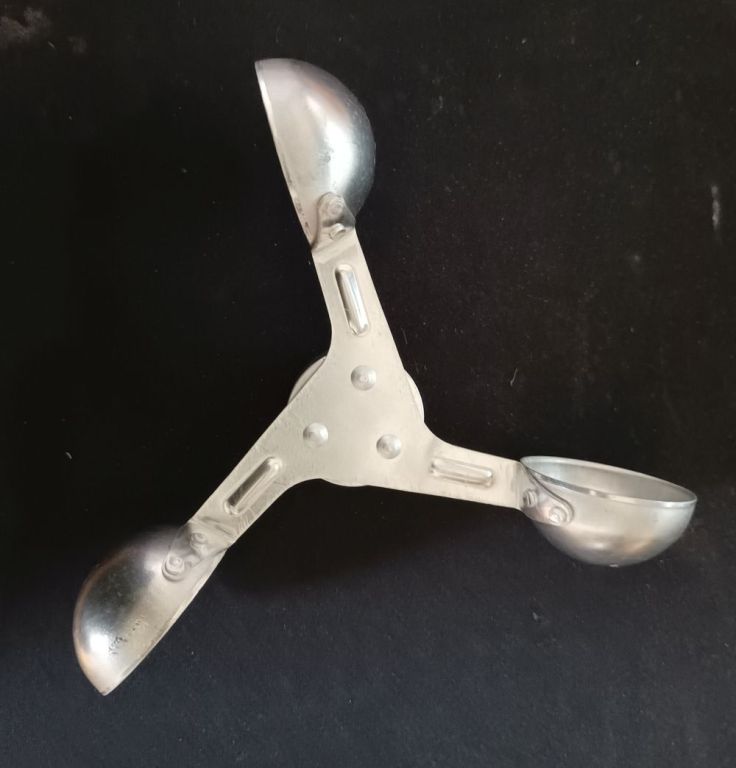
Looking at the cups from above, they look ok.
Calibration
I expected that I would eventually find a table or formula to convert the output voltage to wind speed, but I haven’t. I really should have done more research first. Before attempting to calibrate it myself, I made a mounting bracket and placed it up on a pole, connected the output to my ESP32. I left it there for a few weeks so that would wear in, and I can see what analogue values it was sending.
Performance in the Wind
The first thing I noticed was that it needed a reasonable breeze to start rotating. According to my hand held anemometer it was somewhere around 20 kph. Many days it didn’t turn at all even though we did have a light breeze. I have made ornamental wind art from soup ladles that are in the style of an anemometer, and these begin turning in a lower breeze.

Over a couple of days we got some fairly strong winds, and I noticed that the output voltage stayed quite low. I decided to test it by placing it in my bench vice and blowing it with my Ryobi 18V cordless garden blower. The description for that blower lists the air stream from it as 245kmh. My blower is a few years old and that speed may be optimistic, but I can say that it made the anemometer go like the clappers. The output voltage, however, never went over 2.28 volts.
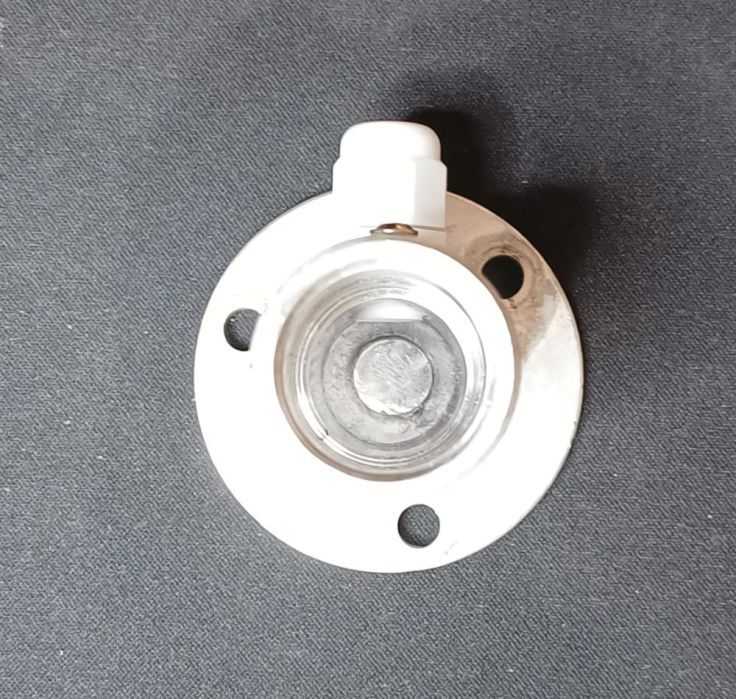
Teardown Time
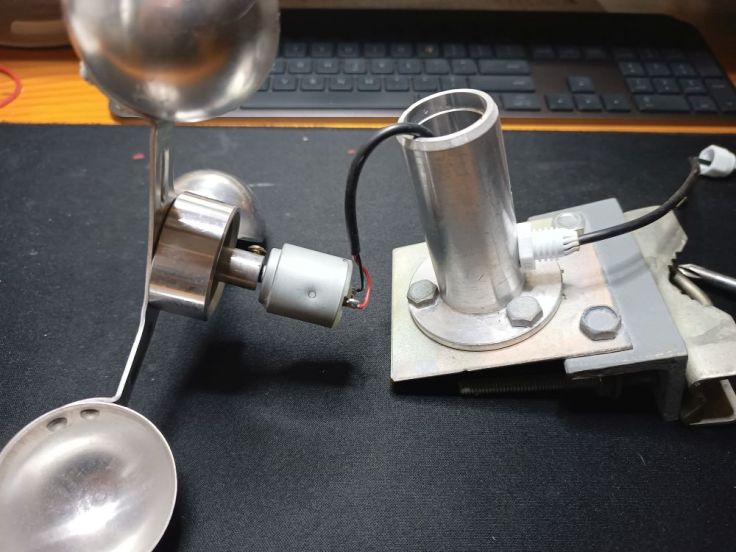
At this point I decided to see if I could take a peek inside and see what is in it. This is fairly easy to do. It just requires loosening the cable gland on the side and loosening one small bolt above it, and the innards slid out.
You can see a round dint in the side what looks like a motor where the small bolt held it in place.
The bottom side of the cups shows they are mounted to the motor shaft with a screw.
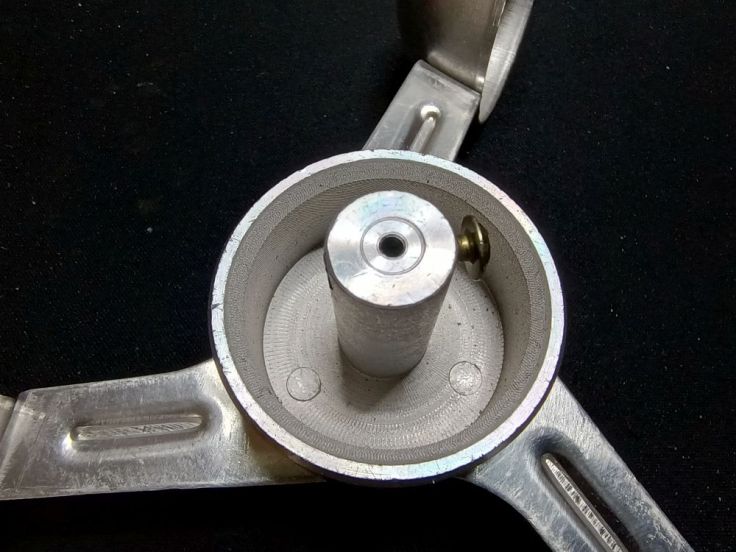
Looking down inside the casing, shows it is machined. The diameter of the motor is about 24mm which is about the same as the internal size of the housing.
I removed what I now thought was a motor and connected it to 3 volts. The motor began to spin at a moderate speed.
I then opened it up and had a look inside it. I could be wrong, but it looks like a standard brushed electric motor to me.

Summing up
To be fair, I’m not saying this anemometer doesn’t work. Turning motors produce electricity, and for some applications it may be fine. It’s just I was looking for something that would give me confidence it would withstand some high winds and storms for years to come. The small shaft of the motor, thin brushes and sleeve bearings don’t give me that confidence. Given its low price, particularly compared to professional ones I probably shouldn’t be surprised.
What now?
I have removed cups from the top and am using these to build one from an old bicycle hub for testing. I’ll try it with magnets and a hall effect sensor. I don’t know that I’ll use it for the final version, but I thought it is worth a go.

If I was starting again, I would look at other anemometers that have a pulsed output, better reviews and data about calibration. If I was to build my own there is the option of just buying the cups like these, but that would still require calibration. Be aware if you look at most of these they have very few or no sales or reviews.
If you have one of these anemometers I would like to hear from you and get your impressions.

Leave a comment