
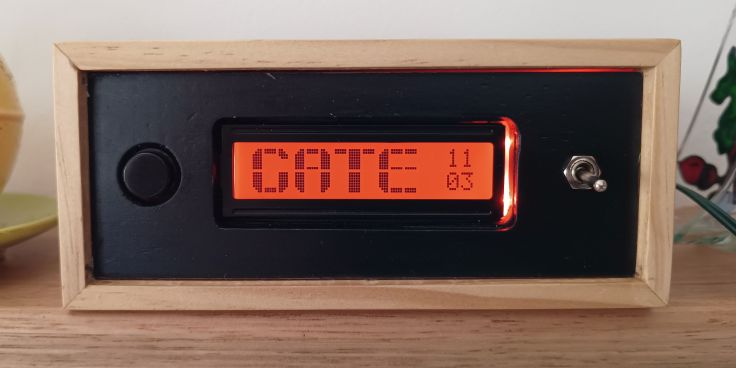
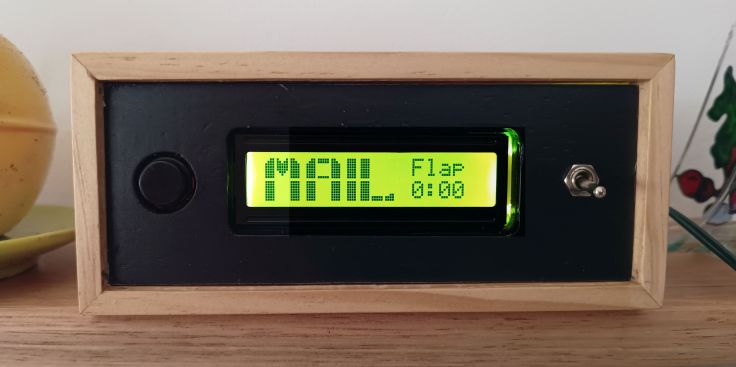
The mailbox and driveway monitor that I built has a 12X2 LCD screen. I know these are not as fancy as many newer displays, but I like their simplicity. The screen in this project runs all the time, usually displaying the time. When mail is delivered, I wanted a coloured visual alert as well as displaying text on the screen. I originally thought of mounting an LED in the front panel, but then wondered if I could temporarily change the backlighting for the LED from its default green to red.
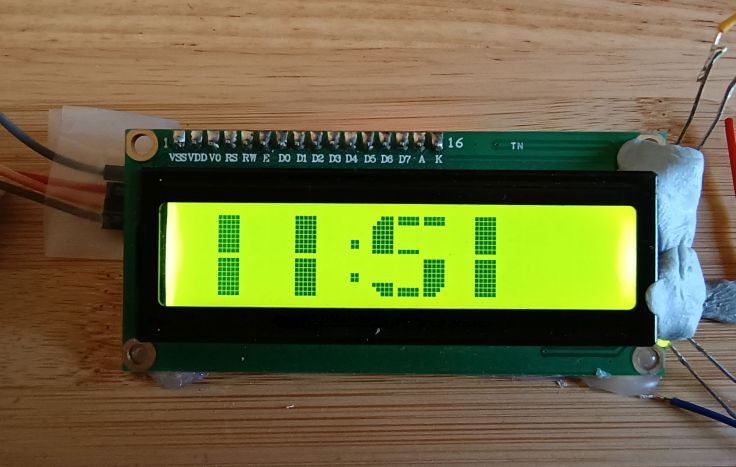
The green LCDs are my favourite. It appears both the backlight LED and the plastic light guide behind the LCD screen are both green. Around the edge of the light guide near the built-in LED is some silver sided tape to prevent light escaping. The tape on mine had already started peeling back so I peeled the rest back to expose the light guide.
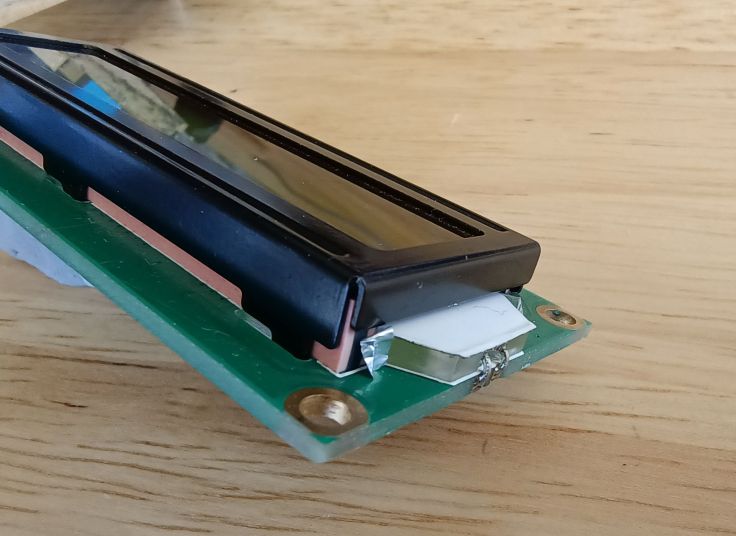
I experimented with mounting different coloured LEDs held in place with blu tack. Two LEDs worked best to get an even coverage and to overcome the green light guide. I only have 5mm LEDs which are too thick for the way I intended to mount the display. The rounded front of the lens resulted in patterns from the beam behind the display, so I sanded 2 sides and some of the lens. Using rectangular od SMC LEDs would have been easier and probably better.

In the final project the external LEDs were glued to the display using hot melt glue. This photo is quite blurry, but it’s the best I have.

Coding was quite simple. The LCD library has commands to turn the built-in backlight on and off. I wired up the 2 red LEDs in parallel with a current limiting resistor and controlled them using a pin using digitalWrite. It was simply a matter of turning the built-in backlight off and the external LEDs on and visa versa.
It works well for my purpose, but it is used in a room that is not overly bright. If I take it outside, it is mainly lit by the ambient light and appears green even though the red LEDs are lit.
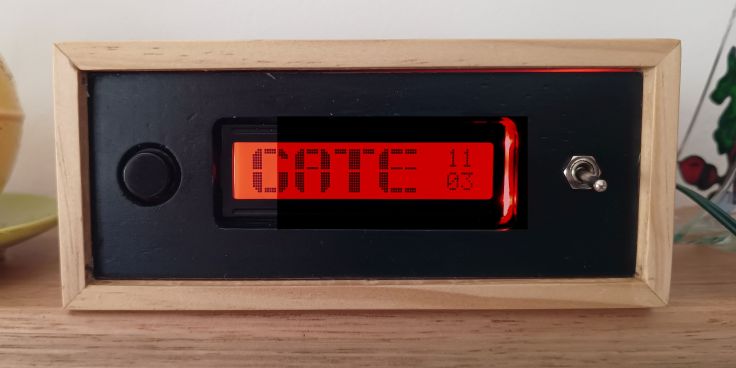
Digital cameras seem to have a difficult time recording the colour of LEDs. In these images of the final project, I have tweaked the colour settings of most of the LCD (right three quarters) to make them appear more as they appear closer to how it appears in real life.
While a bit bodgy and only really works in lower light, I’m happy with the result and would do it again. Let me know you have tried this or can see any issues that I may encounter.

Leave a comment