
A while ago, during a visit to our local tip shop I saw this object. The moment I saw it I knew I didn’t need it, but the force was strong. This could become an integral part in a jet pack. Common sense prevailed and I left it there.
A week or two later, I was back and it was still there, but I am strong willed and once again I overcame its draw. The following visit it was there again. Maybe I was meant to have it? I don’t believe in that sort of thing, but just in case I purchased it anyway. It was only two or three dollars.
If it had been complete and in good order I probably wouldn’t have purchased it as I would have felt I was desecrating it if I modified it. I’m not opposed to talented people doing that, but I don’t have enough confidence in my ability to do it justice.
A bit of Electrolux history
Before modifying anything, I wanted to know exactly what I was dealing with. I knew it was part of an old vacuum cleaner, but wasn’t sure exactly what. I discovered it was an Electrolux and appears to be a model XI produced between 1927 and 1930.
I didn’t know much about Electrolux history, but found that it started as a Swedish company that formed from the merger of two companies. Lux was founded in 1901 when it launched the Lux lamp. In 1910 Elektromekaniska was founded by the engineer Sven Carlstedt and the company began manufacturing a vacuum cleaner. In 1917 Elektron bought Elektromekaniska and in 1918 Lux took over Elektron.
In 1919 an agreement was reached between Lux and Svenska Elektron. Elektromekaniska changed its name to Electrolux. The new name is a combination of Elektromekaniska and Lux. The company has a history timeline here.
According to Wikipedia, The company successfully marketed vacuum cleaners in the United Kingdom with the slogan “Nothing sucks like an Electrolux”. Yes, they knew what they were doing.
This eVacuumStore page shows many models from 1924 until the present. I admire the designers of these early vacuum cleaners, they really knew how to make them look stylish.
This video by Marcin Barcz shows the Model XI. Beware it is not in English, but does show a beautiful example of the XI.
What other people have done
Some people have made some very impressive pieces of art from these. I recommend having a look the Electrolux Rocket post on the All Sci-Fi forum and Meinert Hansen’s Spacesuit to see some amazing examples of what has been done.
My plans
I don’t have a plan for it, but I do have the concept of a plan, and that’s all you need to start spending money. It seems to be begging to be made into a steampunk rocket backpack. Even if I never wear it, I think it would look great mounted on a wall.
Initially all I’m going to do is to give it good clean. Not enough to make it look like new, but enough to make it look less filthy. I’ve got a few other old bits that could accompany it, but that will be for a later post.
Before cleaning
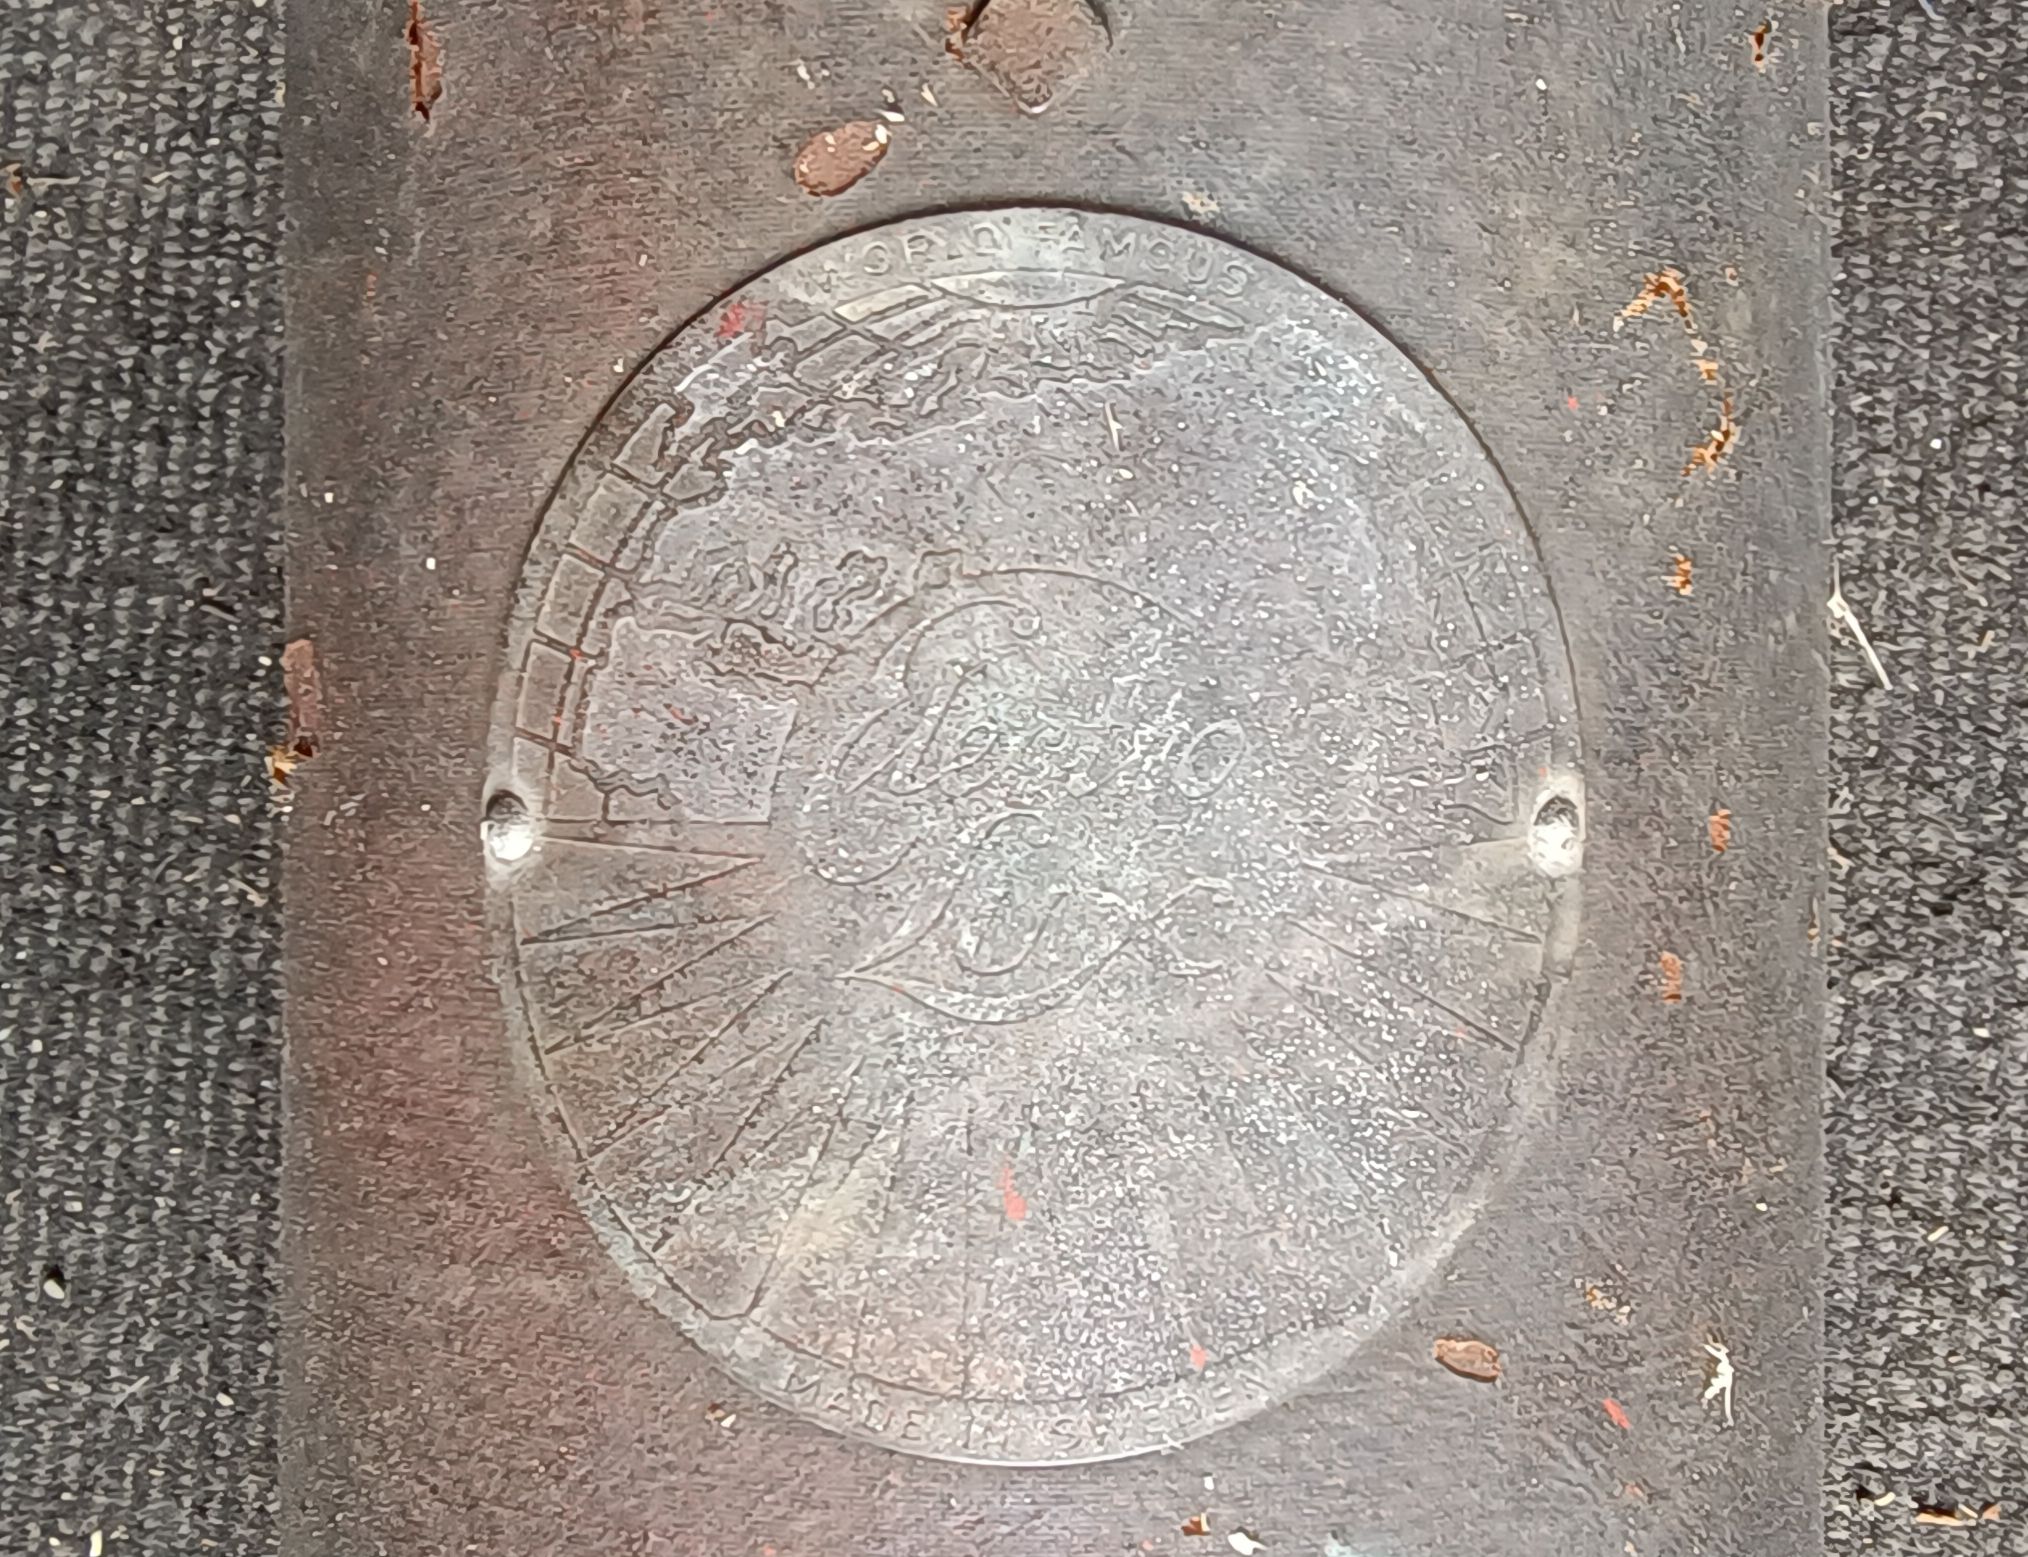
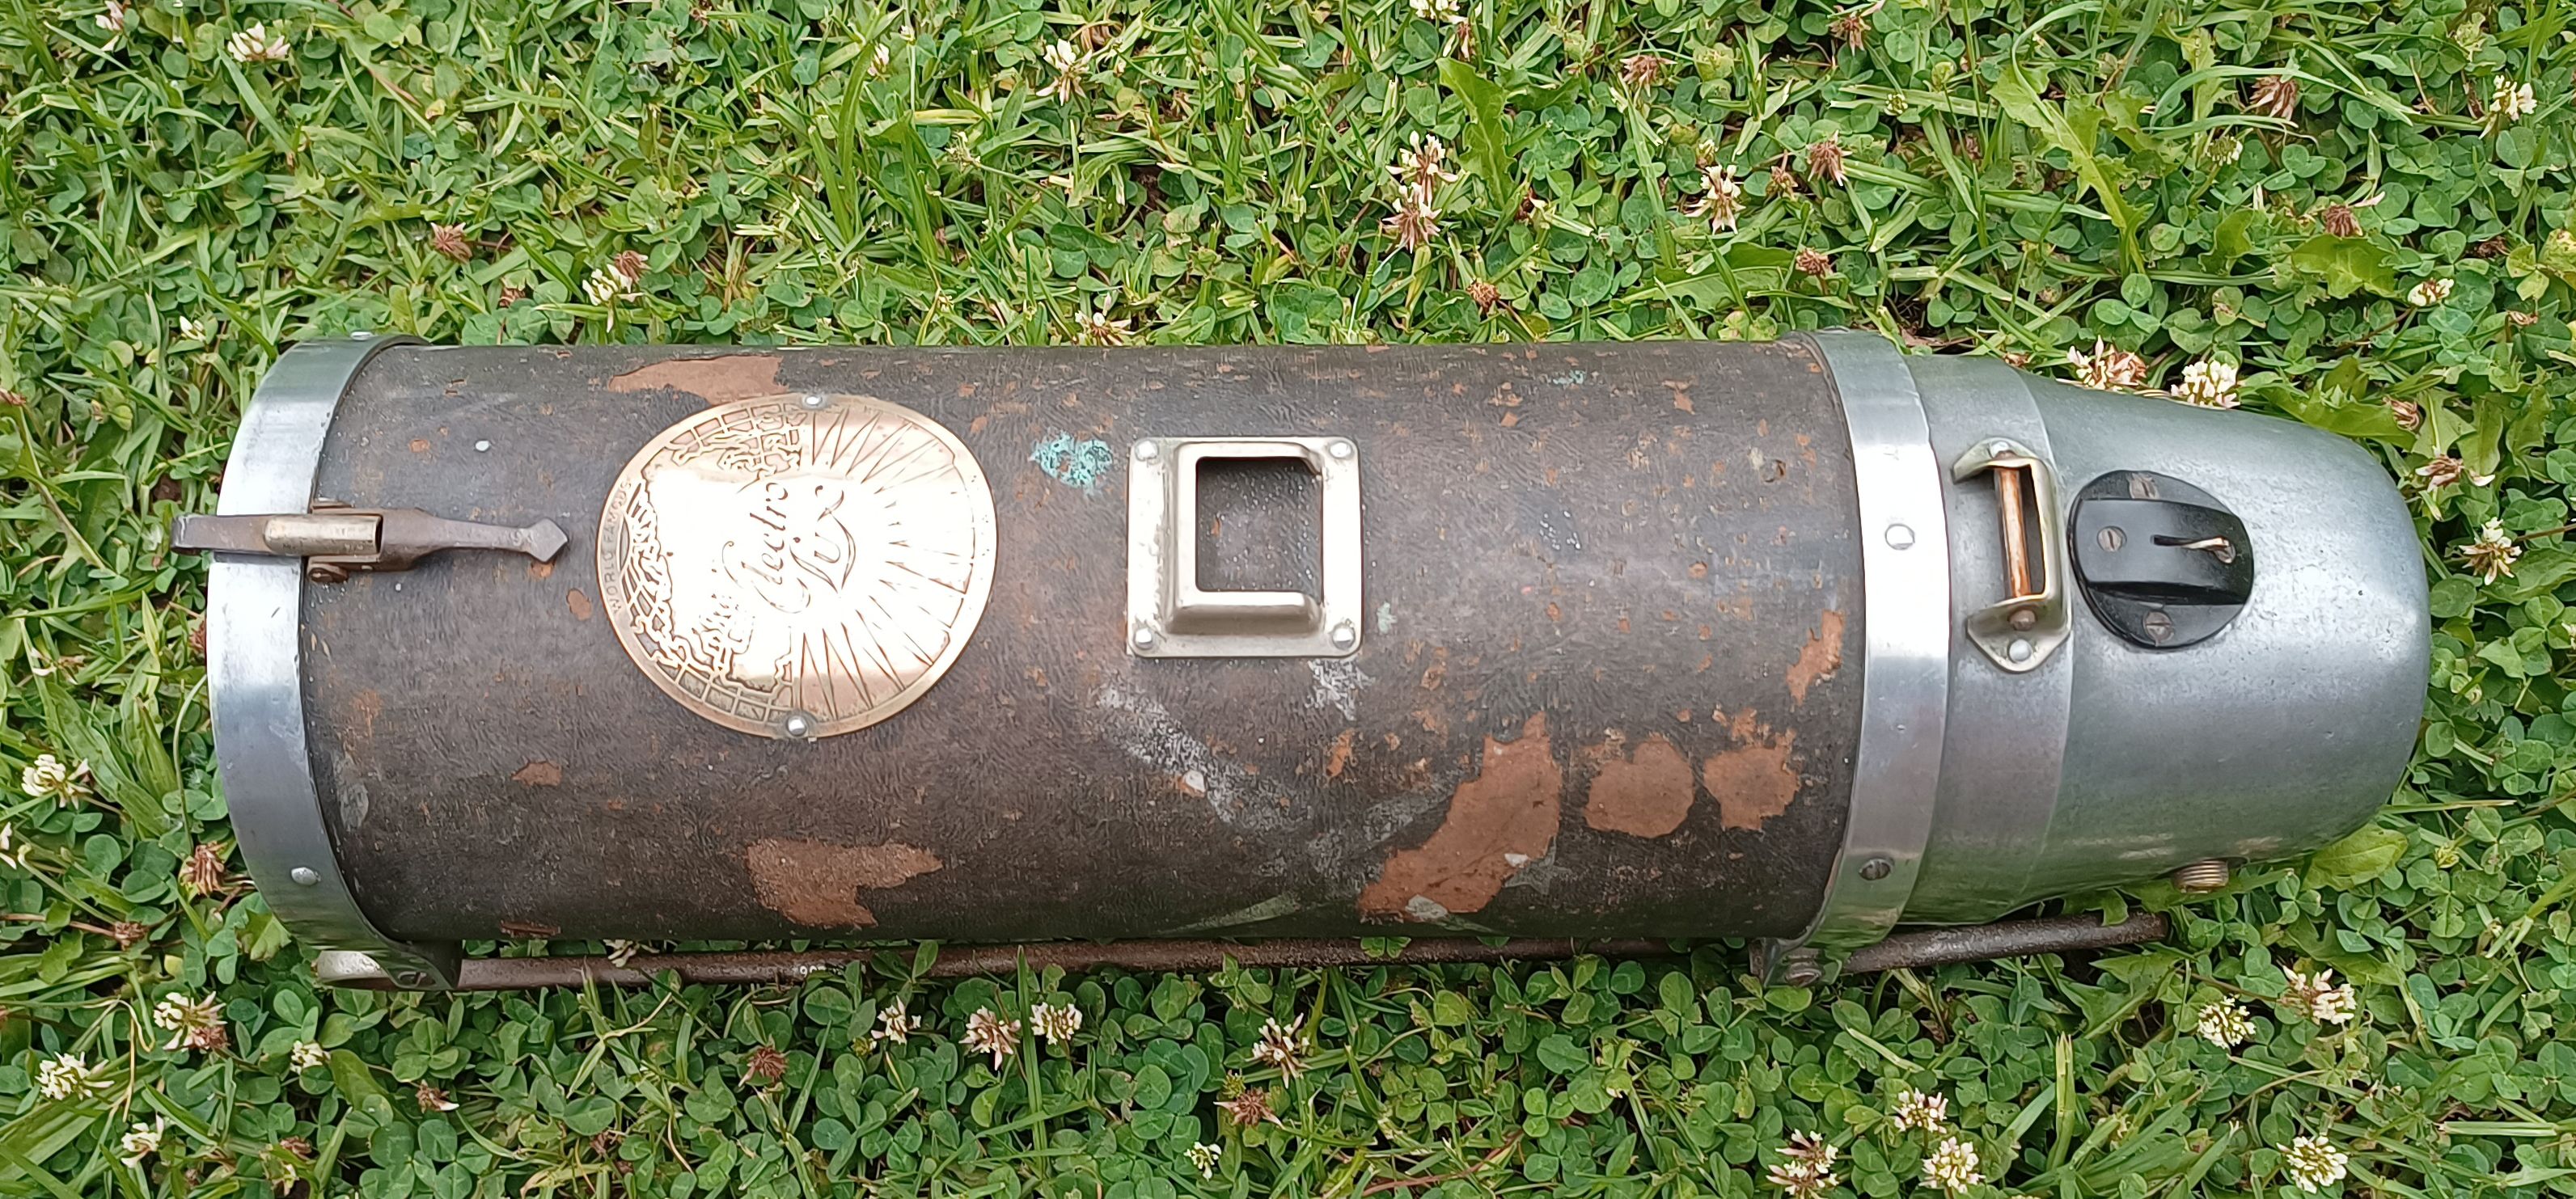
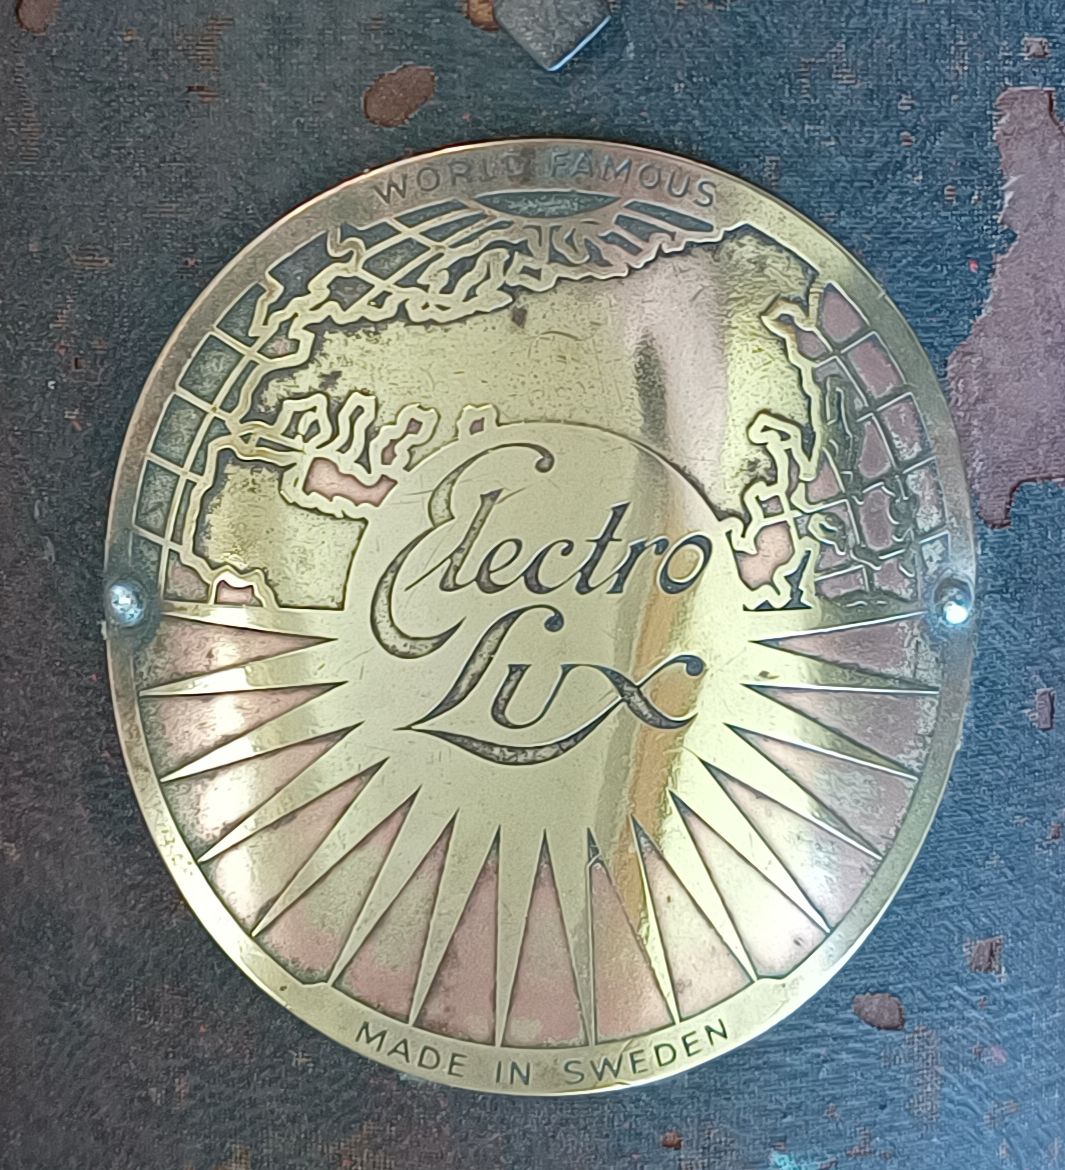
This is the badge. It was only after googling I realised it says “Electrolux” in the centre. At the top it has “World famous” and at the bottom, “Made in Sweden”.
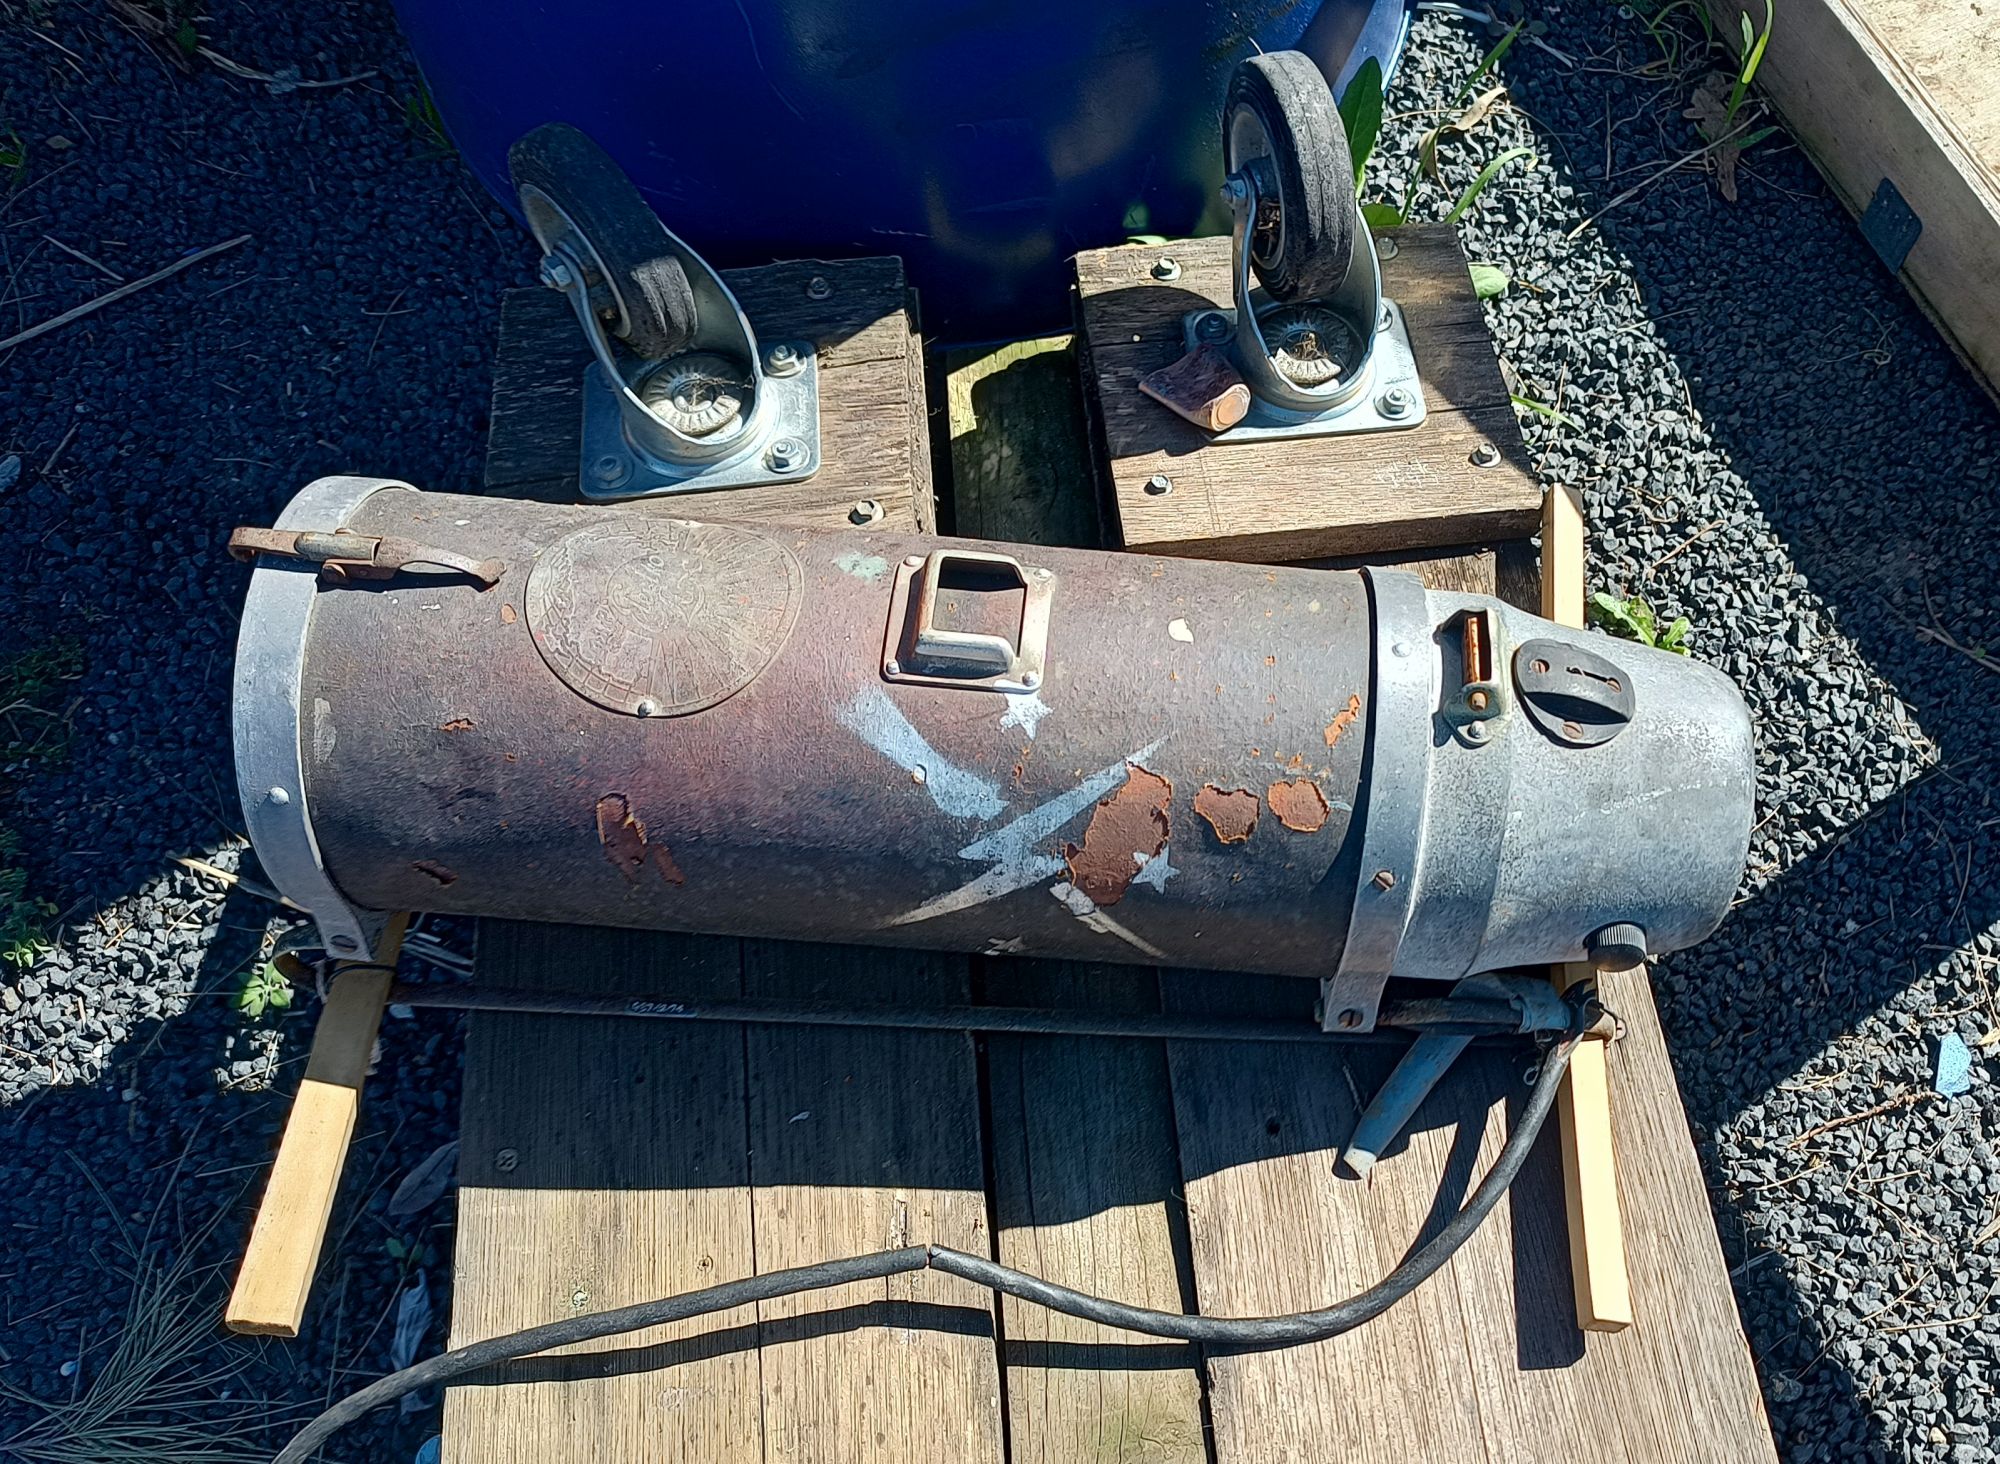
Here is a view taken from above. I think that is leatherette around the body. It came with the barrel pre-dinted. Rather than remove them I can weave them into a story, perhaps occurred due to a hard landing when the fuel ran out.
On the top is the power switch. The knob is missing which confused me for a while.
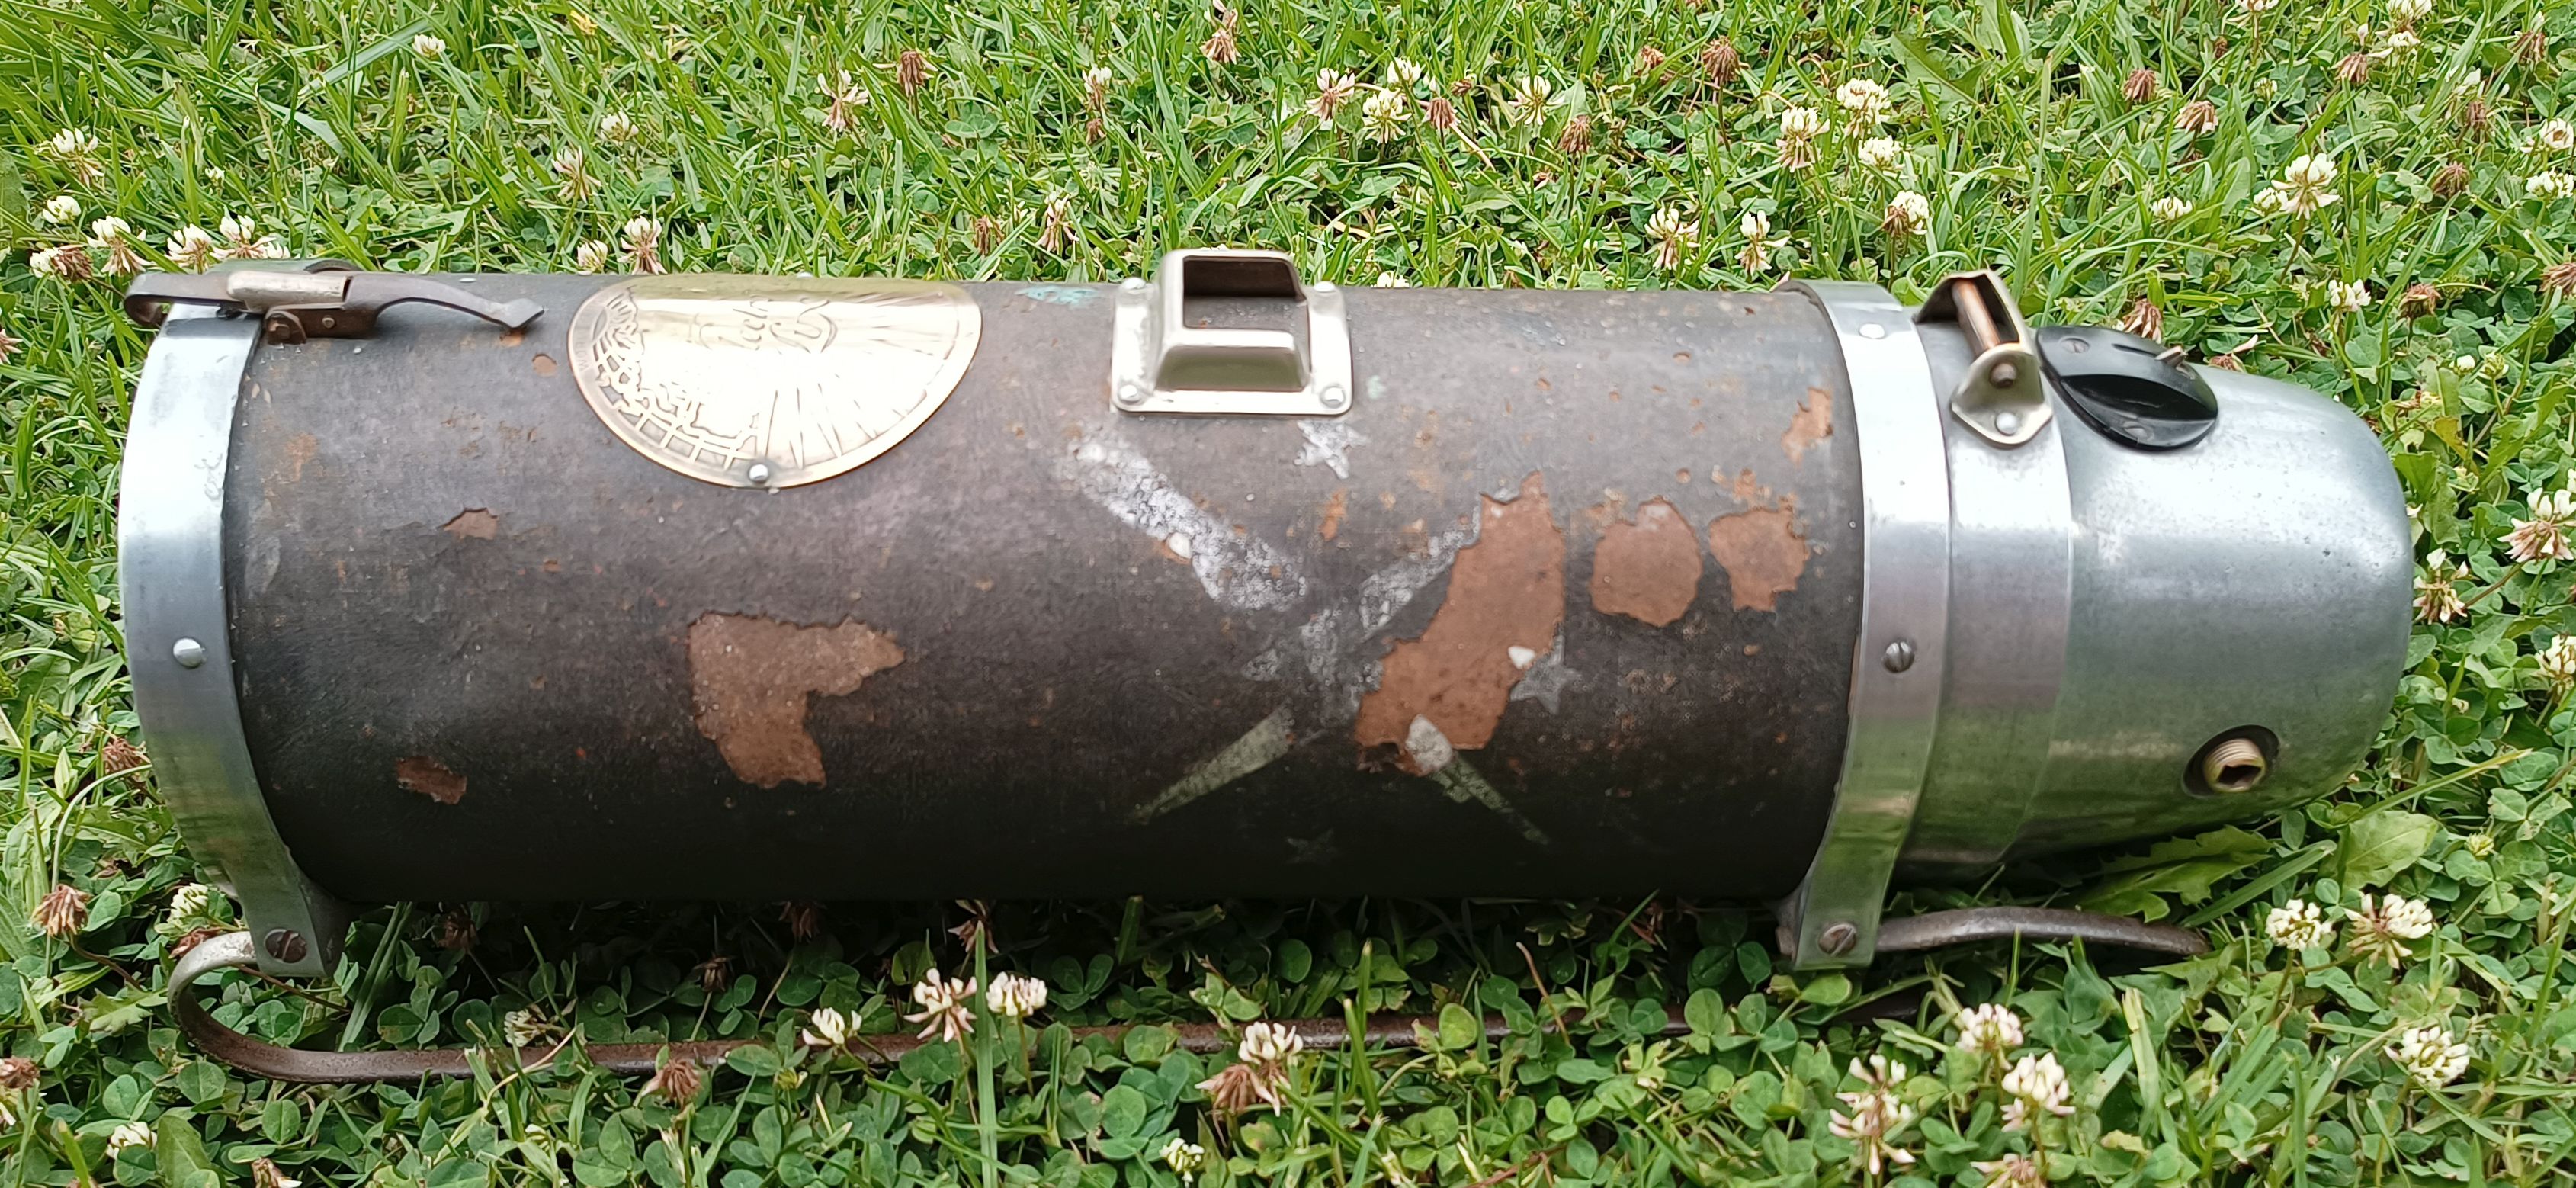
These were built before the invention of the wheel, so it slid along the floor on runners. I’ve no idea why someone had put a couple of bits of timber on the runners. Notice the cable. It was soldered to a socket. The original cable had a bayonet socket and connected like attaching a light bulb.
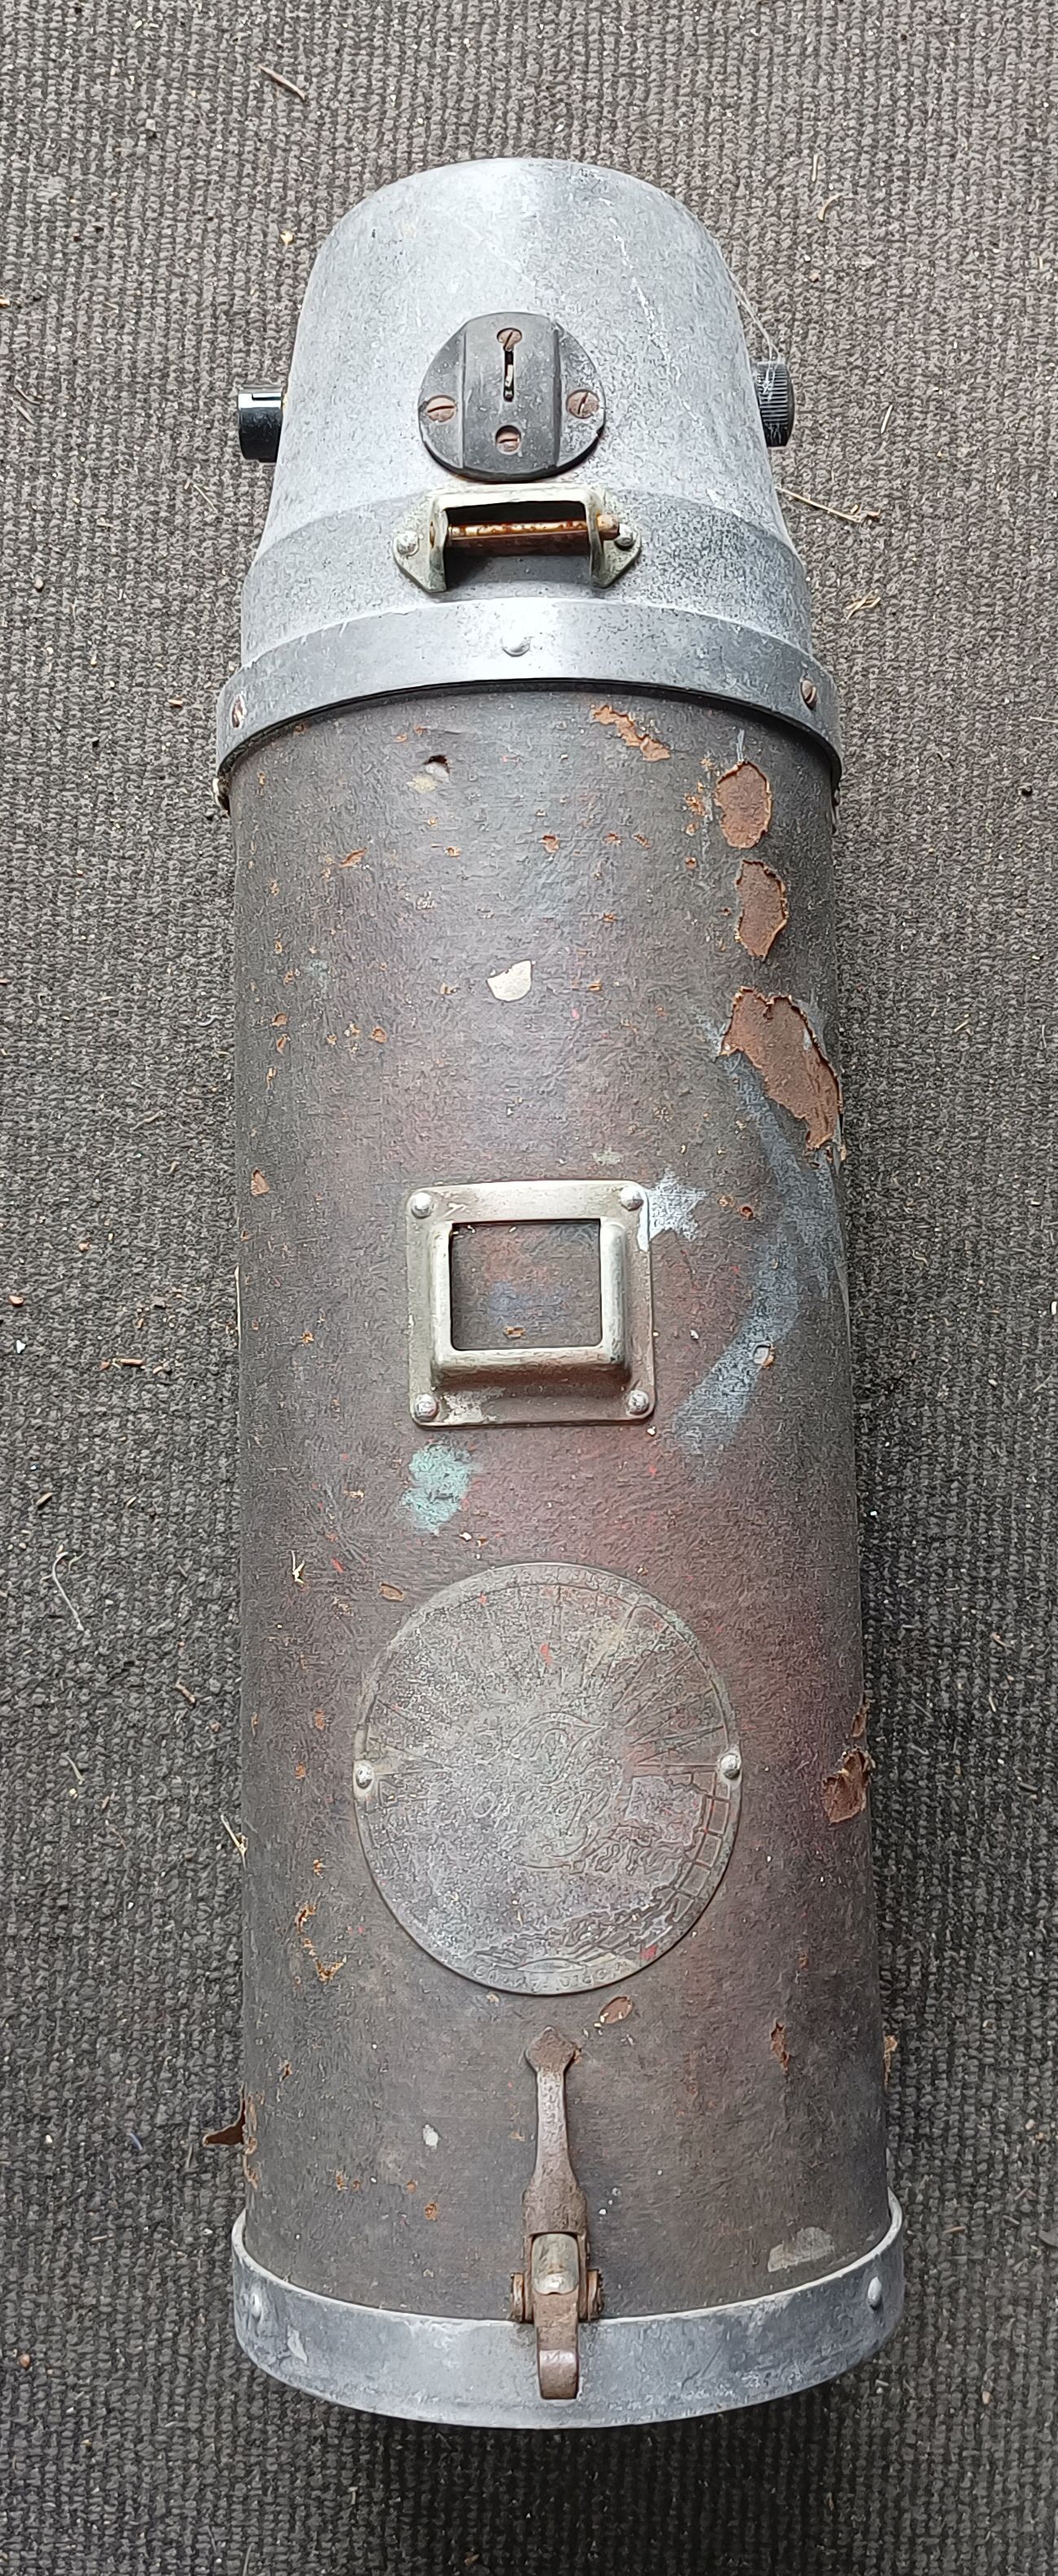
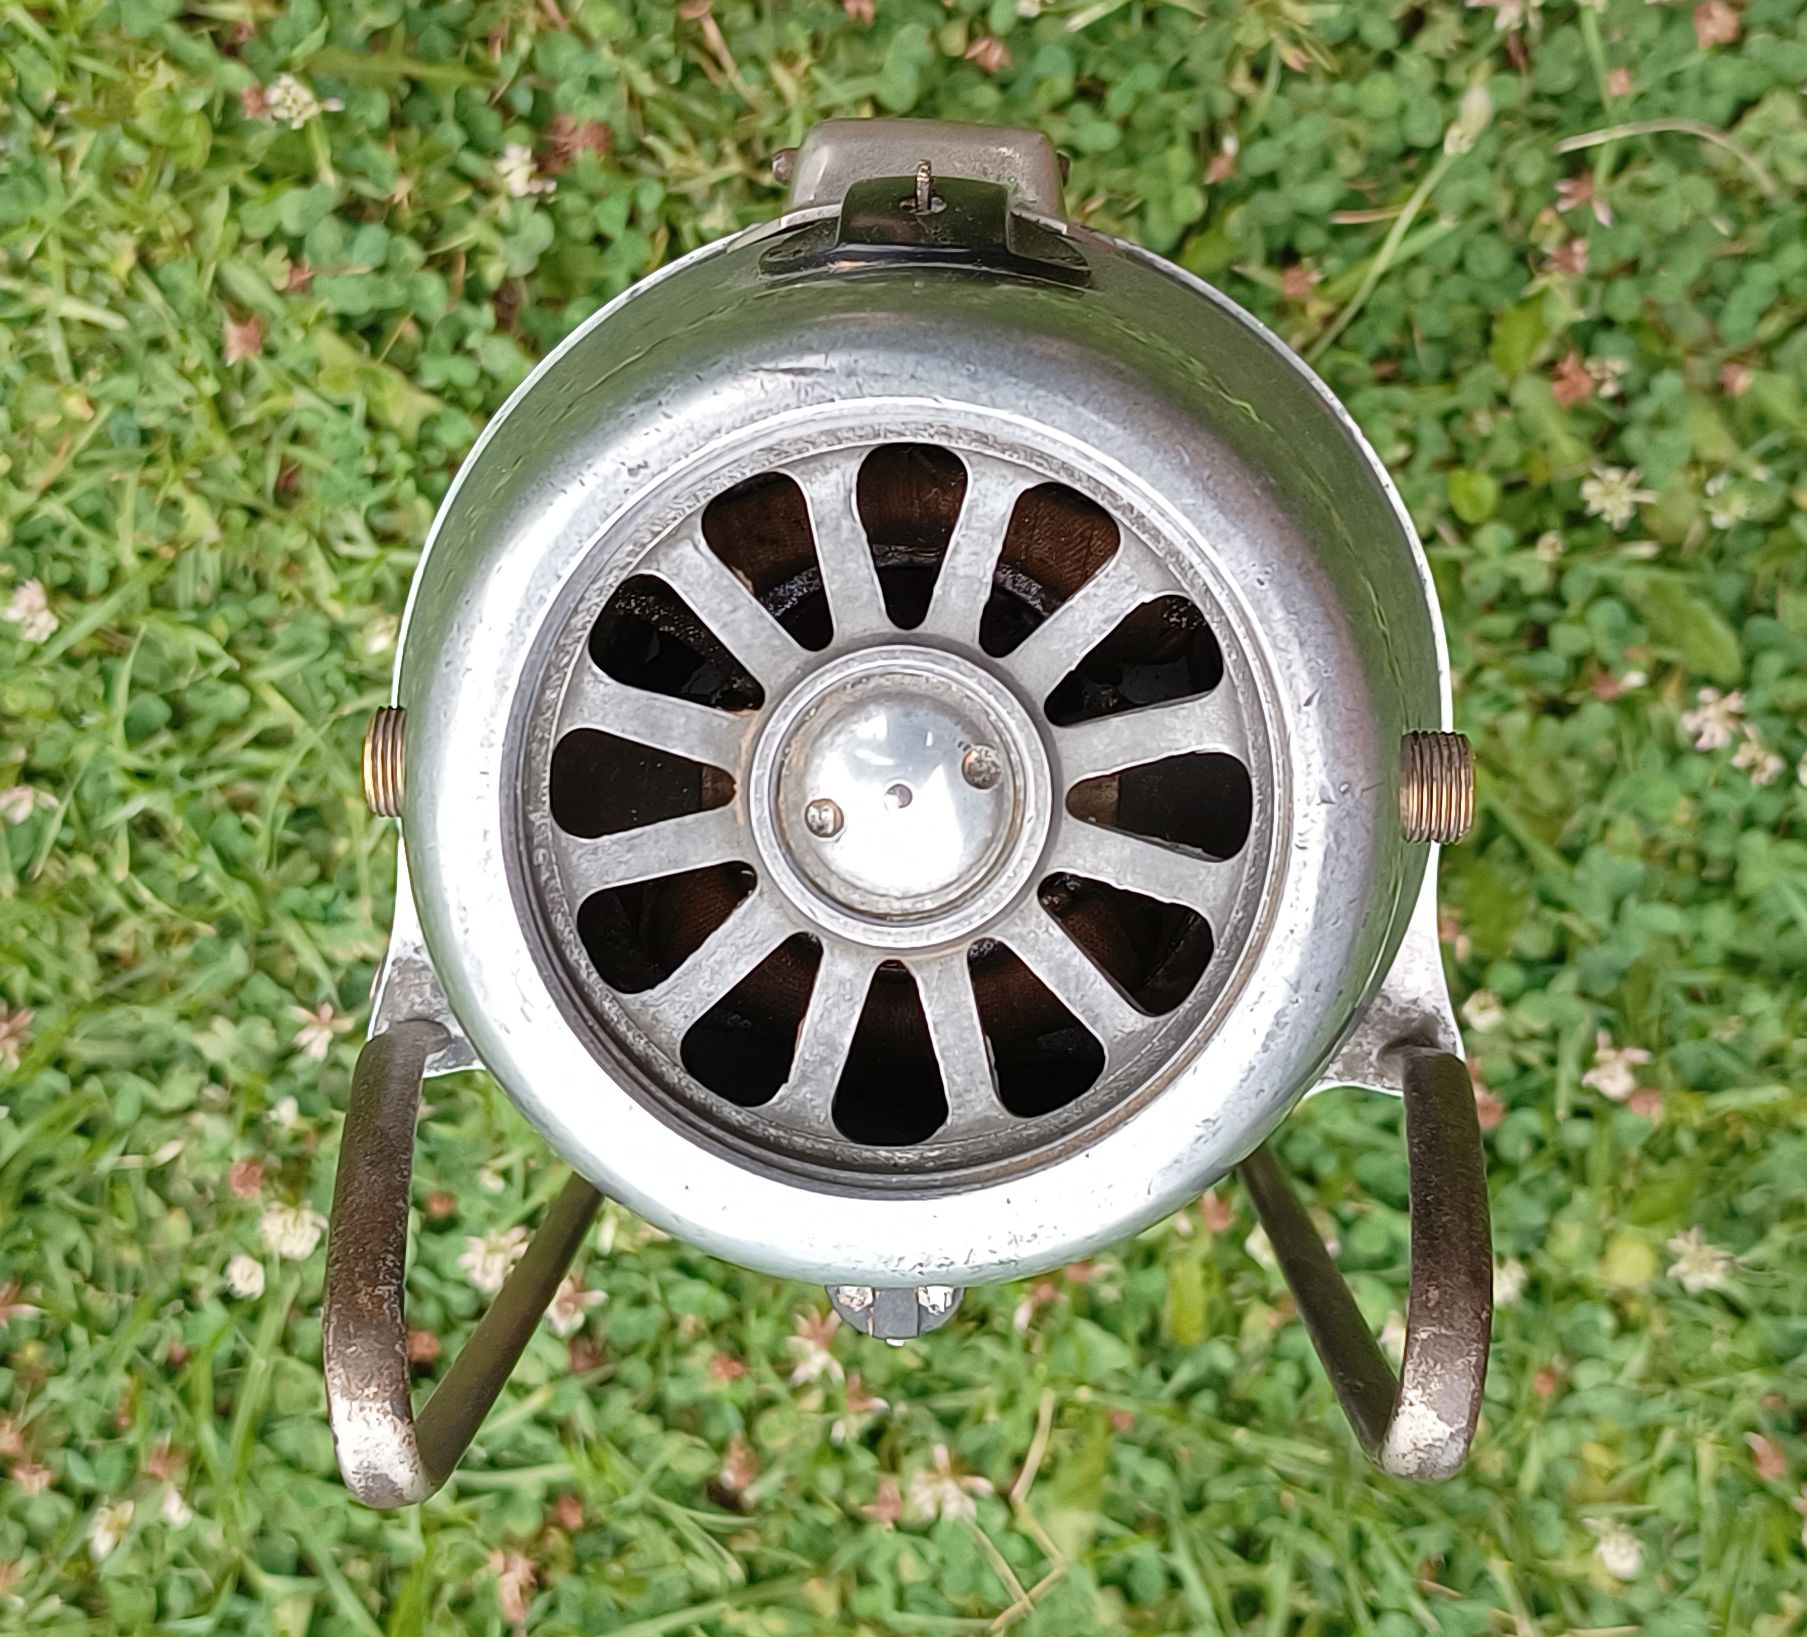
This is a view from the blow end. This end contains the motor.

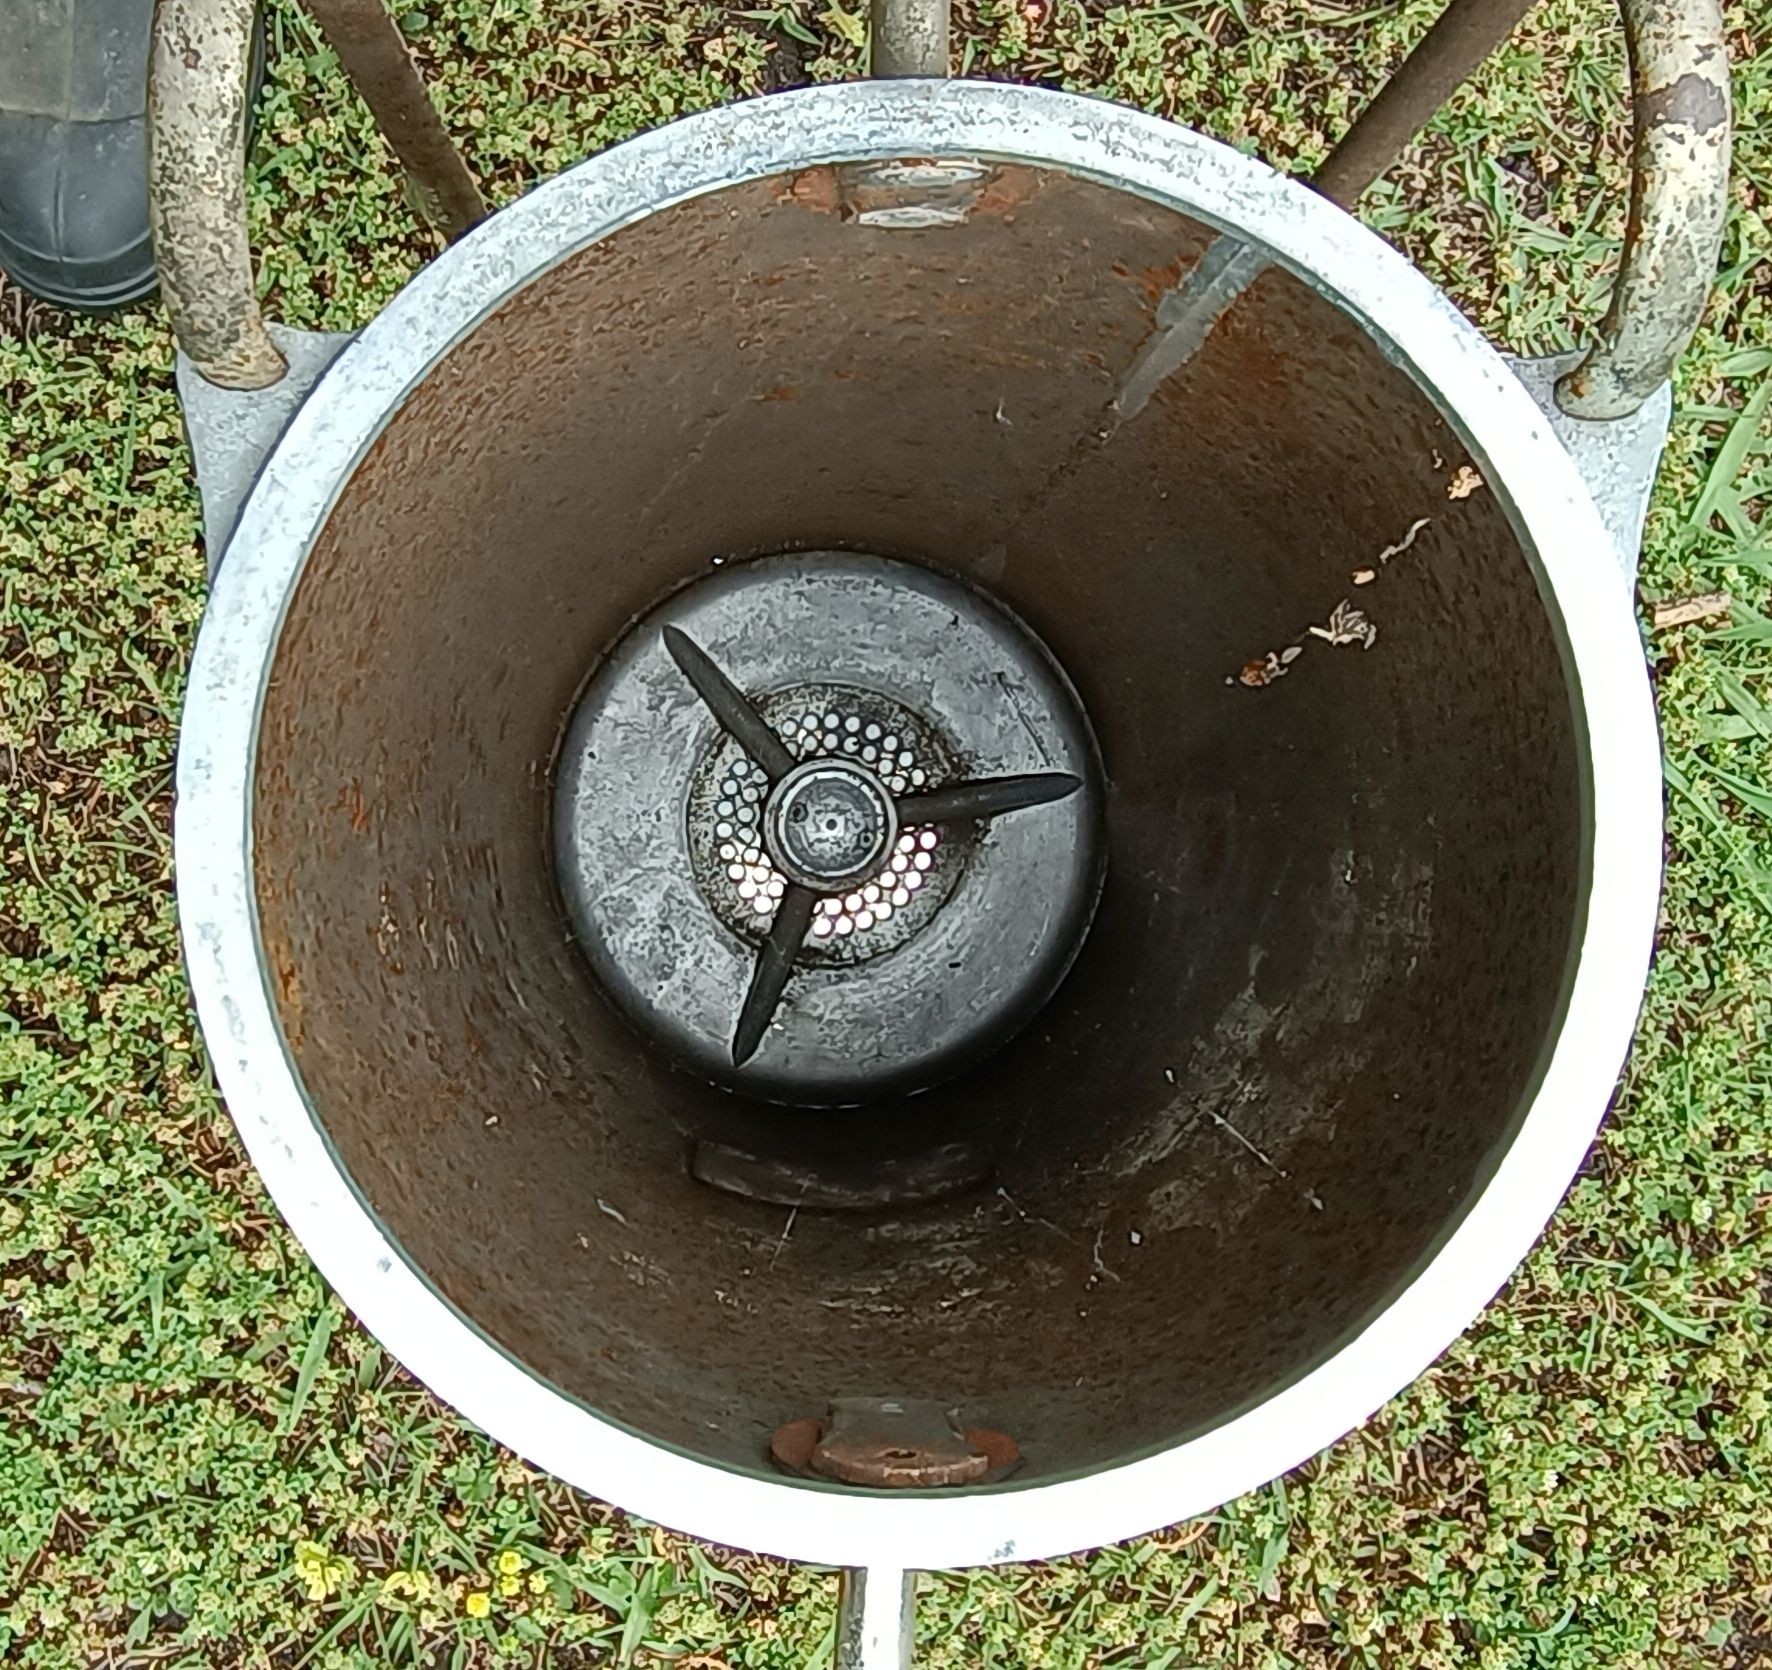
This is the sucky end. The housing for this end is missing.
After cleaning
It required a lot of effort to clean up. Some of the aluminium cleaned up well, but the motor housing was quite corroded and still looks a bit more corroded than I would have liked, but overall I think it is ok. I had to clean the badge more than I wanted, but I’m sure it will get a patina soon enough.
Here is a view from the side. The cloth around the casing looks tatty. I would consider doing something to it to make the colour more consistent and stabilise it, but it is ok. I’ll think about it later.
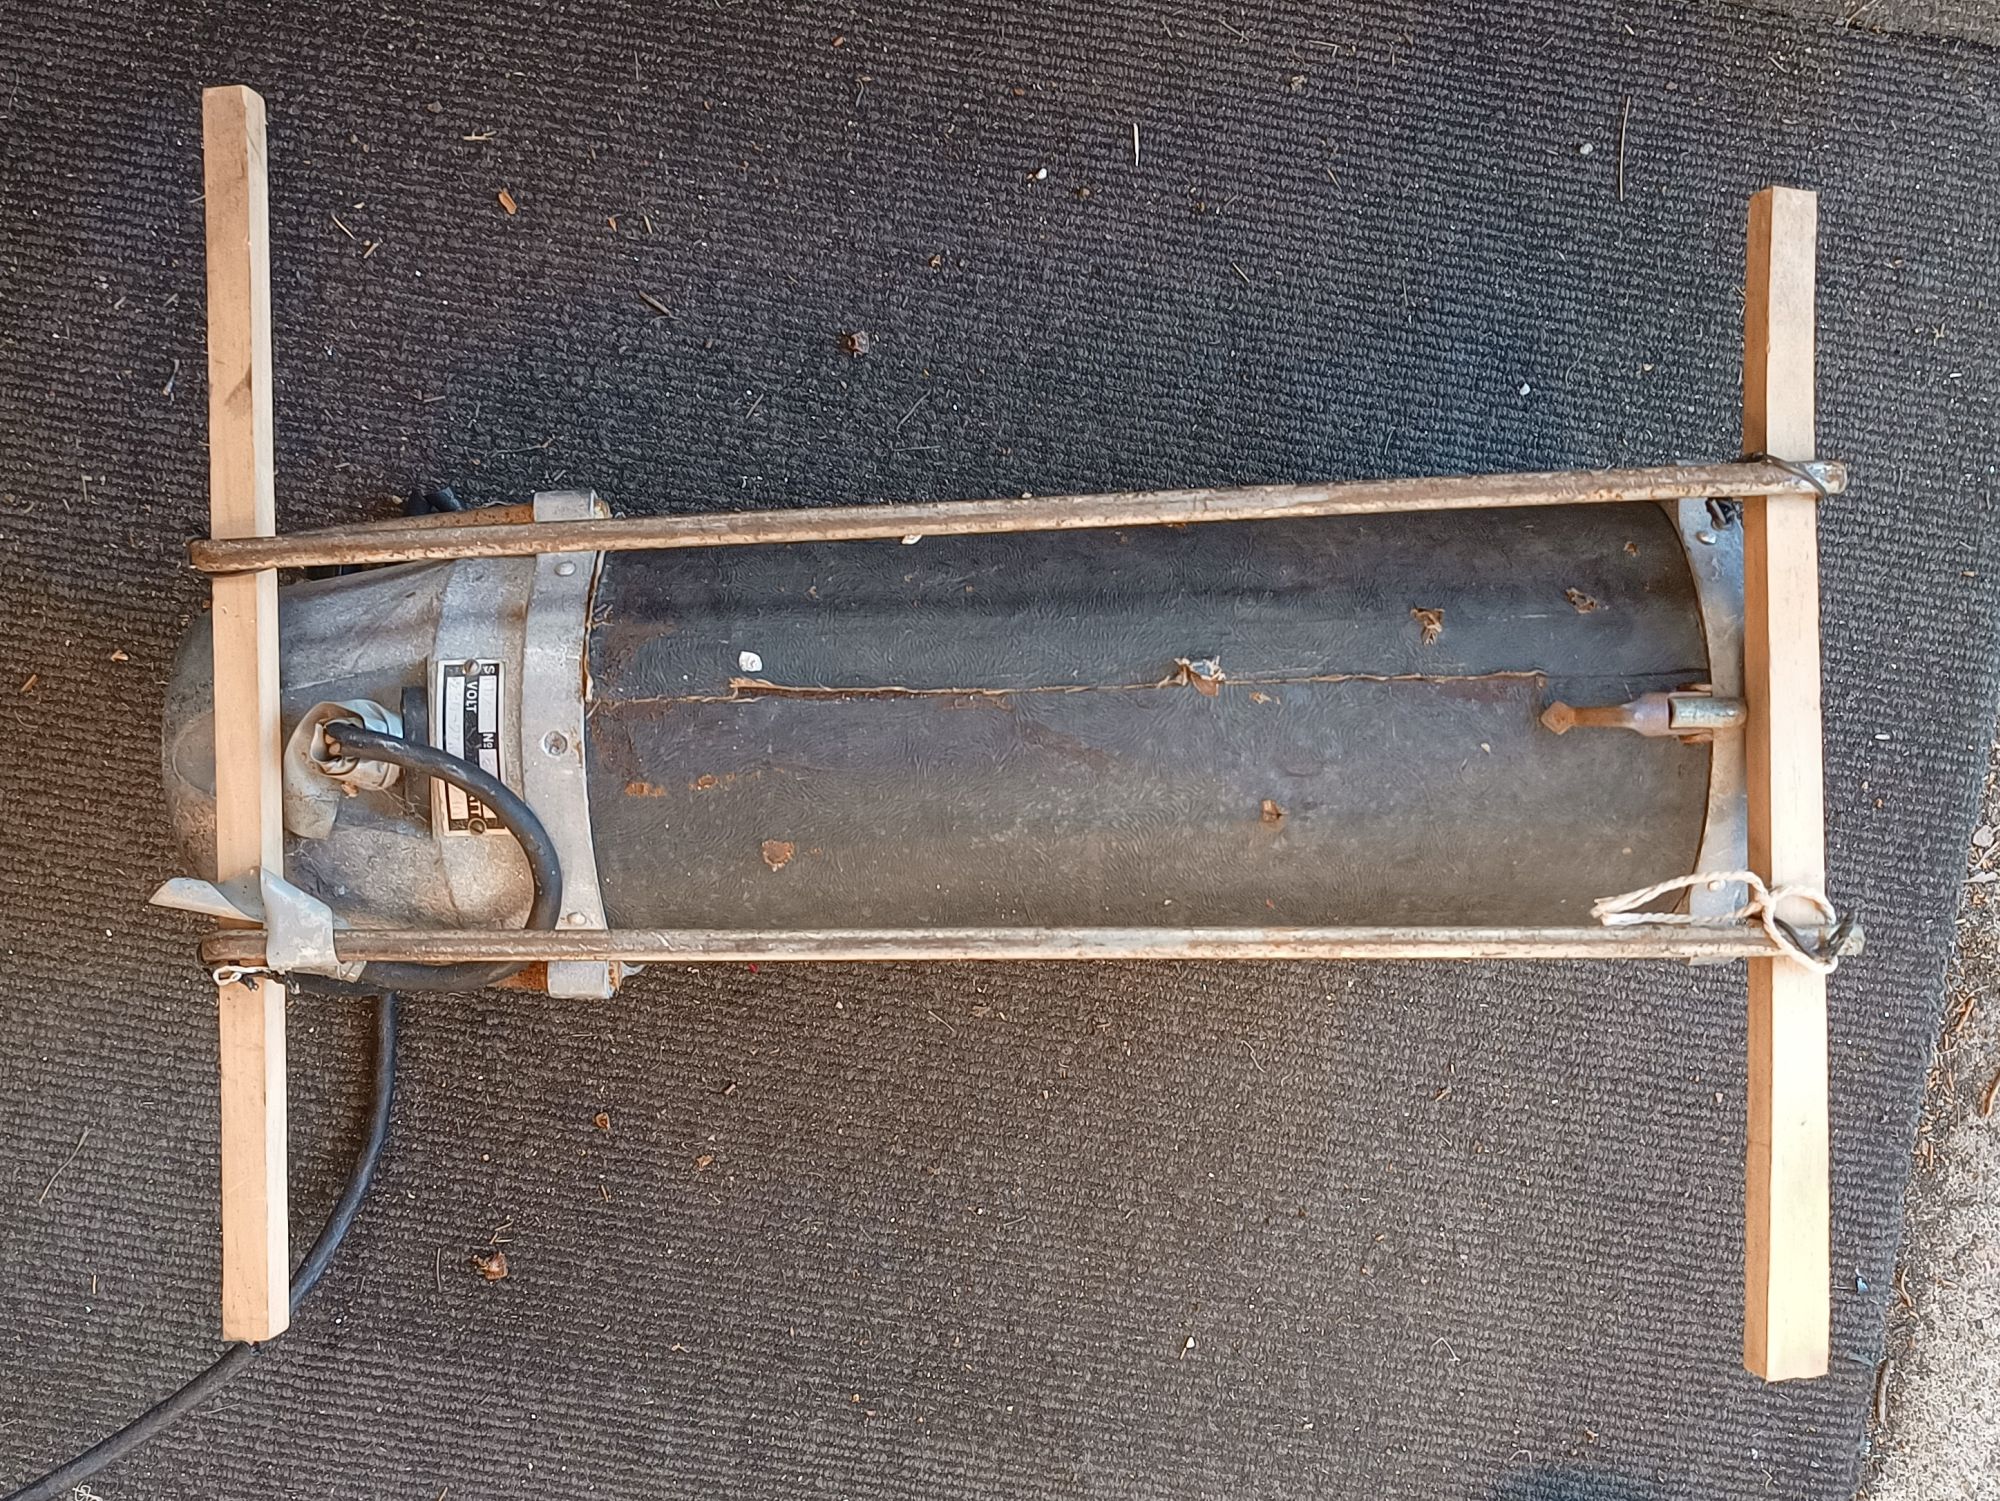
This is the bottom. The runners cleaned up a bit, but they still look rusty, particularly on the top.
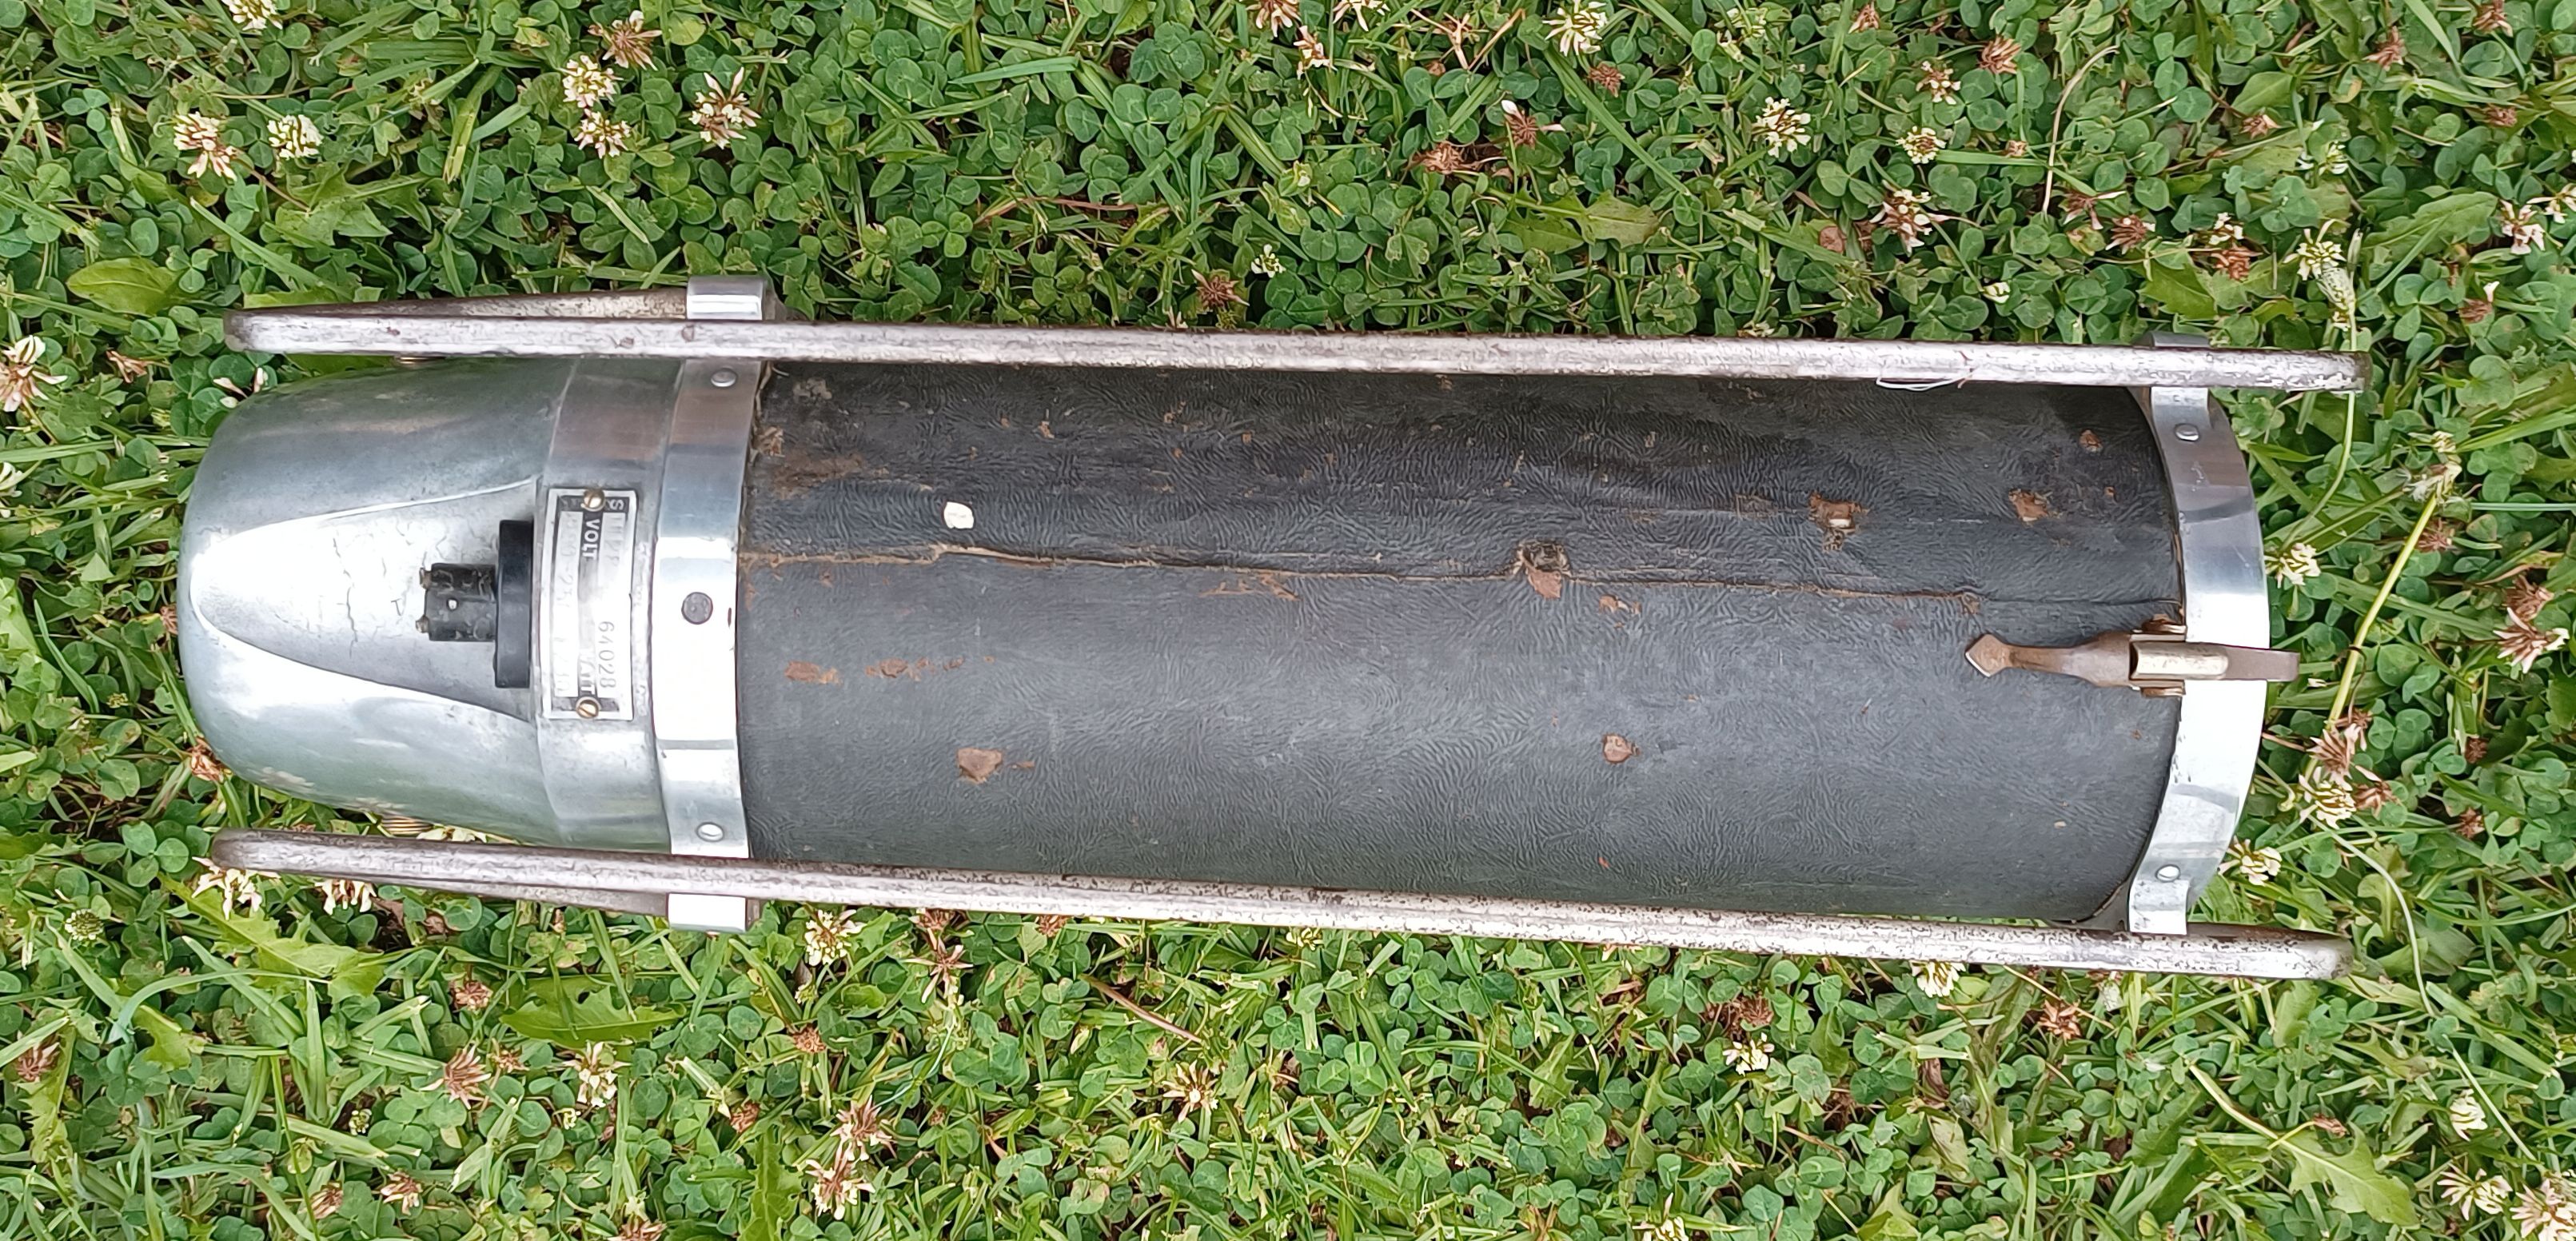
The blow end came up ok. Definitely has a steampunk vibe to it. The brass threads out the sides are for the motor brushes.
And finally a close up of the badge. It looks like some of it had a copper coating, or perhaps it is copper with a brass coating. The badge looks a bit better than the photo shows as there are lots of reflections.
What do you think?
Does it look like a good candidate for a project?
I’ve started looking through my boxes of junk to see what I have to use with it. If I continue on the next phase will be adding a fuel tank to one side and control box to the other. I will also add some switches and gauges. This phase would all be cosmetic. If that turns out well, I’m thinking of adding some electronics for lighting and sound effects.

Nice little machine. I bet someone in one of the vacuum cleaner collector Facebook groups has the front end and bag as spares, if you go that route. It does appear to be missing the carbon brushes and caps(the brass holes on the motor). It won’t run without these. These machines are getting rare.
LikeLike
Hi. Thanks for the idea. I hadn’t thought of looking at a Facebook group. My current plan is I’ll experiment with some of the junk I have here to see if I think I can make something cool with it. Even if I do, I want to make as little damage to it as I can as it just feels like sacrilege. If I don’t think I can do it justice I’ll turn to Facebook.
LikeLike