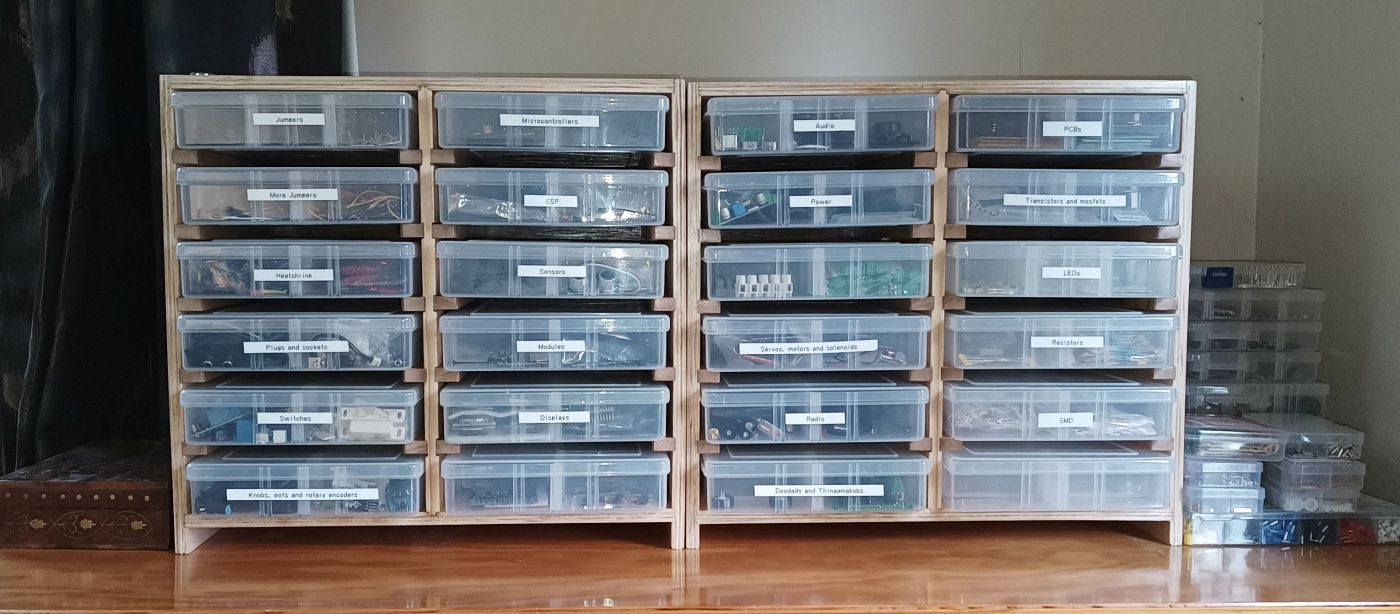
I’ve been using these cheap storage compartments from Bunnings to store my ever-growing pile of electronic components and modules.
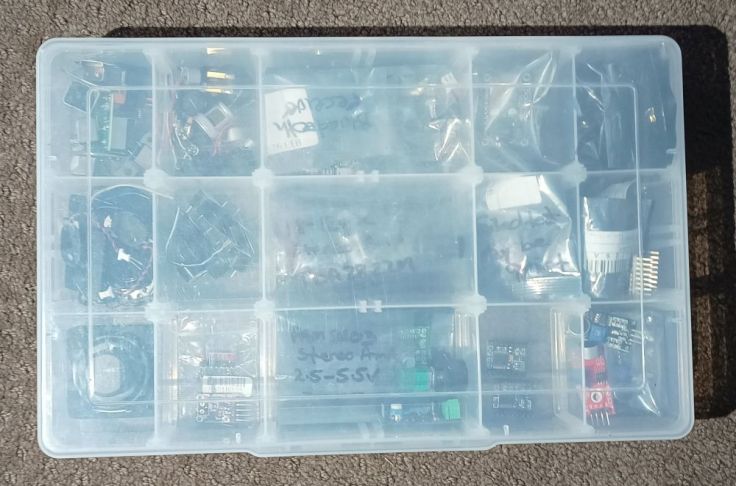
They are inexpensive at only AU$5.50 each. I’ve now got 24 of them and had been storing them in stacks. They stack well but it was getting annoying as every time I wanted to grab something it always seemed to be near the bottom of the stack. I also hoped that if they were easier to access, I may use them more often.
Decision to Build
So, I decided it was time to build some shelving, custom-sized to house my 24 boxes. I’m not a hardcore electronics buff (not really a woodworker either), more of a dabbler. I’m trying to avoid becoming a collector of parts. By limiting my storage, I’m hoping to keep it mean and clean, and not becoming a shelf of shame.
Materials and Construction
I initially hoped to use some of the timber scraps I had lying around. However, less than half of what I needed came from my significant pile of timber. I ended up buying a small sheet of 12mm plywood. It was a bit of a splurge at AU$49, but I expected this would be a significant amount of work and wanted to give the project the best chance of success. This ply was my first time with anything thicker than 3-ply and it was more challenging to work with than I expected. Particularly as it tended to chip out at the corners.
The build
I went ahead and built the two racks, each 2 boxes wide by 6 high. This size kept them manageable. Plus, it offered flexibility: side-by-side for a nice, wide look or stacked up for a tall, if I decided to have them in another spot later. Also, the dimensions ensured minimal plywood wastage.
This is the back. This was cut (oops, a bit too small) from some 3 ply I had on hand.
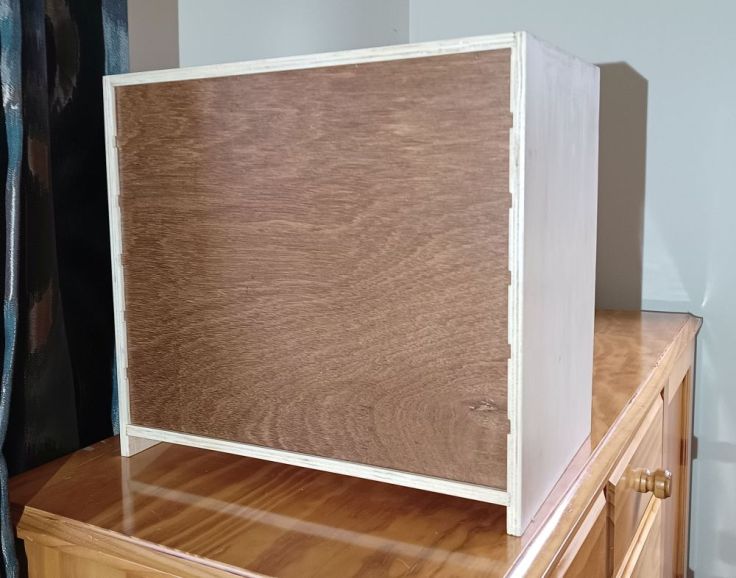
A close up with a couple of boxes removed. The divider in the centre doesn’t go through to the back because I didn’t have anything that fitted. In practice it still works ok.

And here they are now, already surrounded by crap. And yes, one is a little bit taller than the other.

Learnings
Here’s what I learned:
- Plywood is more challenging to work with than I expected. It tends to chip out at the corners.
- When routing out channels, make sure everything is locked down tight. I didn’t, and my dividers ended up with some on the wrong places and others like a drunk snails trail.
- On a brighter note, I found that water-based polyurethane (I used Cabot’s) was good to work with as it dries quickly and doesn’t give the wood that unfortunate yellow tinge.
Conclusion
In the end, I’m pretty happy with how it all turned out. But knowing what I know now, if there had been a pre-made version for sale, I’d have snapped it up.

Leave a comment